3. How to Make NFTs with On-Chain Metadata - Hardhat and JavaScript
When creating NFTs, it is good practice to store the metadata on centralized object storages or decentralized solutions like IPFS, to avoid the humongous Gas fees derived from storing big amounts of data, such as images and JSON Objects, directly on-chain.
There's an issue with this though:
Not storing your metadata on the blockchain will make interacting with it from your smart contract impossible, as the blockchain can't communicate with "the external world".
If we want to update our metadata directly from our smart contract we'll need to store it on-chain, but what about gas fees?
Luckily, L2 chains such as Polygon are here to help, drastically reducing Gas costs, and introducing a number of advantages that allow developers to expand the functionalities of their applications.
In this tutorial, you're going to learn how to create the basics of a blockchain game, develop a fully dynamic NFT with on-chain metadata that changes based on your interactions with it, and deploy it on Polygon Mumbai to lower gas fees.
More precisely, you'll learn:
- How to store NFTs metadata on chain
- What is Polygon and why it's important to lower Gas fees.
- How to deploy on Polygon Mumbai
- How to process and store on-chain SVG images and JSON objects
- How to modify your metadata based on your interactions with the NFT
You can also follow the video tutorial:
Before going deeper into our code and developing our dynamic NFTs smart contract, we need to briefly understand a couple of things:
- What is Polygon,
- Why we're going to use it.
Also, make sure to sign up for an Alchemy account here, we'll need it later on for the challenge.
Let's get started!
Polygon PoS - Lower Gas fees and Faster Transactions
Polygon is a decentralized EVM-compatible scaling platform that enables developers to build scalable user-friendly DApps with low transaction fees without sacrificing security.
It belongs to a group of chains described as Layer 2 chains (L2), which means that are built on top of Ethereum to solve some of the issues characterizing it - while relying on it to function.
As we all know, Ethereum is neither fast nor cheap, and deploying smart contracts on it might rapidly become very costly, that's where L2 solutions like Polygon or Optimism, come into play.
Polygon for example comes with 2 main advantages:
- Faster transactions (65,000 tx/seconds vs ~14)
- Approximately ~10,000x lower gas costs per transaction than Ethereum
The second is exactly the reason why we're deploying our NFTs smart contract with on-chain metadata on Polygon. If on one hand, when storing our metadata on Ethereum we can expect hundreds of dollars per transaction, on Polygon it won't cost more than a couple of cents.
If you want to dig deeper into how Polygon and other L2 chains lower transaction costs - speeding up transaction speed, I suggest you go and look at this guide.
Now that we have a brief understanding of what L2 solutions bring to the table, and why using Polygon, in this case, is a game-changer - Let's start by setting up our wallet to connect with Polygon Mumbai, and get some free Matic we'll later need to pay for our Gas fees.
Add Polygon Mumbai to your Metamask Wallet
First of all, let's add Polygon Mumbai to our Metamask wallet.
Navigate to mumbai.polygonscan.com and scroll down to the bottom of the page. You'll see the "Add Polygon Network" button, click on it and confirm you want to add it to Metamask:

As simple as that, you'll now have Polygon Mumbai added to your Metamask wallet! 🎉
Now that we have Polygon Mumbai connected to our Metamask extension, we'll need to get some test MATIC to pay for the Gas fees.
Get free Matic to Deploy your NFTs smart contract
Getting Test MATIC is super simple, just navigate to one of the following faucets:
Copy the wallet address into the text bar and click on “Send Me MATIC”:
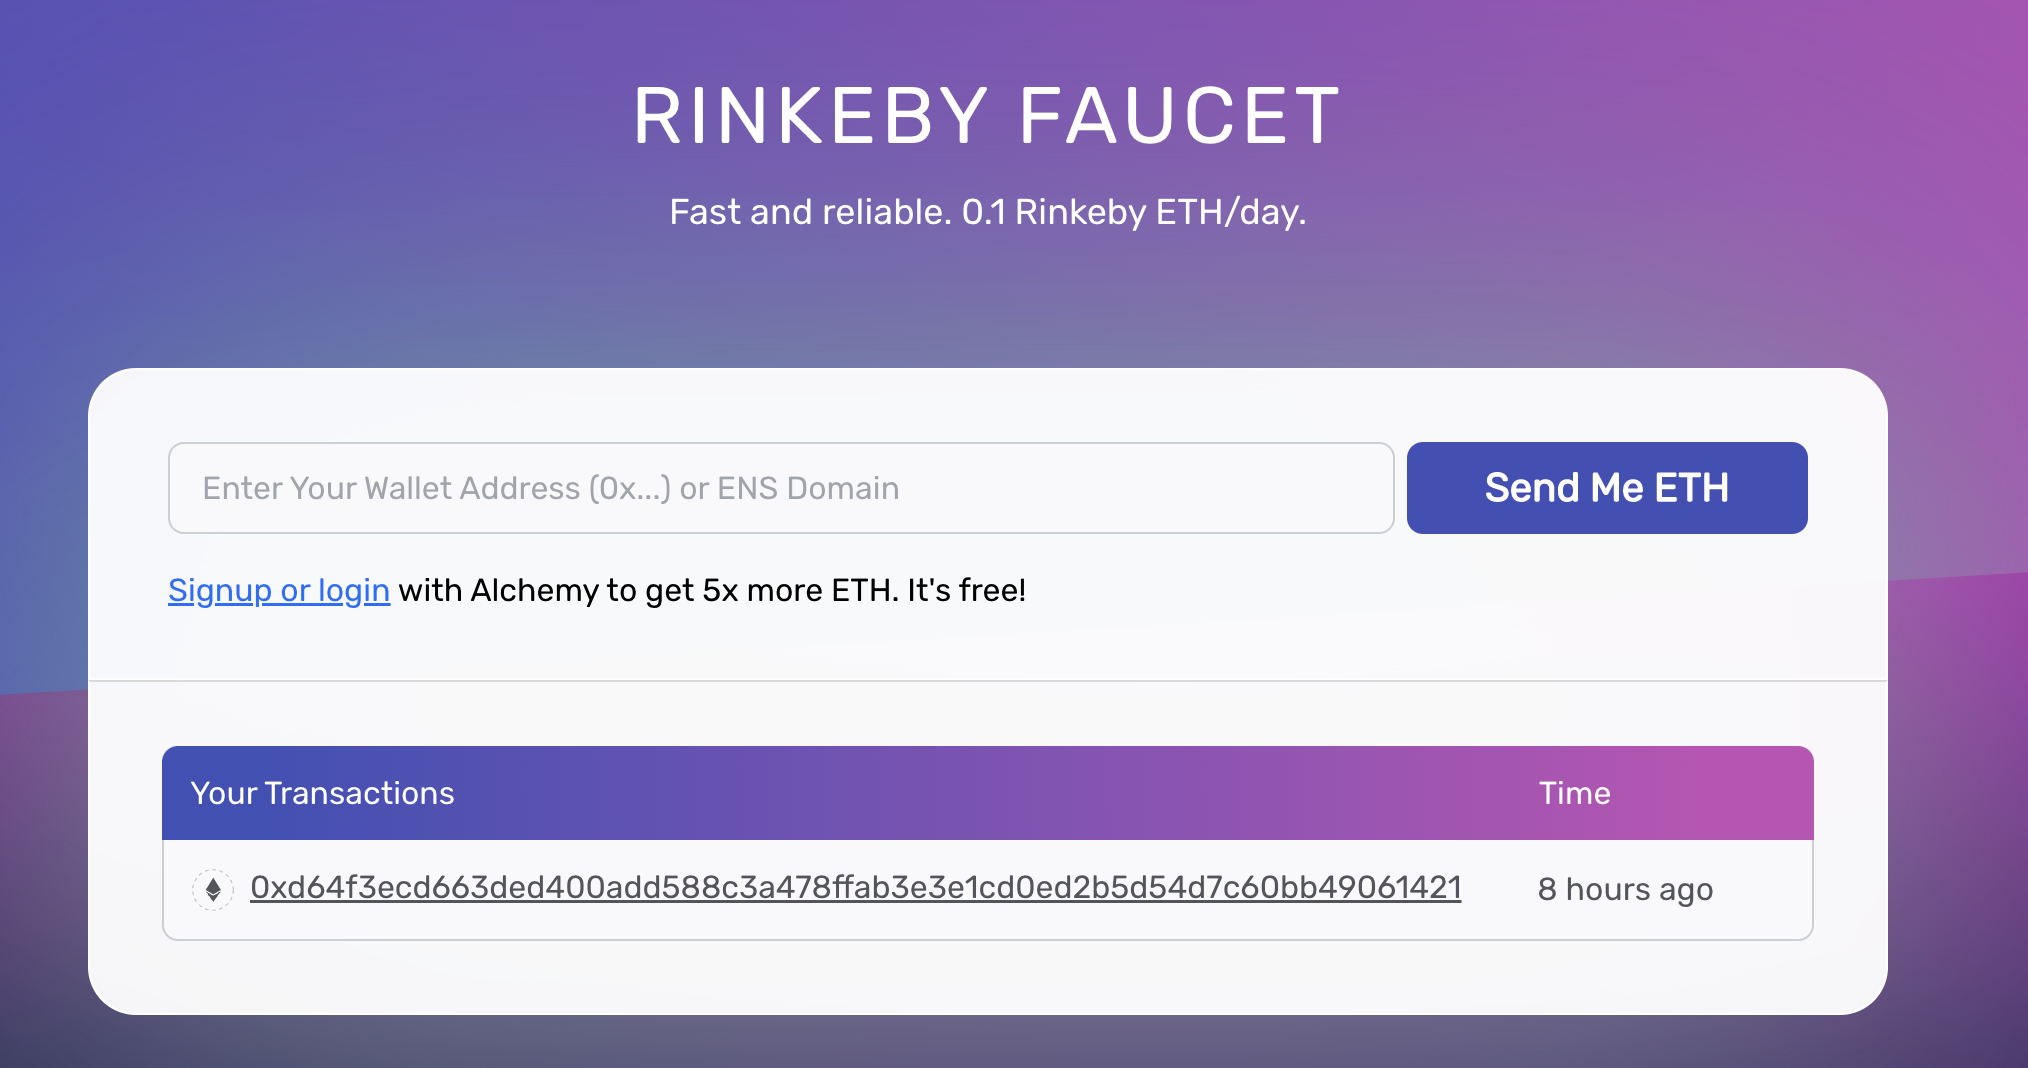
After 10-20 seconds you'll see the MATIC appearing in the Metamask Wallet.
You'll be able to get up to 1 MATIC every 24 without logging in, or 5 with an Alchemy account.
Great! Now that our wallet is ready to go, it's time to create our project, develop the dynamic NFTs smart contract, and start interacting with it!
How to Make NFTs with On-Chain Metadata - Project Setup
Open the terminal, create a new folder called "ChainBattled" and install Hardhat running the following command:
yarn add hardhat
Then initialize hardhat to create the project boilerplates:
npx hardhat init
You should then see a welcome message and options on what you can do. Select Create a JavaScript project:
888 888 888 888 888
888 888 888 888 888
888 888 888 888 888
8888888888 8888b. 888d888 .d88888 88888b. 8888b. 888888
888 888 "88b 888P" d88" 888 888 "88b "88b 888
888 888 .d888888 888 888 888 888 888 .d888888 888
888 888 888 888 888 Y88b 888 888 888 888 888 Y88b.
888 888 "Y888888 888 "Y88888 888 888 "Y888888 "Y888
👷 Welcome to Hardhat v2.12.2 👷
? What do you want to do? …
❯ Create a JavaScript project
Create a TypeScript project
Create an empty hardhat.config.js
Quit
Agree to all the defaults (project root, adding a .gitignore, and installing all sample project dependencies):
✔ What do you want to do? · Create a JavaScript project
✔ Hardhat project root: · /Users/user/docs/new
✔ Do you want to install this sample project's dependencies with npm (@nomiclabs/hardhat-waffle ethereum-waffle chai @nomiclabs/hardhat-ethers ethers)? (Y/n) · y
Hardhat will then generate a hardhat.config.js file for us along with a couple of folders with sample code we can work with, including contracts, scripts, and test.
To check if everything works properly, run:
npx hardhat test
We now have our hardhat development environment successfully configured.
Now we'll need to install the OpenZeppelin package to get access to the ERC721 smart contract standard that we'll use as a template to build our NFTs smart contract.
Install the OpenZeppelin smart contract library:
yarn add @openzeppelin/contracts
Amazing! We have now installed everything we'll need to make NFTs with on-chain metadata 🔥
Let's clean up and modify our project boilerplates and create the dynamic NFTs smart contract.
First, though, we'll need to modify the hardhat.config.js file to connect with Polygon Mumbai and polygon scan - we'll need it later on to verify the code.
Modify the hardhat.config.js file
Let's open up the project in VSCode or your favorite text editor and delete the Greeter.sol smart contract, inside the "contract" folder, and the "test-deploy.js" script, inside the "scripts" folder".
The next step is to connect Hardhat to Polygon Mumbai. Open the hardhat.config.js file contained in the root of your project and inside the module.exports object, copy the following code:
module.exports = {
  solidity: "0.8.10",
  networks: {
    mumbai: {
      url: process.env.TESTNET_RPC,
      accounts: [process.env.PRIVATE_KEY]
    },
  },
};
When we'll deploy our smart contract, we'll also want to verify it using mumbai.polygonscan, to do so we'll need to provide Hardhat with an etherscan or, in this case, Polygon scan API key.
We'll grab the Polygonscan API key later on, for the moment, just add the following code in the hardhat.config.js file:
etherscan: {
    apiKey: process.env.POLYGONSCAN_API_KEY
  }
At this point, your hardhat.config.js file should look as follows:
require("dotenv").config();
require("@nomiclabs/hardhat-waffle");
require("@nomiclabs/hardhat-etherscan");

module.exports = {
  solidity: "0.8.10",
  networks: {
    mumbai: {
      url: process.env.TESTNET_RPC,
      accounts: [process.env.PRIVATE_KEY]
    },
  },
  etherscan: {
    apiKey: process.env.POLYGONSCAN_API_KEY
  }
};
Now that our configuration file is ready, let's start developing the smart contract!
NFTs with On-Chain Metadata: Develop the Smart Contract
In the contracts folder, create a new file and call it "ChainBattles.sol".
As always, we'll need to specify the SPDX-Licence-Identifier, the pragma, and import a couple of libraries from OpenZeppelin that we'll use as a foundation of our smart contract:
// SPDX-License-Identifier: MIT

pragma solidity ^0.8.0;

import "@openzeppelin/contracts/token/ERC721/extensions/ERC721URIStorage.sol";
import "@openzeppelin/contracts/utils/Counters.sol";
import "@openzeppelin/contracts/utils/Strings.sol";
import "@openzeppelin/contracts/utils/Base64.sol";
In this case, we're importing:
- The ERC721URIStorage contract that will be used as a foundation of our ERC721 Smart contract
- The counters.sol library, will take care of handling and storing our tokenIDs
- The string.sol library to implement the "toString()" function, that converts data into strings - sequences of characters
- The Base64 library that, as we've seen previous, will help us handle base64 data like our on-chain SVGs
Next, let's initialize the contract.
Initialize The Smart Contract
First of all, we'll need to create a new contract that inherits from the ERC721URIStorage extension we imported from OpenZeppelin. We can do it by using the "is" keyword:
contract ChainBattles is ERC721URIStorage {}
Inside the contract, initialize the Strings and Counters library:
contract ChainBattles is ERC721URIStorage {
    using Strings for uint256;
    using Counters for Counters.Counter;
}
In this case "using Strings for uint256" means we're associating all the methods inside the "Strings" library to the uint256 type. You can learn more about associating libraries to types here.
The same applies to the "using Counters for Counters.Counter line" - you can read more about it on the OpenZeppelin forum.
Now that we have initialized our libraries, declare a new tokenIds function that we'll need to store our NFT IDs:
contract ChainBattles is ERC721URIStorage {
    using Strings for uint256;
    using Counters for Counters.Counter;
    Counters.Counter private _tokenIds;
}
The last global variable we need to declare is the tokenIdToLevels mapping, which we'll use to store the level of an NFT associated with its tokenId:
mapping(uint256 => uint256) public tokenIdToLevels;
The mapping will link an uint256, the NFTId, to another uint256, the level of the NFT.
Next, we'll need to declare the constructor function of our smart contract:
constructor() ERC721 ("Chain Battles", "CBTLS"){
}
At this point your code should look as follow:
// SPDX-License-Identifier: MIT
pragma solidity ^0.8.0;

import "@openzeppelin/contracts/token/ERC721/extensions/ERC721URIStorage.sol";
import "@openzeppelin/contracts/utils/Counters.sol";
import "@openzeppelin/contracts/utils/Strings.sol";
import "@openzeppelin/contracts/utils/Base64.sol";

contract ChainBattles is ERC721URIStorage  {
    using Strings for uint256;
    using Counters for Counters.Counter;
    Counters.Counter private _tokenIds;

    mapping(uint256 => uint256) public tokenIdToLevels;

    constructor() ERC721 ("Chain Battles", "CBTLS"){
    }
}
Now that we have the foundation of our NFT smart contract, we'll need to implement 4 different functions:
- generateCharacter: to generate and update the SVG image of our NFT
- getLevels: to get the current level of an NFT
- getTokenURI: to get the TokenURI of an NFT
- mint: to mint - of course
- train: to train an NFT and raise its level
Let's start from the first function that will take an SVG, convert it into Base64 data, and save it on-chain - but first, we should spend a couple of words understanding why SVGs can be used to save on-chain images and what's their relations with Base64 data.
What Are SVGs and Why They Matter
An SVG file, short for scalable vector graphic file, is a standard graphics file type used for rendering two-dimensional images on the internet. Unlike other popular image file formats, the SVG format stores images as vectors, which is a type of graphic made up of points, lines, curves, and shapes based on mathematical formulas.
SVG files are written in XML, a markup language used for storing and transferring digital information. The XML code in an SVG file specifies all of the shapes, colors, and text that comprise the image:
<svg xmlns="http://www.w3.org/2000/svg" preserveAspectRatio="xMinYMin meet" viewBox="0 0 350 350">
   <style>.base { fill: white; font-family: serif; font-size: 14px; }</style>
   <rect width="100%" height="100%" fill="black" />
   <text x="50%" y="40%" class="base" dominant-baseline="middle" text-anchor="middle">Warrior</text>
   <text x="50%" y="50%" class="base" dominant-baseline="middle" text-anchor="middle">Levels: getLevels(tokenId)</text>
 </svg>
The cool thing about SVGs is that they can be:
- Easily modified and generate using code
- Easily converted to Base64 data
Now, you might wonder why we want to convert SVGs files into Base64 data, the answer is very simple:
You can display base64 images in the browser without the need for a hosting provider.
Let's take this image for example:
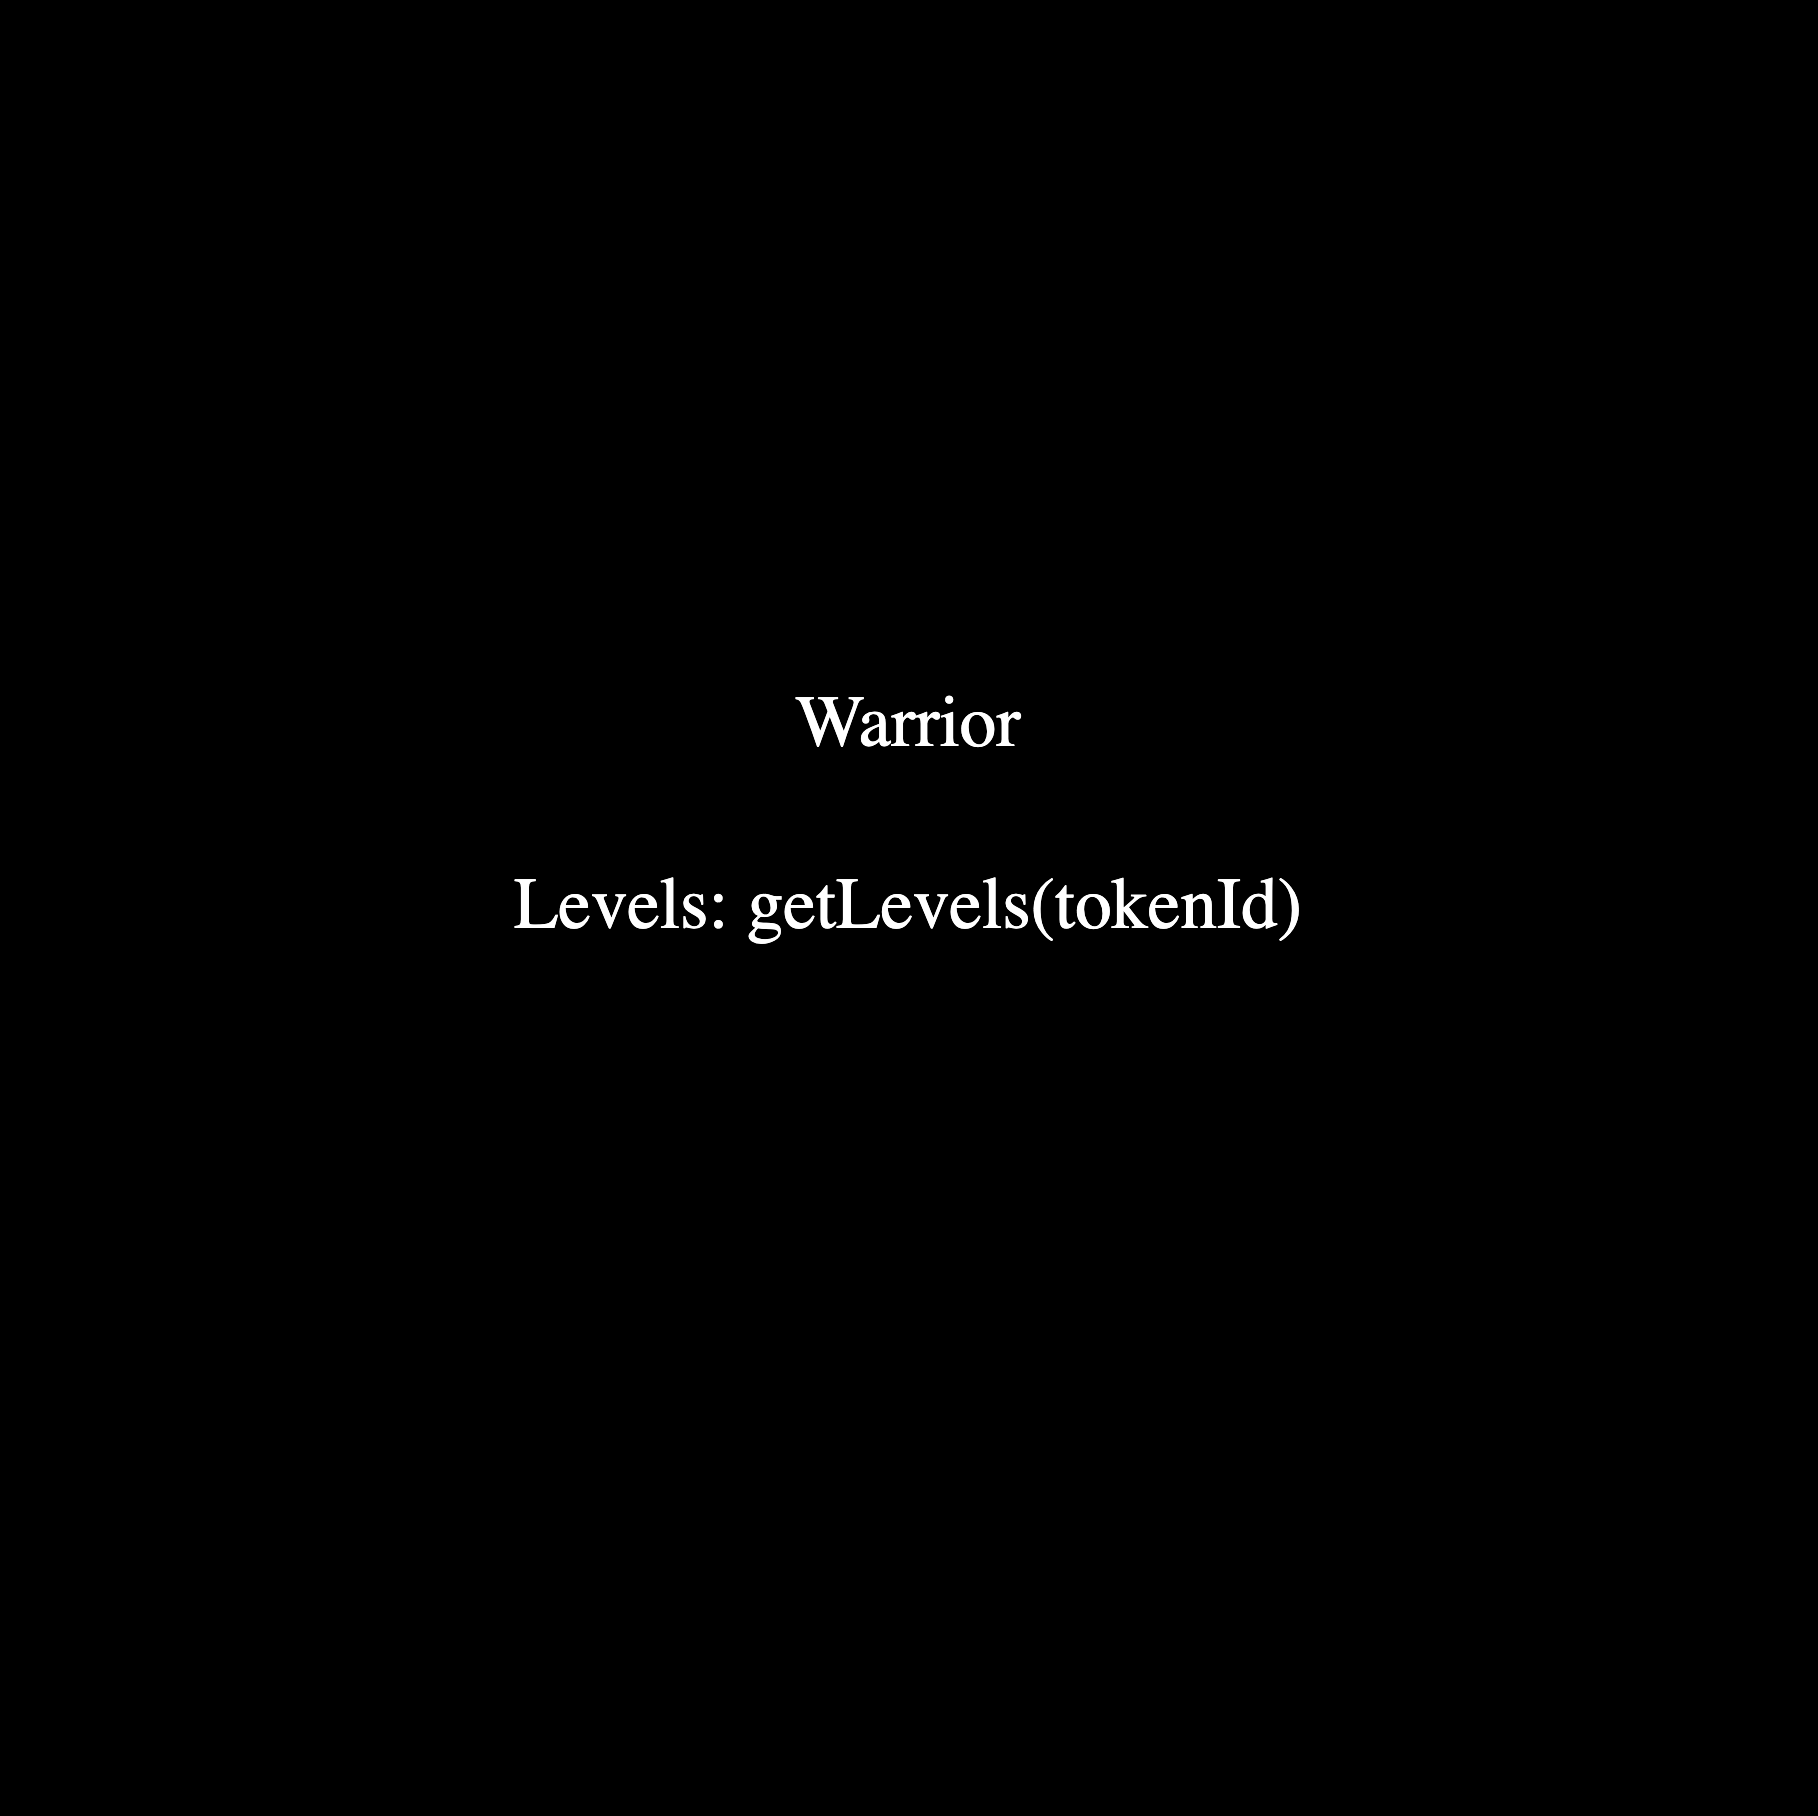
Copying and pasting the following code in your browser URL bar will display the same image:
data:image/svg+xml;base64,IDxzdmcgeG1sbnM9Imh0dHA6Ly93d3cudzMub3JnLzIwMDAvc3ZnIiBwcmVzZXJ2ZUFzcGVjdFJhdGlvPSJ4TWluWU1pbiBtZWV0IiB2aWV3Qm94PSIwIDAgMzUwIDM1MCI+CiAgICAgICAgPHN0eWxlPi5iYXNlIHsgZmlsbDogd2hpdGU7IGZvbnQtZmFtaWx5OiBzZXJpZjsgZm9udC1zaXplOiAxNHB4OyB9PC9zdHlsZT4KICAgICAgICA8cmVjdCB3aWR0aD0iMTAwJSIgaGVpZ2h0PSIxMDAlIiBmaWxsPSJibGFjayIgLz4KICAgICAgICA8dGV4dCB4PSI1MCUiIHk9IjQwJSIgY2xhc3M9ImJhc2UiIGRvbWluYW50LWJhc2VsaW5lPSJtaWRkbGUiIHRleHQtYW5jaG9yPSJtaWRkbGUiPldhcnJpb3I8L3RleHQ+CiAgICAgICAgPHRleHQgeD0iNTAlIiB5PSI1MCUiIGNsYXNzPSJiYXNlIiBkb21pbmFudC1iYXNlbGluZT0ibWlkZGxlIiB0ZXh0LWFuY2hvcj0ibWlkZGxlIj5MZXZlbHM6IGdldExldmVscyh0b2tlbklkKTwvdGV4dD4KICAgICAgICA8L3N2Zz4=
As you can notice the code you've pasted is not a common URL, it is in fact composed of two parts:
- Data directives - tell the browser how to handle the data ( data:image/svg+xml;base64,)
- The Base64 data - contains the actuals data
This is useful because, even if Solidity is not able to handle images, it is able to handle strings and SVGs aren't anything else than sequences of tags and strings we can easily retrieve runtime, plus, converting everything to base64, will allow us to store our images on-chain without the need of object storage.
Now that we explained why SVGs are important, let's learn how to generate our own on-chain SVGs and convert them into Base64 data.
Create the generateCharacter Function to Create the SVG Image
We'll need a function that will generate the NFT image on-chain, using some SVG code, taking into consideration the level of the NFT.
Doing this in Solidity is a little tricky, so let's copy the following code first, and then will go through the different parts of it:
function generateCharacter(uint256 tokenId) public returns(string memory){

    bytes memory svg = abi.encodePacked(
        '<svg xmlns="http://www.w3.org/2000/svg" preserveAspectRatio="xMinYMin meet" viewBox="0 0 350 350">',
        '<style>.base { fill: white; font-family: serif; font-size: 14px; }</style>',
        '<rect width="100%" height="100%" fill="black" />',
        '<text x="50%" y="40%" class="base" dominant-baseline="middle" text-anchor="middle">',"Warrior",'</text>',
        '<text x="50%" y="50%" class="base" dominant-baseline="middle" text-anchor="middle">', "Levels: ",getLevels(tokenId),'</text>',
        '</svg>'
    );
    return string(
        abi.encodePacked(
            "data:image/svg+xml;base64,",
            Base64.encode(svg)
        )
    );
}
The first thing you should notice is the "bytes" type, a dynamically sized array of up to 32 bytes where you can store strings, and integers.
If you want to dig deeper into Bytes, on the other hand, I really suggest you go read this guide by Jean Cvllr.
In this case, we're using it to store the SVG code representing the image of our NFT, transformed into an array of bytes thanks to the abi.encodePacked() function that takes one or more variables and encodes them into abi.
You can read more about the abi global Solidity object and the encode function on the Solidity documentation.
As you can notice the SVG code takes the return value of a getLevels() function and use it to populate the "Levels:" property - we'll implement this function later on, but take note that you can use functions and variables to dynamically change your SVGs.
As we've seen before, to visualize an image on the browser we'll need to have the base64 version of it, not the bytes version - plus, we'll need to prepend the "data:image/svg+xml;base64," string, to specify to the browser that Base64 string is an SVG image and how to open it.
To do so, in the code above, we're returning the encoded version of our SVG turned into Base64 using Base64.encode() with the browser specification string prepended, using the abi.encodePacked() function.
Now that we have implemented the function to generate our image, we need to implement a function to get the level of our NFTs.
Create the getLevels Function to retrieve the NFT Level
To get the level of our NFT, we'll need to use the tokenIdToLevels mapping we've declared in our smart contract, passing the tokenId we want to get the level for into the function:
function getLevels(uint256 tokenId) public view returns (string memory) {
    uint256 levels = tokenIdToLevels[tokenId];
    return levels.toString();
}
As you can see this was pretty straightforward, the only thing to notice is the toString() function, that's coming from the OpenZeppelin Strings library, and transforms our level, that is an uint256, into a string - that will be then be used by generateCharacter function as we've seen before.
Next, we'll need to create the getTokenURI function to generate and retrieve our NFT TokenURI.
Create the getTokenURI Function to generate the tokenURI
The getTokenURI function will need one parameter, the tokenId, and will use that to generate the image, and build the name of the NFT.
As always, let's first see the code, and go through the different parts of it:
function getTokenURI(uint256 tokenId) public returns (string memory){
    bytes memory dataURI = abi.encodePacked(
        '{',
            '"name": "Chain Battles #', tokenId.toString(), '",',
            '"description": "Battles on chain",',
            '"image": "', generateCharacter(tokenId), '"',
        '}'
    );
    return string(
        abi.encodePacked(
            "data:application/json;base64,",
            Base64.encode(dataURI)
        )
    );
}
The first thing to notice is that we're using again the abi.encodePacked function, this time though, to create a JSON Object.
If you don't know what JSON objects are, let's briefly say that are a series of keys and values pairs, the name of a property, and the value of the property.
The value of "name" in this case is: "Chain Battles" plus "#" and the tokenId toString(), the value of the "image" property, on the other hand, is the value returned from the generateCharacter() function.
Finally, we return a string containing the array of bytes representing the Base64 encoded version of the dataURI with the JSON data instructions - similar to what we did with our SVG image.
Now that we have created our getTokenURI, we'll need to create a function to actually mint our NFTs and initialize our variables - let's see how!
Create the Mint Function to create the NFT with on-chain metadata
The mint function in this case will have 3 goals:
- Create a new NFT,
- Initialize the level value,
- Set the token URI.
Copy the following code:
function mint() public {
    _tokenIds.increment();
    uint256 newItemId = _tokenIds.current();
    _safeMint(msg.sender, newItemId);
    tokenIdToLevels[newItemId] = 0;
    _setTokenURI(newItemId, getTokenURI(newItemId));
}
As always, we first increment the value of our _tokenIds variable, and store its current value on a new uint256 variable, in this case, "newItemId".
Next, we call the _safeMint() function from the OpenZeppelin ERC721 library, passing the msg.sender variable, and the current id.
Then we create a new item in the tokenIdToLevels mapping and assign its value to 0, this means our NFTs/character will start from level.
As the last thing, we set the token URI passing the newItemId and the return value of getTokenURI().
This will mint an NFT of which metadata, including the image, is completely stored on-chain 🔥
That also means we'll be able to update the metadata directly from the Smart Contract, let's see how to create a function to train our NFTs and let them level up!
Create the Train Function to raise your NFT Level
As we said, now that the metadata of our NFTs is completely on-chain, we'll be able to interact with it directly from the smart contract.
Let's say we want to raise the level of our NFTs after intensive training, to do so, we'll need to create a train function that will:
- Make sure the trained NFT exists and that you're the owner of it.
- Increment the level of your NFT by 1.
- Update the token URI to reflect the training.
function train(uint256 tokenId) public {
    require(_exists(tokenId), "Please use an existing token");
    require(ownerOf(tokenId) == msg.sender, "You must own this token to train it");
    uint256 currentLevel = tokenIdToLevels[tokenId];
    tokenIdToLevels[tokenId] = currentLevel + 1;
    _setTokenURI(tokenId, getTokenURI(tokenId));
}
As you can notice, using the require() function, we're checking two things:
- If the token exists, using the _exists() function from the ERC721 standard,
- If the owner of the NFT is the msg.sender (the wallet calling the function).
Once both checks are passed, we get the current level of the NFT from the mapping, and increment it by one.
Lastly, we're calling the _setTokenURI function passing the tokenId, and the return value of getTokenURI().
Calling the train function will now raise the level of the NFT and this will be automatically reflected in the image.
Congratulations! You've just completed writing the smart contract for NFTs with on-chain metadata. 🏆
The next step is to deploy the smart contract on Polygon Mumbai and interact with it via Polygonscan. To do it, we'll need to grab our Alchemy and Polygonscan key.
Deploy the NFTs with On-Chain Metadata Smart Contract
First of all, let's create a new .env file in the root folder of our project, and add the following variables:
TESTNET_RPC=""
PRIVATE_KEY=""
POLYGONSCAN_API_KEY=""
Then, navigate to alchemy.com and create a new Polygon Mumbai application:
Click on the newly created app, copy the API HTTP URL, and paste the API as "TESTNET_RPC" value in the .env file we created above.
Open your Metamask wallet, click on the three dots menu > account details > and copy-paste your private key as "PRIVATE_KEY" value in the .env.
Lastly, go on polygonscan.com, and create a new account:
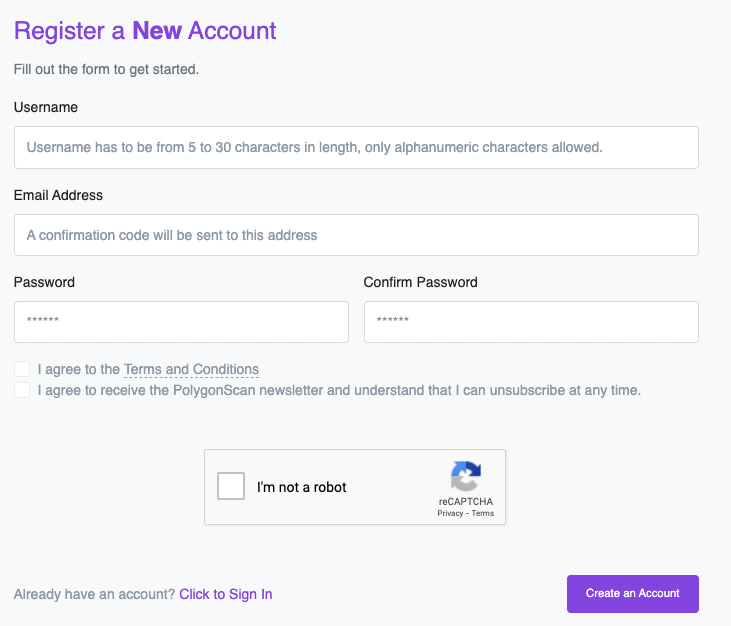
Once you'll have logged in, go on your profile menu and click on API Keys:
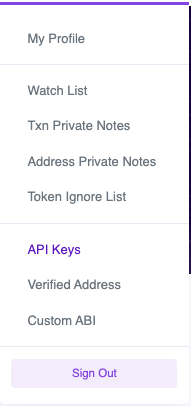
Then click on "Add" and give your app a name:

Now copy-paste the Api-Key Token as "POLYGONSCANAPI_KEY" value in the .env.
One last step before deploying our Smart contract, we'll need to create the deployment script.
Create the Deployment Script
The deployment script, as you've learned in the previous lesson is used to, as the name suggests, tell Hardhat how to deploy the smart contract to the specified blockchain.
Our deployment script, in this case, is pretty straightforward:
const main = async () => {
  try {
    const nftContractFactory = await hre.ethers.getContractFactory(
      "ChainBattles"
    );
    const nftContract = await nftContractFactory.deploy();
    await nftContract.deployed();

    console.log("Contract deployed to:", nftContract.address);
    process.exit(0);
  } catch (error) {
    console.log(error);
    process.exit(1);
  }
};

main();
We're calling the get.contractFactory, passing the name of our smart contract, from Hardhat ethers. We then call the deploy() function and wait for it to be deployed, logging the address.
Everything is wrapped into a try{} catch{} block to catch any error that might occur and print it out for debugging purposes.
Now that our deployment script is ready, it's time to compile and deploy our dynamic NFT smart contract on Polygon Mumbai.
Compile and Deploy the smart contract
To compile the smart contract simply run the following command, in the terminal inside the project:
npx hardhat compile
If everything goes as expected, you'll see your smart contract compiled inside the artifacts folder.
Now, let's deploy the smart contract on the Polygon Mumbai chain running:
npx hardhat run scripts/deploy.js --network mumbai
Wait 10-15 seconds and you should see the address of your Smart contract printed out in your terminal
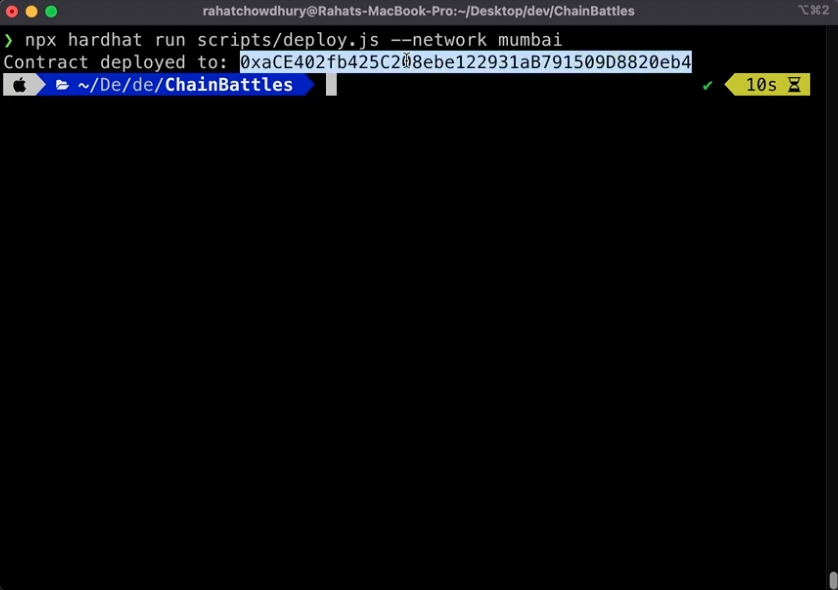
Amazing, you've just deployed your first smart contract on Polygon Mumbai! Next, we'll need to verify our smart contract code to interact with it through polygon scan.
Check your smart contract on Polygon Scan
Copy the address of the just deployed smart contract, go to mumbai.polygonscan.com, and paste the address of the smart contract in the search bar.
Once on your smart contract page, click on the "Contract" tab.
You'll notice that the contract code is not readable:
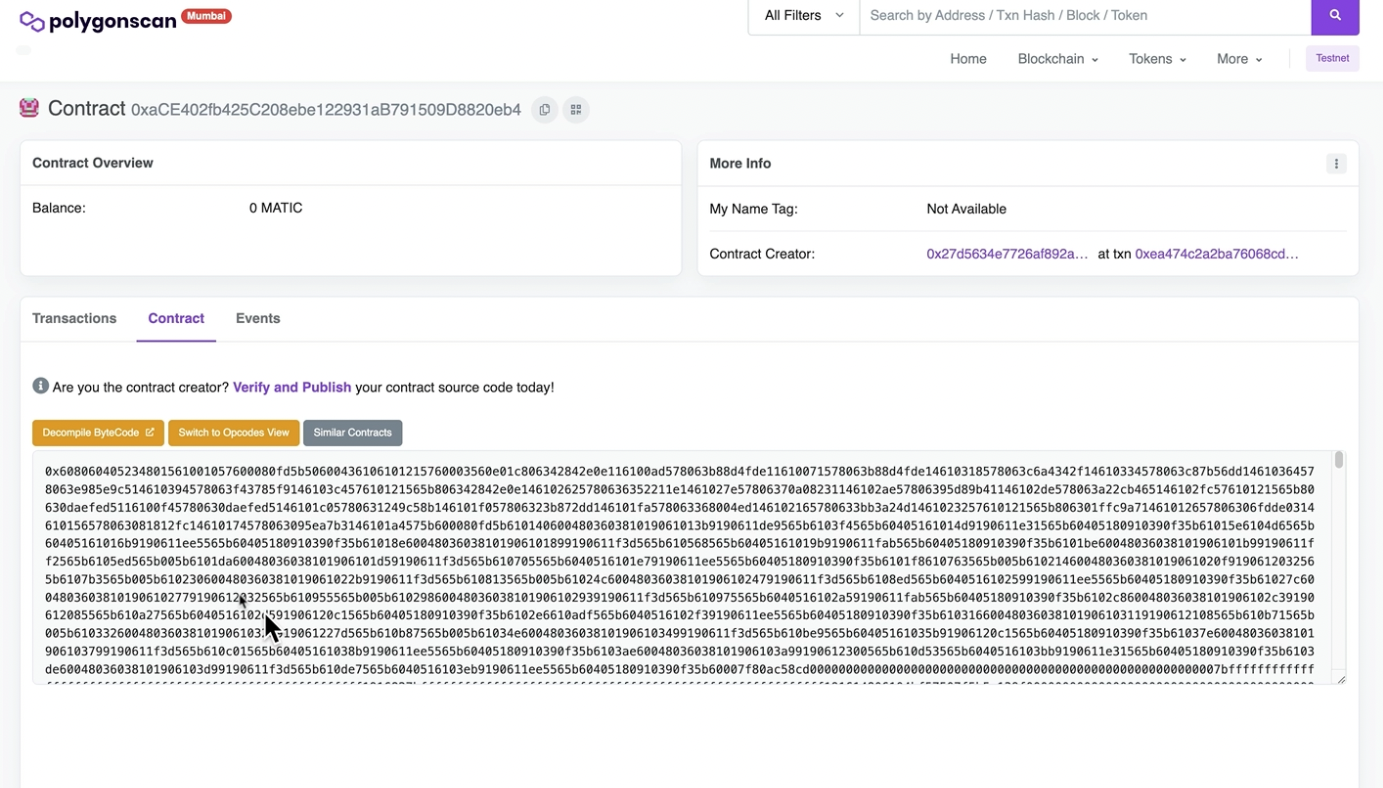
This is because we haven't yet verified our code.
To verify our smart contract we'll need to go back to our project, and, in the terminal, run the following code:
npx hardhat verify --network mumbai YOUR_SMARTCONTRACT_ADDRESS
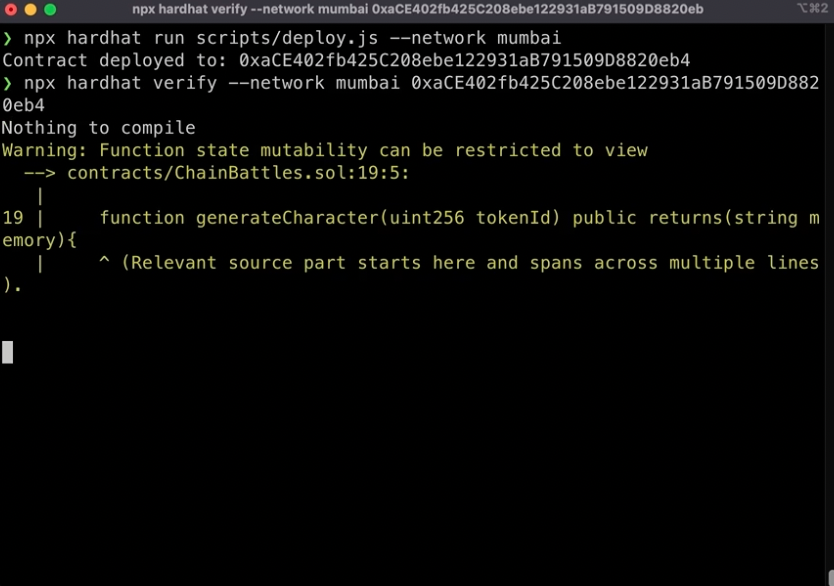
Sometimes you might get the error "failed to send contract verification request" - just try again and it should go through.
This will use the polygon scan API key that we added in the hardhat.config.js file to verify the smart contract code. We'll now be able to interact with it through Polygon scan, let's try it out.
Interact with your Smart Contract Through Polygon Scan
Now that the Smart Contract has been verified, mumbai.polygonscan.com will show a little green tick near it:
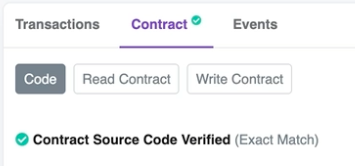
To interact with it, and mint the first NFT, click on the "Write Contract" button under the "contract" tab, and click on "connect to Web3"
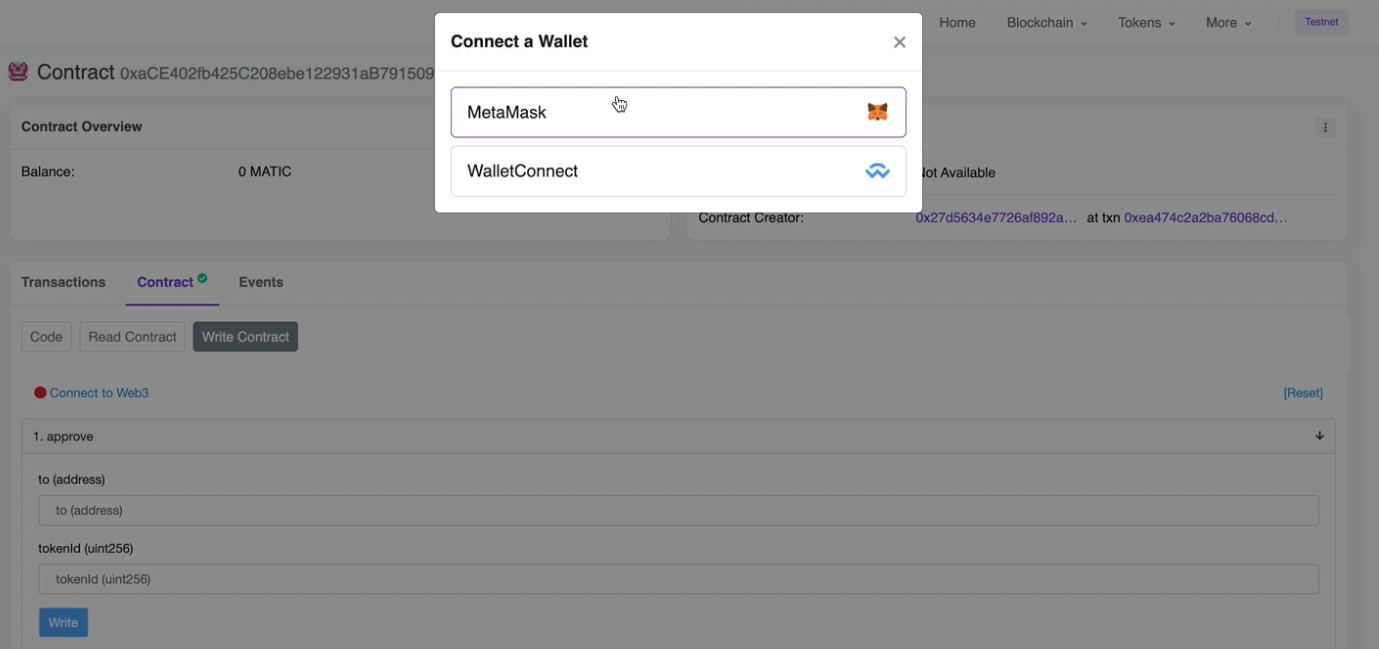
Then look for the "mint" function and click on Write:

This will open a Metamask popup that will ask you to pay for the gas fees, click on the sign button.
Congratulations! You've just minted your first dynamic NFT - let's move to OpenSea Testnet to see it live.
View your Dynamic NFT On OpenSea
Copy the smart contract address, go to testnet.opensea.com, and paste it into the search bar:
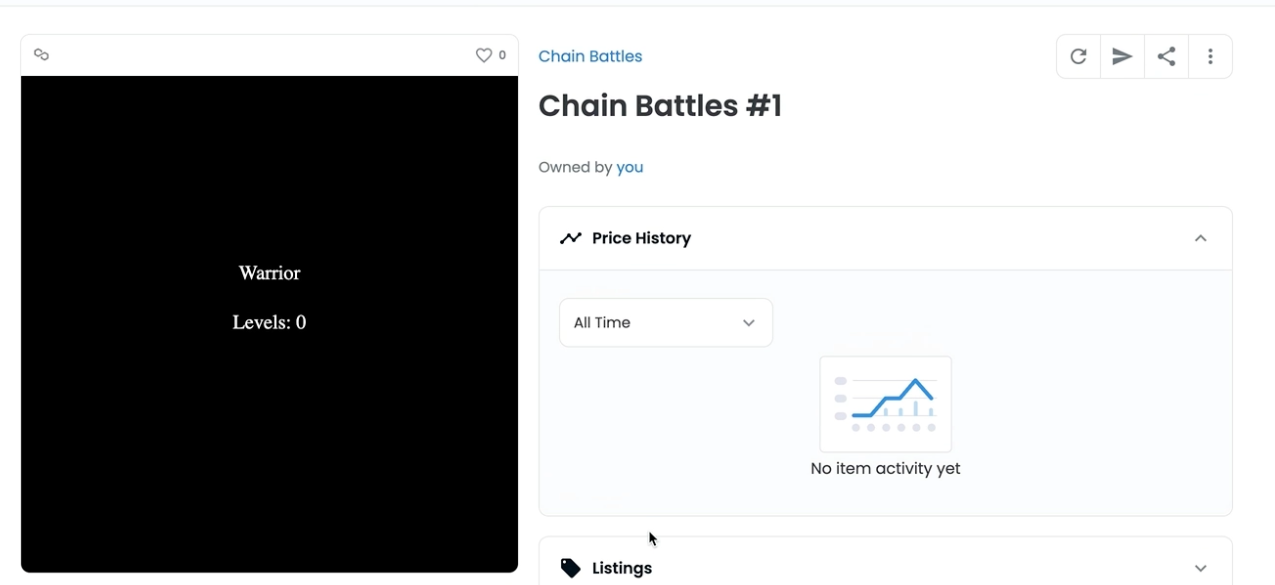
If everything worked as expected you should now see your NFT displaying on OpenSea, with its dynamic image, the title, and the description.
Nothing new until now though, we already built an NFT collection in the first lesson, what's cool here is that we can now update the image in real-time.
Let's go back to Polygon scan.
Update the Dynamic NFT Image Training The NFT
Navigate back to mumbai.polygonscan.com, click on the contract tab > Write Contract and look for the "train" function.
Insert the ID of your NFT - "1" in this case, as we minted only one, and click on Write:

Then go back to testnets.opensea.com and refresh the page:
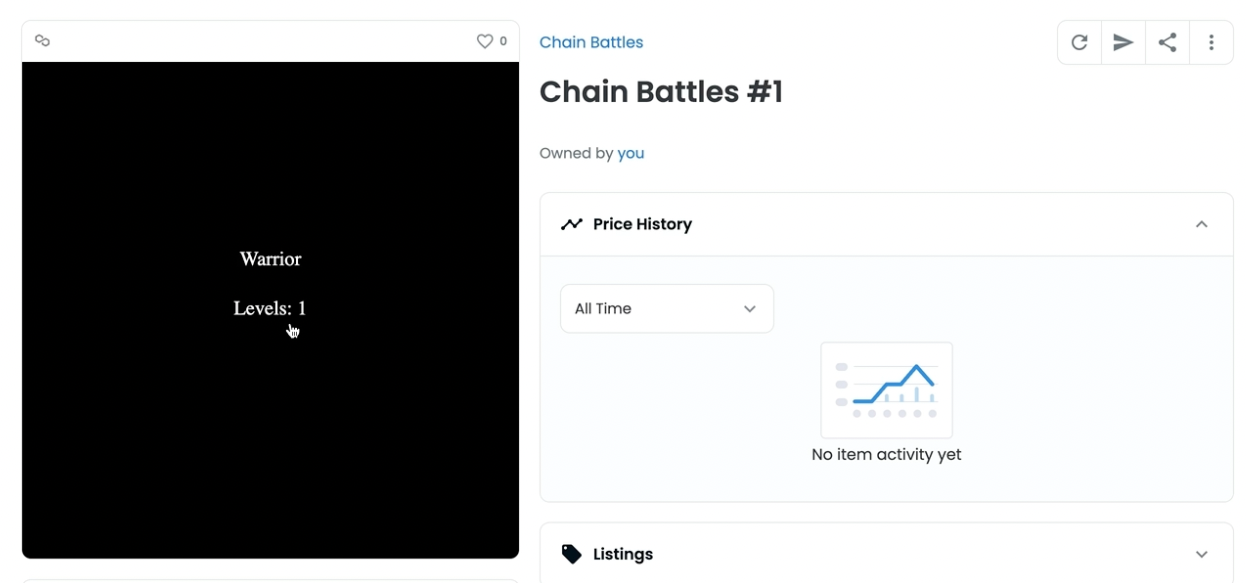
As you can see the image of your NFT just changed reflecting the new level!
Congratulations your NFT just leveled up! Well done! 🎉
It's now time to bring this to the next level with this week's challenge!
This week's challenge
At the moment we're only storing the level of our NFTs, why not store more?
Substitute the current tokenIdToLevels[] mapping with a struct that stores:
- Level
- Speed
- Strength
- Life
You can read more about structs in this guide.
Once you'll have created the struct, initialize the stats in the mint() function, to do so you might want to look into pseudo number generation on Solidity.
Updated almost 2 years ago
