How to Get Started With Custom Webhooks in 3 Minutes
Learn how to quickly use Alchemy’s Custom Webhooks
Overview
What are Alchemy Notify Custom Webhooks?
Alchemy Webhooks enable Web3 developers to receive notifications when events are triggered on Alchemy-supported blockchains. While previous Alchemy Notify solutions covered only pre-defined, transfers-based events, with Custom Webhooks, developers can now understand any contract-based event, from token and marketplace activity, to comprehensive data ingestion. Custom Webhooks utilize a GraphQL interface so that web3 devs can also have rich filters and only receive the precise blockchain data they need.
Custom Webhooks open the floodgates for the types of blockchain data developers now have access to, allowing for an unbounded set of data ingestion and notification use cases. Whether you're looking to monitor smart contract activity or stream full blocks of data in real time, Custom Webhooks can support it!
Which Alchemy webhook does this tutorial use?
In this tutorial, we will be learning how to set up Alchemy’s Custom Webhook (one of the many types of Alchemy Webhooks) in the Notify GraphQL playground. This will allow us to be more familiar with how to set-up and build with Custom Webhooks.
3 Steps to Get Started with Custom Webhooks
To start testing Alchemy's Custom Webhooks, use these two steps:
- Set Up a GraphQL Query in the Custom Webhook Playground
- Test your Query
- Set Up a Webhook Destination
Let’s get started!
Set Up a GraphQL Query in the Custom Webhook Playground
Create Alchemy Account
If you don’t already have one, you’ll first need to create an account on Alchemy. The free version will work fine for getting started.
Once you're fully signed up, head over to the Alchemy Notify dashboard to try out Alchemy's Notify Webhook suite!
Navigate to the GraphQL Playground and explore how to create a query within the dashboard.

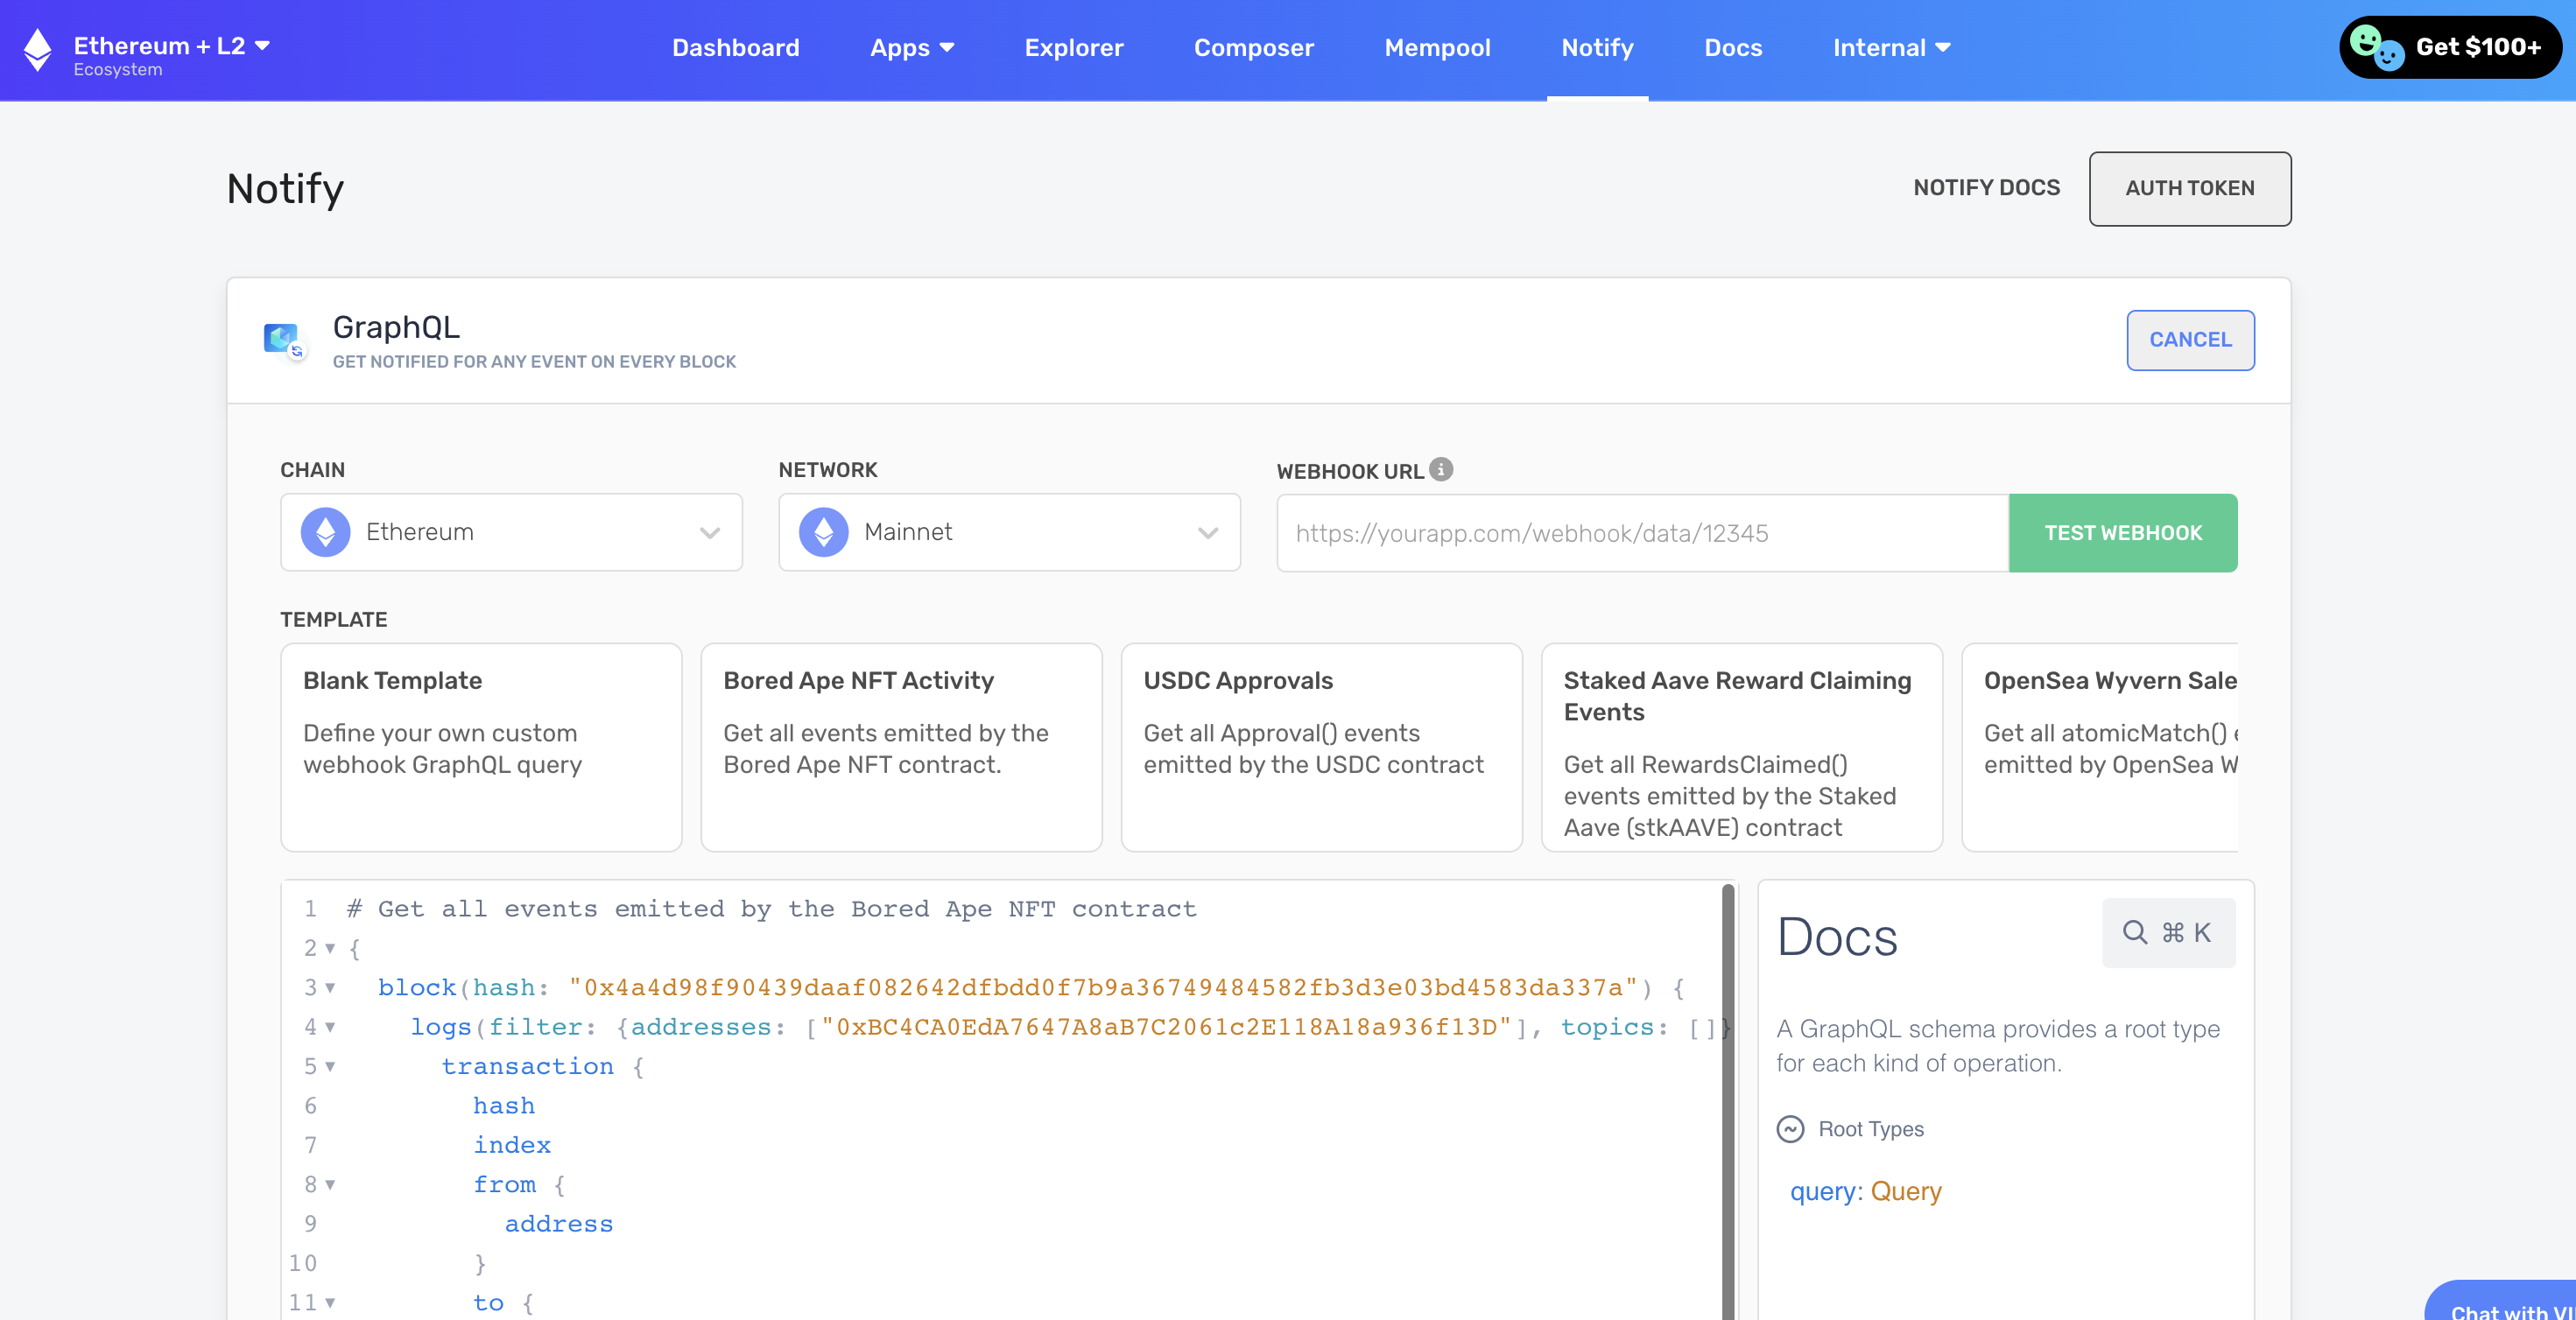
Custom Webhook playground!
Select a chain/network
Pick a target chain and network for your webhook! We're live on all of Alchemy's EVM chains (mainnets and testnets!) Depending on your selection here, you'll have slightly different queries since no 2 blockchains/networks are identical. Note that the template examples will also change based on your selection
Construct a GraphQL Query
Now, we can get building and work on making a GraphQL to define the type of data we want to receive from Alchemy!
To construct a GraphQL query using this schema, you can start by identifying the fields and types you want to get streamed to you. For example, if you want to retrieve the hash, nonce, and value of all transactions, your query could look like this:
{
  block {
    transactions{
      hash
      nonce
      value
    }
  }
}
You can also include nested fields, such as the from and to account of a transaction for instance:
{
  block {
    transactions{
      hash
      from {
        address
      }
      to {
        address
      }
      nonce
      value
    }
  }
}
Remember to use the correct types and syntax when constructing your query, and consult the dynamic schema at the right-hand side of the GraphQL playground for any required arguments or fields!
NOTE: The playground has autocomplete built-in to help give you an idea of the different parameters at your disposal.
If you need some extra help constructing your query or need some inspiration, feel free to browse through the carousel options! Based on your network and chain selection, we have a variety of templates you can directly use or edit and build off of!

Custom Webhook template carousel
Test your Query
Once you've defined your GraphQL query, we need to make sure that the syntax is 100% correct and confirm that the webhook notification includes the desired data payload!
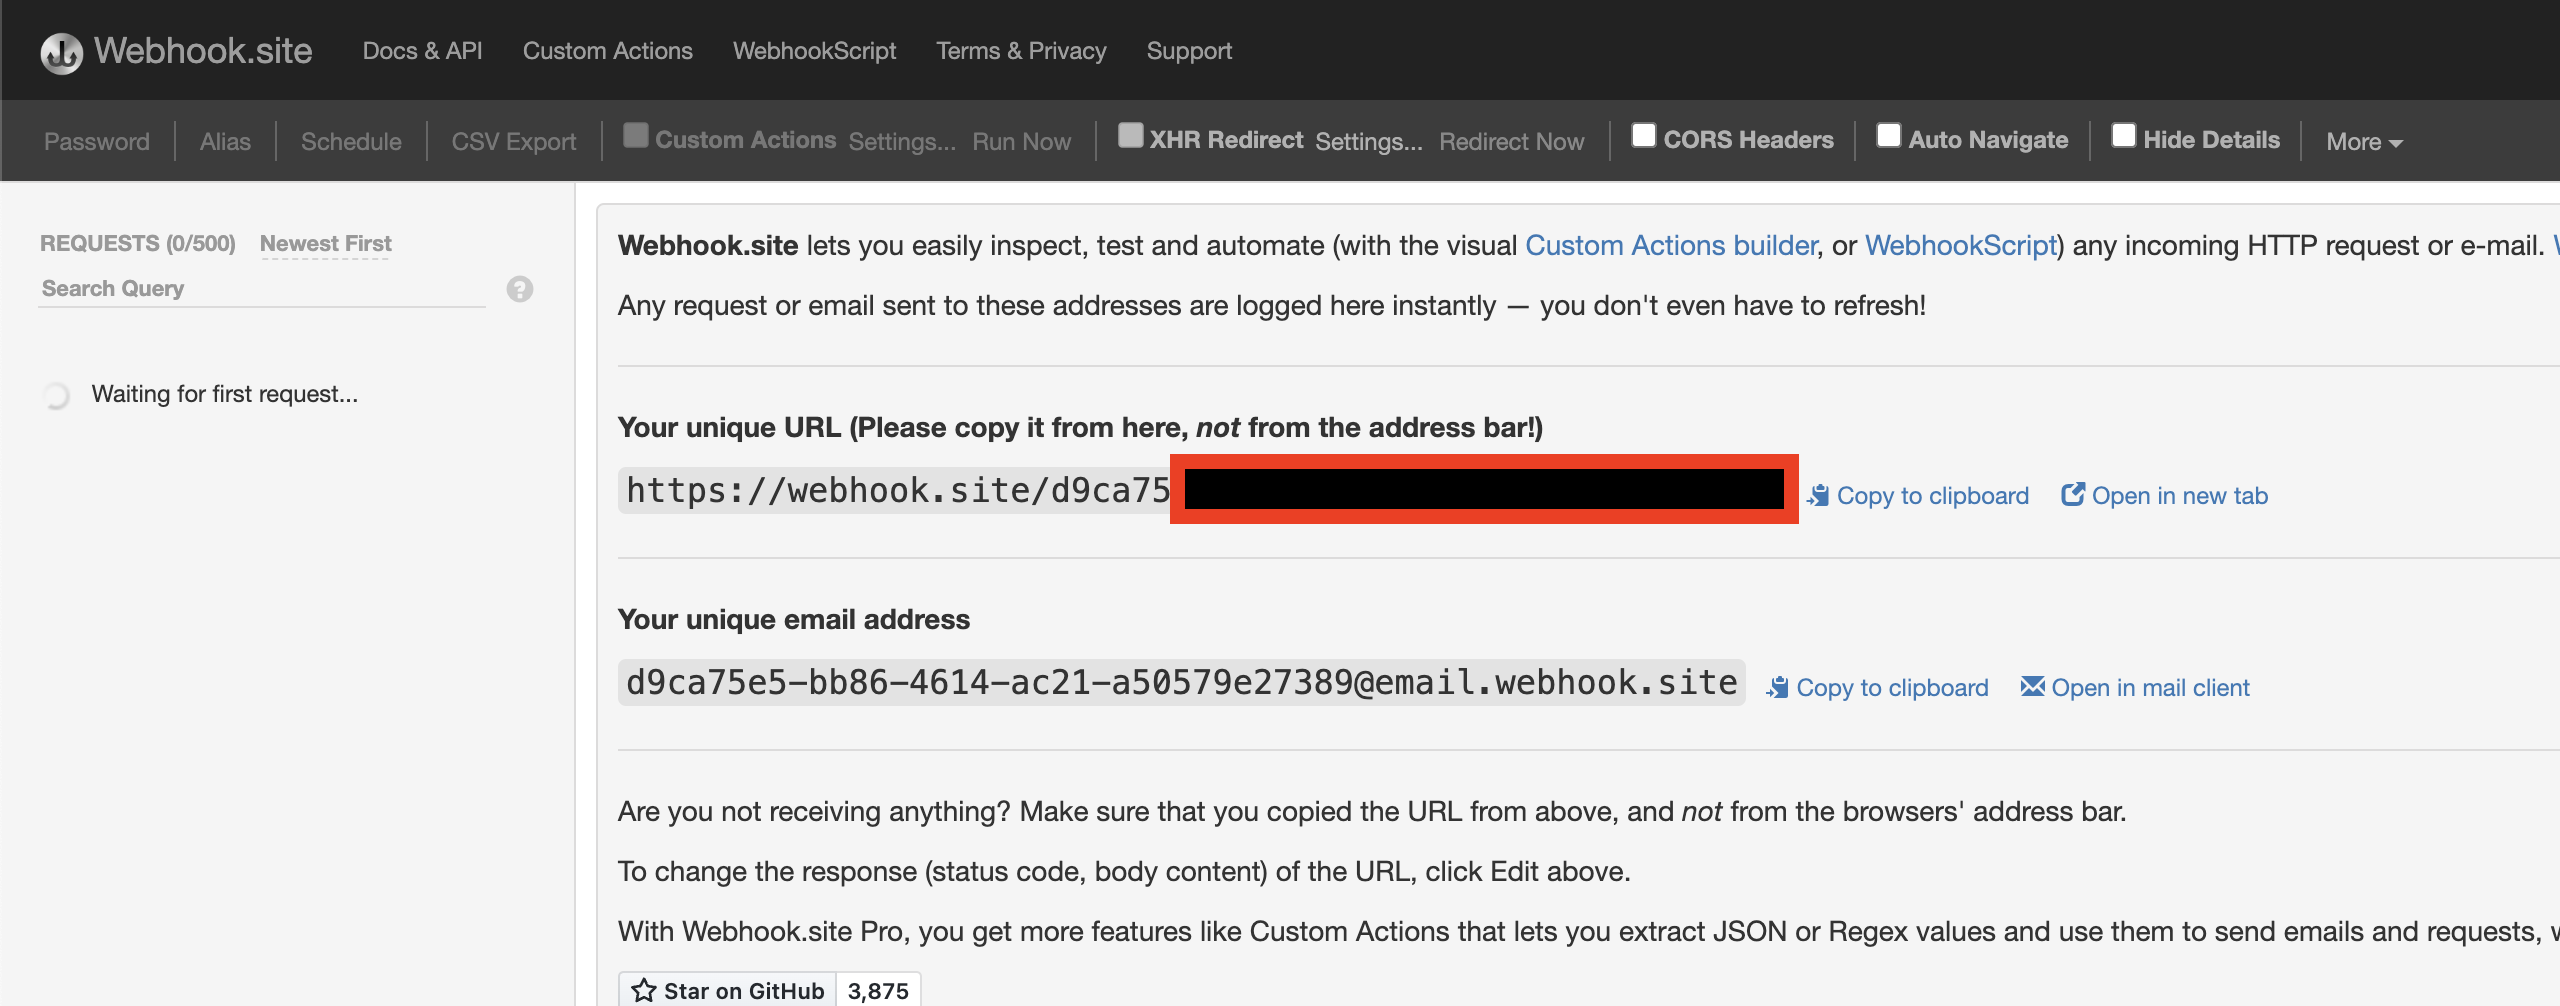
To quickly test your query, we can use a public utility, https://webhook.site/, to test our webhook query!
If you are building a dApp and already have a server setup, replace this step with your dApp's CRUD server URL. Otherwise, for learning purposes, use the webhook.site
Go ahead and copy the URL from the section where it says Your unique URL. Keep this tab/page open! You'll be able to see your Custom Webhook working in real-time! 👀

Paste this URL into the "Webhook URL" input box!

Lastly, click on the "Test Trigger" button and, if everything is successful, you'll be able to see a sample GraphQL notification back on webhook.site!
NOTE:
A common question is "Why do I receive a webhook for every new block?"
Don't be alarmed if you're seeing blank data like the following!
{ "webhookId": "wh_yg0kkvlsnksbzvwz", "id": "whevt_3iho0jjd9zsmfgkk", "createdAt": "2023-02-02T23:11:24.585Z", "type": "GRAPHQL", "event": { "data": { "block": { "logs": [] } }, "sequenceNumber": "10000000000579857000" } }We send you notifications every time we run your GraphQL queries regardless of whether the filter results are
null. This holds us accountable and serves as a receipt that we ran the query on each new canonical block! Think of this as a heartbeat mechanism!
Set Up a Webhook Destination
Once we've confirmed that your GraphQL query is working, replace the testing webhook endpoint with a production level destination!
Feel free to use serverless solutions like AWS Lamda or GCP Cloud Functions! Or try using repl!
If you want to try out the sample at the end of the demo video, check this repl project out!
Final Remarks
Congrats! You have just successfully tried out Alchemy’s Custom Webhook!
We can’t wait to see the amazing projects that this new offering allows you to build. And if you do something cool, don’t forget to share it with us on Twitter or reach out on Discord for any questions (or just to say hi)!
Happy hacking! 🎉
Updated about 2 years ago
