2. 如何构建 Defi 去中心化应用 “请我喝杯咖啡“
本文是中文翻译,原文地址: 2. How to Build a buy me a coffee defi dapp
区块链技术是惊人的,因为它让我们有能力使用代码和软件对金钱进行编程。只需几行代码,就可以建立各种应用和协议,为世界各地的人们创造新的机会。
Buy Me A Coffee 是一个流行的网站,创作者、教育家、艺人和各种人都用它来创建一个页面,任何人都可以发送一定数量的钱作为对他们服务的感谢。然而,使用它的时候你必须有一个银行账户和一张信用卡。但不是每个人都有这个条件!
建立在区块链之上的去中心化应用程序的一个好处是,世界各地的任何人都可以只用一个以太坊钱包来访问该应用程序,任何人都可以在 1 分钟内免费设置。让我们看看如何利用这一点来发挥我们的优势!
在本教程中,你将学习如何开发和部署一个去中心化的 “请我喝杯咖啡” 智能合约,让访客给你发送(测试的)ETH 作为小费,并留下感谢信息。这将会使用到 Alchemy、Hardhat、Ethers.js 和 Ethereum Goerli 测试网。
在本教程结束时,你将学会如何做以下事情:
- 使用 Hardhat 开发环境来构建、测试和部署我们的智能合约。
- 使用 Alchemy 的 RPC 节点将你的 MetaMask 钱包连接到 Goerli 测试网。
- 从 goerlifaucet.com 获得免费的 Goerli ETH 。
- 使用 Ethers.js 与你部署的智能合约互动。
- 用 Replit 为你的去中心化应用建立一个前端网站。
视频教程版本在这里:
(Youtube Video coming soon!)
先决条件
为了准备好学习本教程,你需要有:
node版本为 16.xnpm(npx)版本 8.x(译著:会与 node 同时安装)- 一个 Alchemy 账户,在此免费注册
以下两项不是必须的,但非常有用:
- 对命令行有一定程度的熟悉
- 对 JavaScript 有一定的了解
现在,让我们开始构建我们的智能合约吧!
编写智能合约 BuyMeACoffee.sol
Github参考:
https://github.com/alchemyplatform/RTW3-Week2-BuyMeACoffee-Contracts
如果你以前使用过 OpenZeppelin Wizard 和 Remix 等工具,那么你已经准备好使用 Hardhat。
Hardhat 是类似的,它是一个开发环境和编码工具,但它的可定制性更强一些,并且是从你自己的电脑的命令行界面运行,而不是浏览器端的应用程序。
我们将使用 Hardhat 来:
- 生成项目模板
- 测试我们的智能合约代码
- 部署到 Goerli 测试网
让我们开始吧!
开启命令行工具并且输入如下命令,创建并且切换到目录:
译著:Windows 建议使用 PowerShell,Mac 使用 Terminal。
mkdir BuyMeACoffee-contracts
cd BuyMeACoffee-contracts
在这个目录中,我们要通过 npm 初始化一个 JavaScript 项目(使用默认设置即可):
npm init -y
这应该会为你创建一个 package.json 文件,内容看起来像这样:
{
  "name": "buymeacoffee-contracts",
  "version": "1.0.0",
  "description": "",
  "main": "index.js",
  "scripts": {
    "test": "echo \"Error: no test specified\" && exit 1"
  },
  "keywords": [],
  "author": "",
  "license": "ISC"
}
安装 hardhat:
npm install --save-dev hardhat
初始化 hardhat 项目:
npx hardhat
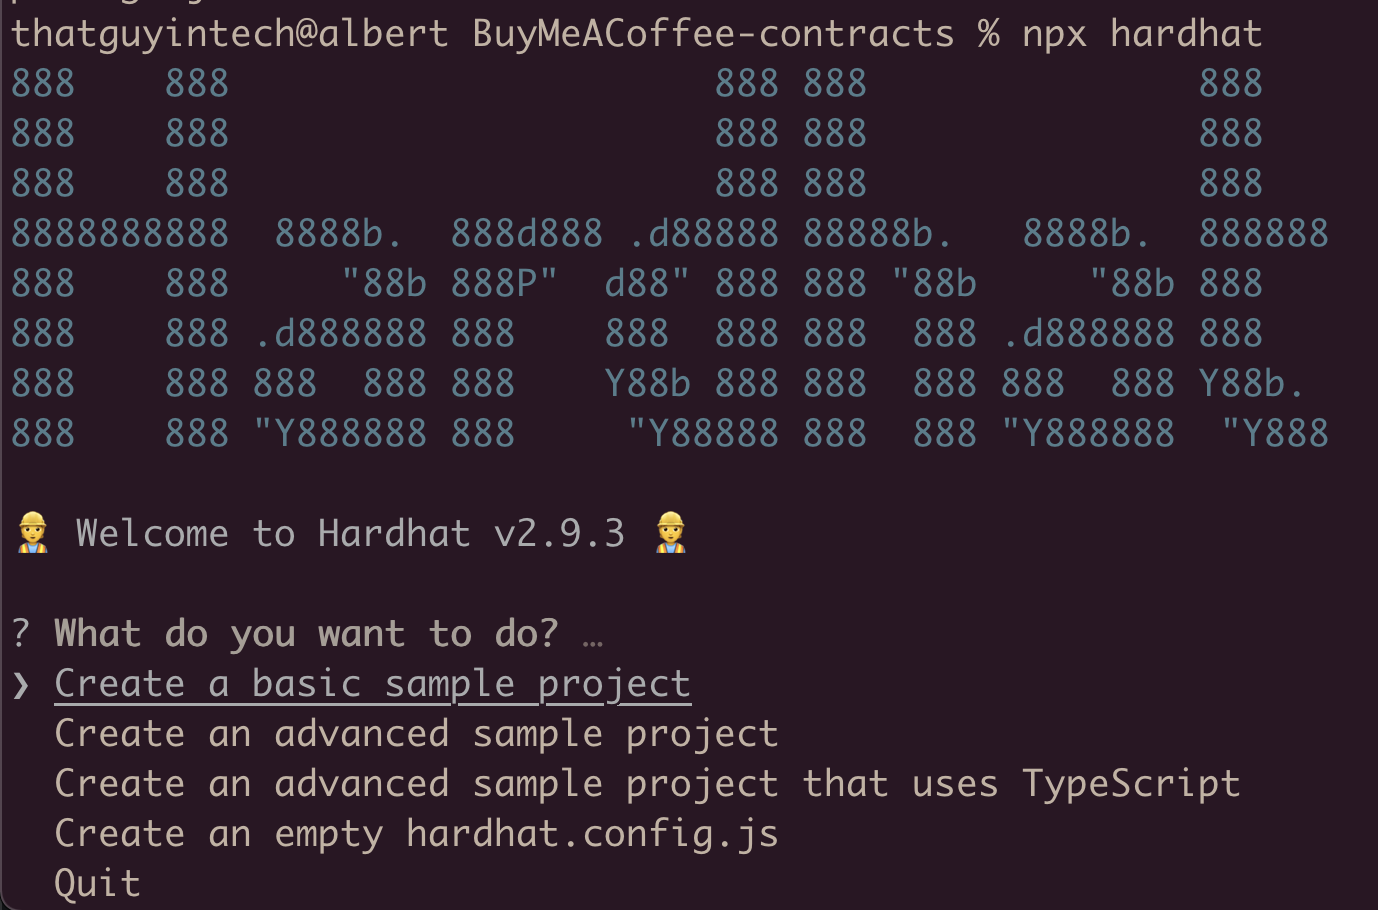
译著:
第一步可能会看到
“Need to install the following packages:
hardhat
Ok to proceed? (y)”
按下 y 键即可然后选项选择 Create a JavaScript project(默认的),其他全部按 Enter 即可。
你的项目目录结构应该是这样的(我用 tree 命令来把它形象化):
├── README.md
├── contracts
├── hardhat.config.js
├── node_modules
├── package-lock.json
├── package.json
├── scripts
└── test
重要的文件夹和文件是:
contracts存放智能合约的文件夹- 在这个项目中,我们只创建一个(合约),用来组织我们的 BuyMeACoffee 逻辑。
scripts存放你的 hardhat JavaScript 脚本的文件夹。- 我们将编写 deploy (部署)的逻辑
- 买咖啡的脚本例子
- 和一个 “提款” 脚本来提取我们合约里的小费
hardhat.config.js包含 solidity 版本和部署设置的配置文件。
现在,使用任何代码编辑器来打开项目文件夹吧 我喜欢使用VSCode。
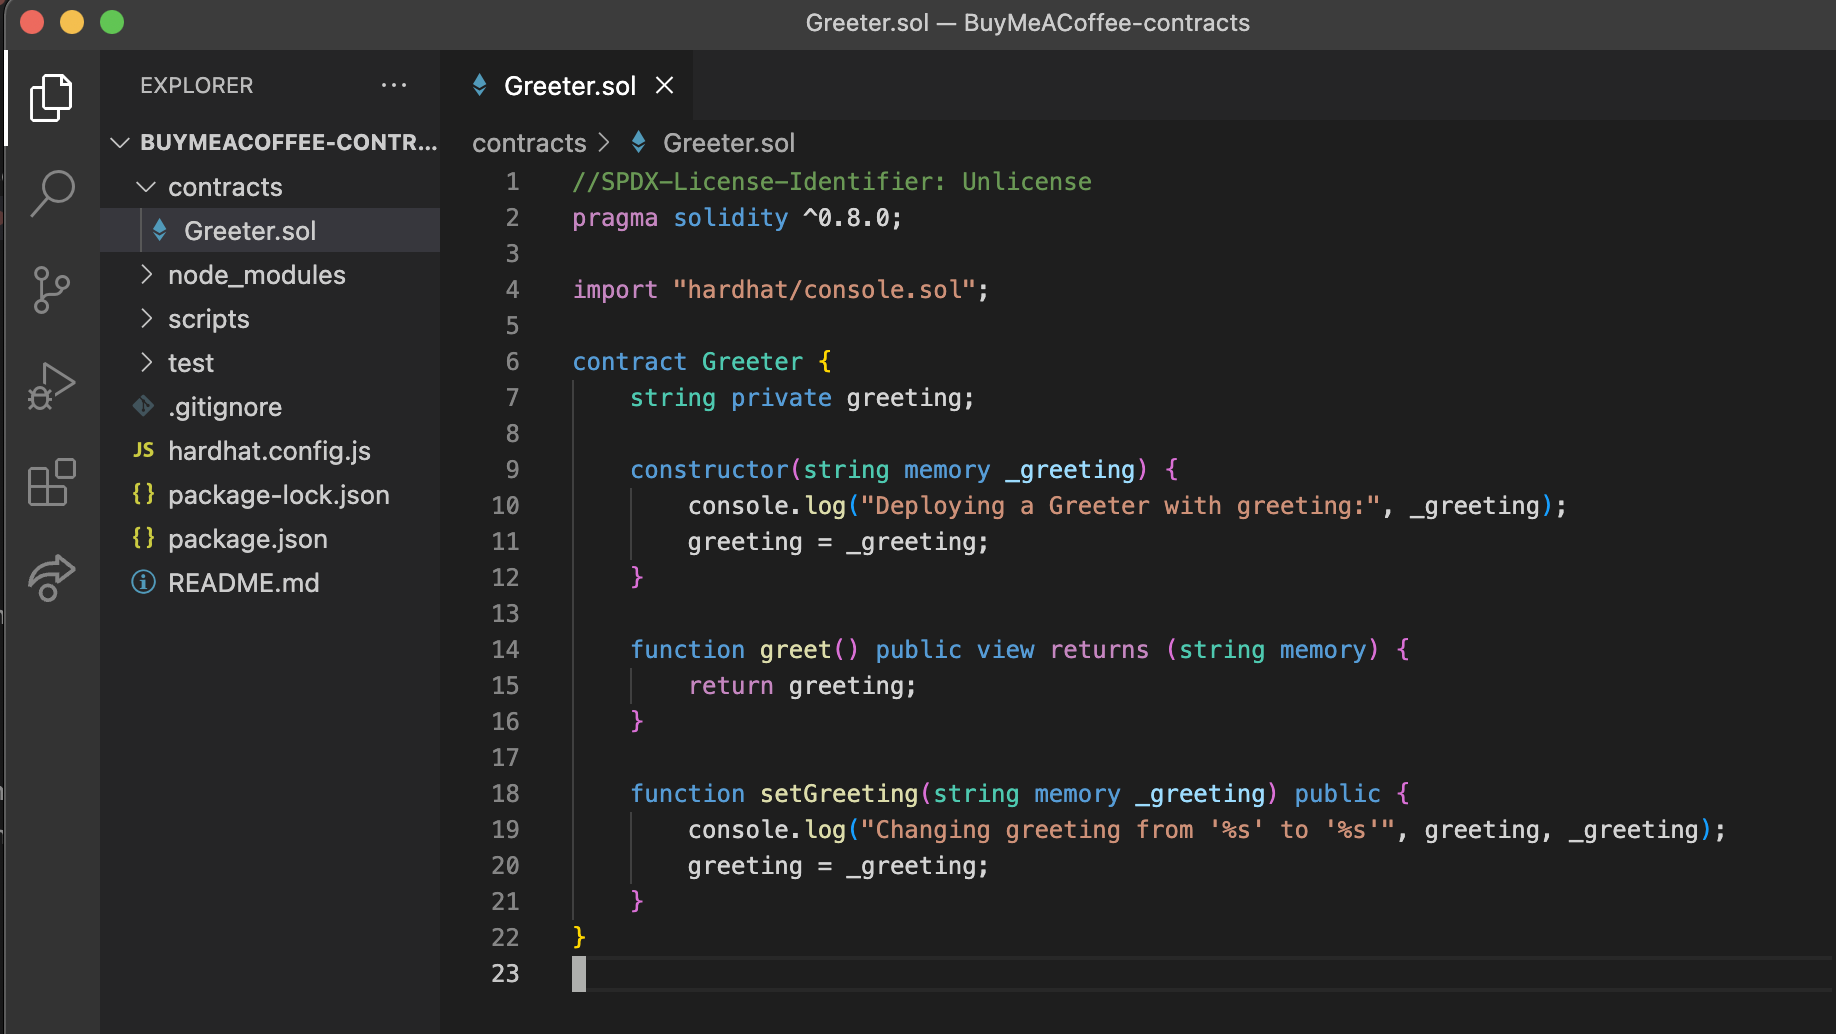
你会注意到,有一些文件已经通过 Hardhat 样本项目工具自动生成了。我们将替换所有这些文件,从 “Greeter.sol” 文件开始:
-
将合同文件重命名为
BuyMeACoffee.sol。 -
将内容替换为以下代码:
//SPDX-License-Identifier: Unlicense
// contracts/BuyMeACoffee.sol
pragma solidity ^0.8.0;// Switch this to your own contract address once deployed, for bookkeeping!
// Example Contract Address on Goerli: 0xDBa03676a2fBb6711CB652beF5B7416A53c1421Dcontract BuyMeACoffee {
// Event to emit when a Memo is created.
event NewMemo(
address indexed from,
uint256 timestamp,
string name,
string message
);// Memo struct. struct Memo { address from; uint256 timestamp; string name; string message; } // Address of contract deployer. Marked payable so that // we can withdraw to this address later. address payable owner; // List of all memos received from coffee purchases. Memo[] memos; constructor() { // Store the address of the deployer as a payable address. // When we withdraw funds, we'll withdraw here. owner = payable(msg.sender); } /** * @dev fetches all stored memos */ function getMemos() public view returns (Memo[] memory) { return memos; } /** * @dev buy a coffee for owner (sends an ETH tip and leaves a memo) * @param _name name of the coffee purchaser * @param _message a nice message from the purchaser */ function buyCoffee(string memory _name, string memory _message) public payable { // Must accept more than 0 ETH for a coffee. require(msg.value > 0, "can't buy coffee for free!"); // Add the memo to storage! memos.push(Memo( msg.sender, block.timestamp, _name, _message )); // Emit a NewMemo event with details about the memo. emit NewMemo( msg.sender, block.timestamp, _name, _message ); } /** * @dev send the entire balance stored in this contract to the owner */ function withdrawTips() public { require(owner.send(address(this).balance)); }}
花点时间阅读一下合约内的注释,看看你是否能理解到发生了什么事!我在这里列出了一些重点:
- 当我们部署合约时,
constructor将负责部署的钱包的地址保存在owner变量中,作为payable地址。这对以后我们想提取合约内的消费很重要。 buyCoffee函数是合约中最重要的函数。它接受两个参数,一个是_name,一个是_message,由于payable的存在,它还能接受 ETH。它使用_name和_message来创建一个Memo结构,存储在区块链上。- 当访问者调用
buyCoffee函数时,由于require(msg.value > 0)这一语句,他们必须在交易中发送一些 ETH。然后 ETH 会被保存在合约的balance上,直到它被提取。
- 当访问者调用
memos数组记录所有在购买咖啡时产生的Memo结构。NewMemo事件在每次购买咖啡时都会发出。这使我们能够从前端网站中监听新的购买咖啡事件。withdrawTips(提取小费)是一个任何人都可以调用的函数,但它只会向部署合约的地址发送钱(ETH)。address(this).balance获取合约上的 ETH。owner.send(...)是创建一个以太坊发送交易的语法。require(...)语句中描述了需要通过的条件,如果有任何问题,交易会被恢复,没有任何损失。- 所以我们可以通过
require(owner.send(address(this).balance))来确定发送是否成功。
有了这个智能合约的代码,我们现在可以写一个脚本来测试我们的逻辑了!
创建一个 buy-coffee.js 脚本来测试你的合约
在 scripts 文件夹下,应该有一个已经写有示范代码的 sample-script.js。让我们将该文件重命名为 buy-coffee.js,并粘贴以下代码:
const hre = require("hardhat");

// Returns the Ether balance of a given address.
async function getBalance(address) {
  const balanceBigInt = await hre.ethers.provider.getBalance(address);
  return hre.ethers.utils.formatEther(balanceBigInt);
}

// Logs the Ether balances for a list of addresses.
async function printBalances(addresses) {
  let idx = 0;
  for (const address of addresses) {
    console.log(`Address ${idx} balance: `, await getBalance(address));
    idx++;
  }
}

// Logs the memos stored on-chain from coffee purchases.
async function printMemos(memos) {
  for (const memo of memos) {
    const timestamp = memo.timestamp;
    const tipper = memo.name;
    const tipperAddress = memo.from;
    const message = memo.message;
    console.log(`At ${timestamp}, ${tipper} (${tipperAddress}) said: "${message}"`);
  }
}

async function main() {
  // Get the example accounts we'll be working with.
  const [owner, tipper, tipper2, tipper3] = await hre.ethers.getSigners();

  // We get the contract to deploy.
  const BuyMeACoffee = await hre.ethers.getContractFactory("BuyMeACoffee");
  const buyMeACoffee = await BuyMeACoffee.deploy();

  // Deploy the contract.
  await buyMeACoffee.deployed();
  console.log("BuyMeACoffee deployed to:", buyMeACoffee.address);

  // Check balances before the coffee purchase.
  const addresses = [owner.address, tipper.address, buyMeACoffee.address];
  console.log("== start ==");
  await printBalances(addresses);

  // Buy the owner a few coffees.
  const tip = {value: hre.ethers.utils.parseEther("1")};
  await buyMeACoffee.connect(tipper).buyCoffee("Carolina", "You're the best!", tip);
  await buyMeACoffee.connect(tipper2).buyCoffee("Vitto", "Amazing teacher", tip);
  await buyMeACoffee.connect(tipper3).buyCoffee("Kay", "I love my Proof of Knowledge", tip);

  // Check balances after the coffee purchase.
  console.log("== bought coffee ==");
  await printBalances(addresses);

  // Withdraw.
  await buyMeACoffee.connect(owner).withdrawTips();

  // Check balances after withdrawal.
  console.log("== withdrawTips ==");
  await printBalances(addresses);

  // Check out the memos.
  console.log("== memos ==");
  const memos = await buyMeACoffee.getMemos();
  printMemos(memos);
}

// We recommend this pattern to be able to use async/await everywhere
// and properly handle errors.
main()
  .then(() => process.exit(0))
  .catch((error) => {
    console.error(error);
    process.exit(1);
  });
到现在为止,你的项目目录结构应该是这样的:
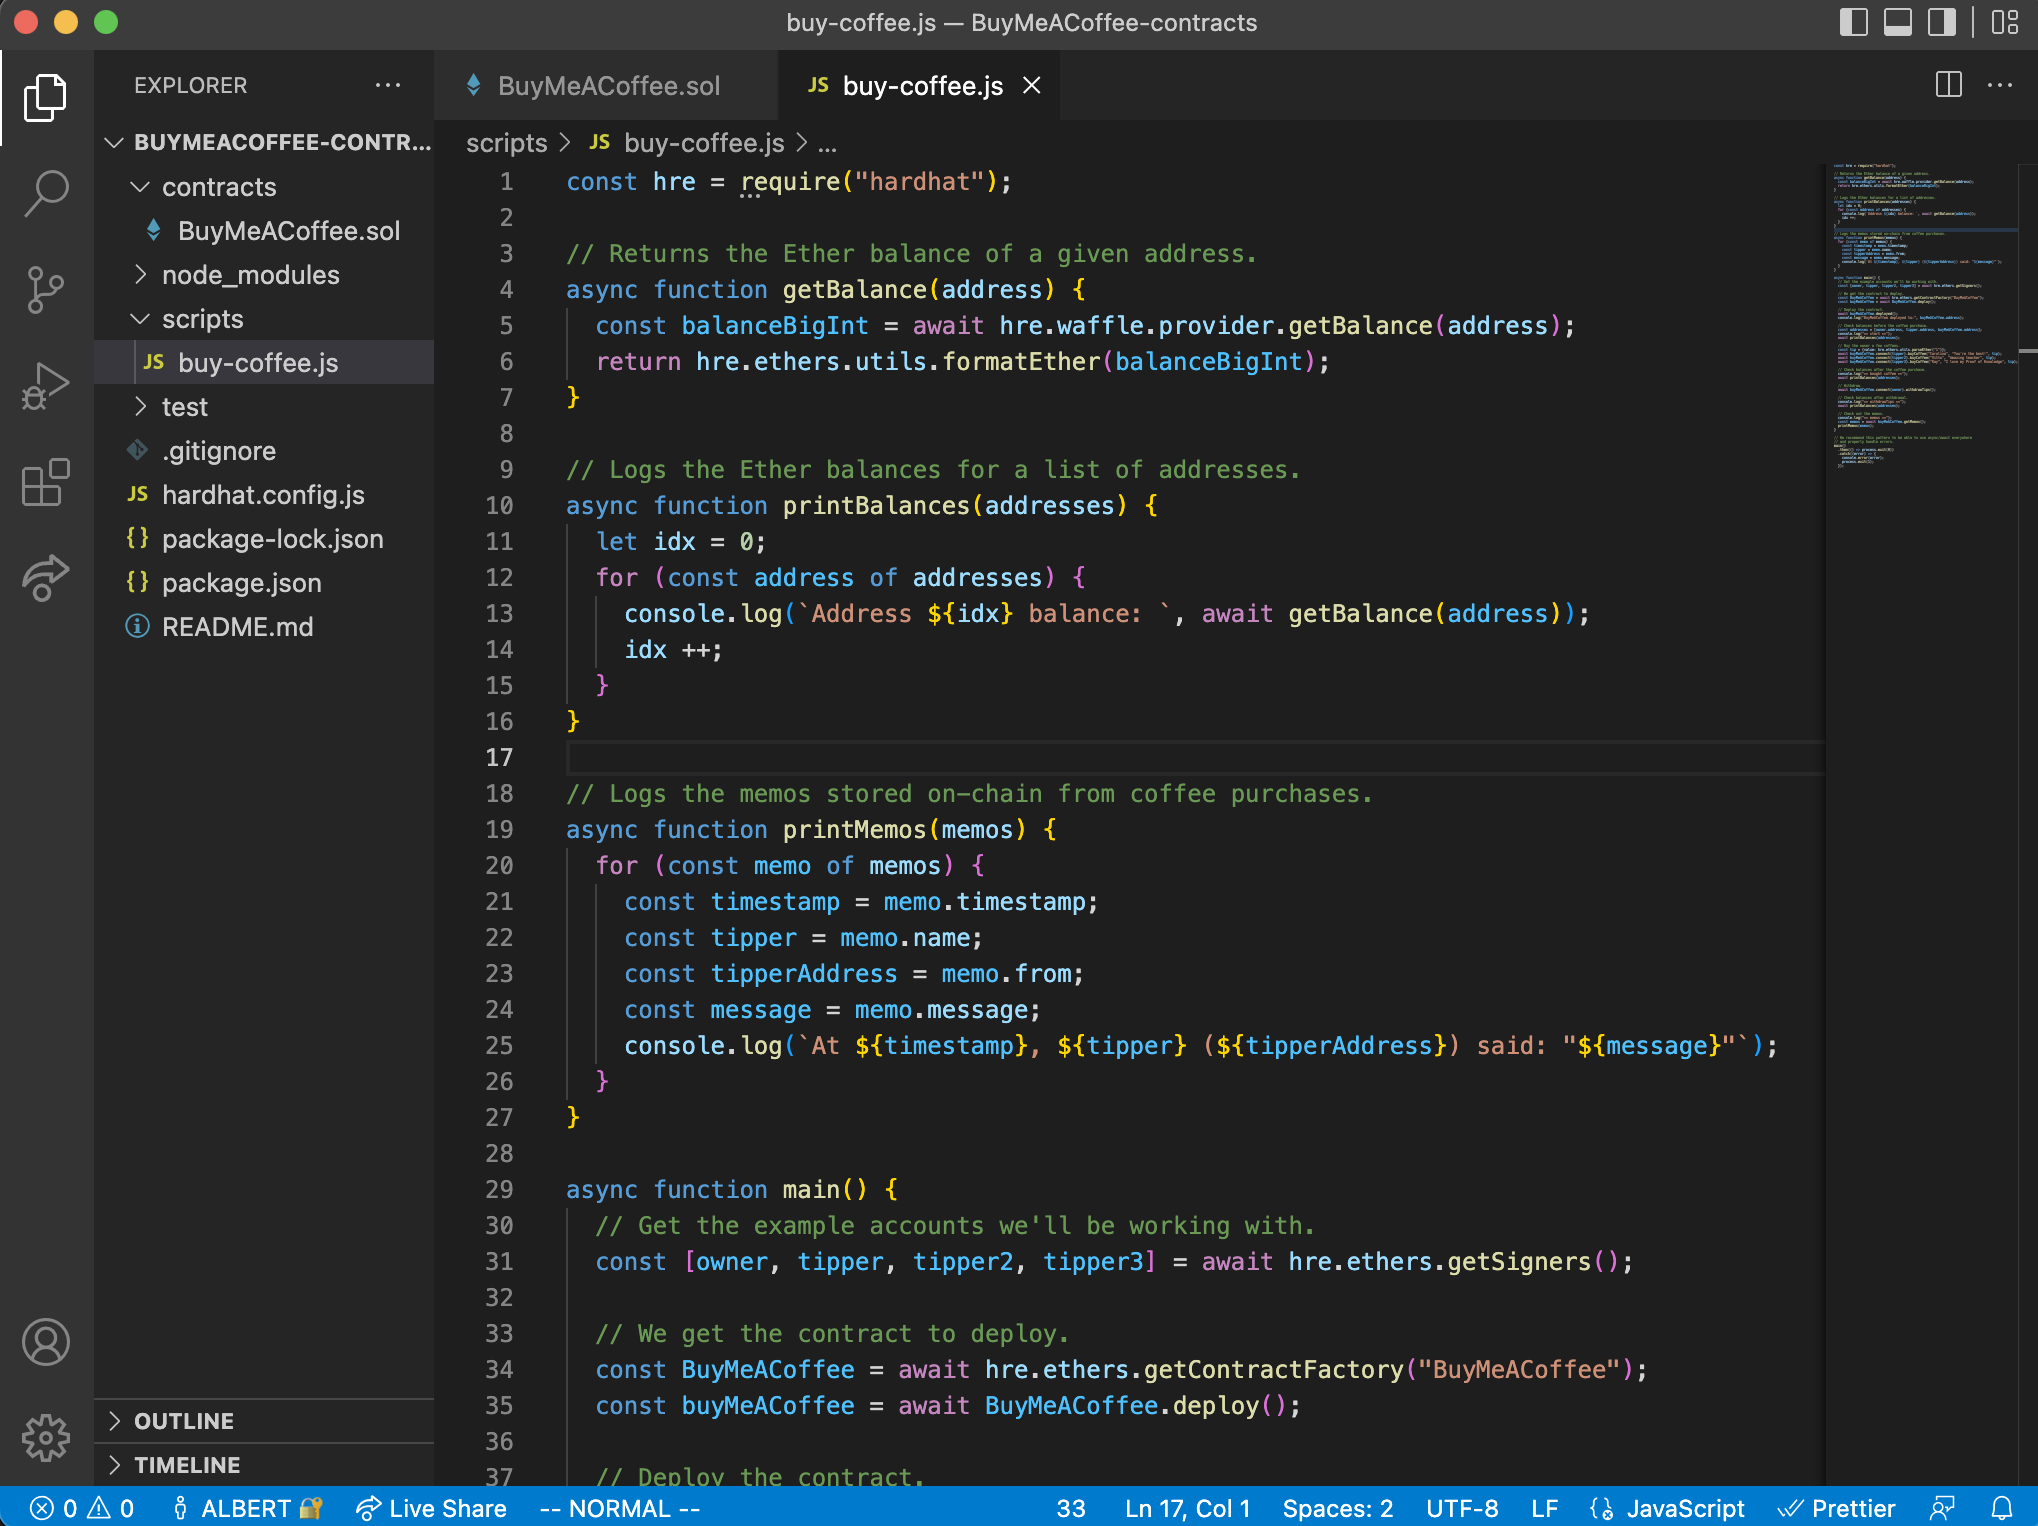
请花点时间阅读一下脚本代码。为了方便起见,我在顶部定义了一些实用的函数,例如获取钱包余额并打印出来。
脚本的主要逻辑在 main() 函数中,代码注释描述了该脚本的流程:
- 获取我们将要使用的示例账户(译著:在 hardhat 中,默认有一批测试钱包,每一个测试钱包有 10000 个 ETH)
- 获取要部署的合同
- 部署合同
- 在购买咖啡前检查余额
- 给老板买几杯咖啡
- 买完咖啡后检查余额
- 提款
- 取款后检查余额
- 检查 Memo (买咖啡时附带的信息)
这个脚本测试了我们在智能合约中实现的所有功能!这真是太棒了!
你可能还注意到,我们有一些你没有见过的函数调用,比如:
hre.ethers.provider.getBalancehre.ethers.getContractFactoryhre.ethers.utils.parseEther- 等。
这几行代码我们利用了 Hardhat (hre) 开发环境以及 Ethers SDK 的功能,这些功能允许我们读取区块链钱包账户余额,部署合约,以及格式化 ETH 的数值(译著:1 ETH = 1000000000000000000 gwei)。
在本教程中,我们不会对这些代码进行太深入的研究,但你可以通过查阅 Hardhat 和 Ethers.js 的文档来了解它们。
说得够多了。现在让我们来运行脚本:
npx hardhat run scripts/buy-coffee.js
你应该在你的终端看到这样的输出:
thatguyintech@albert BuyMeACoffee-contracts % npx hardhat run scripts/buy-coffee.js

Compiled 1 Solidity file successfully

BuyMeACoffee deployed to: 0x5FbDB2315678afecb367f032d93F642f64180aa3
== start ==
Address 0 balance:  9999.99877086625
Address 1 balance:  10000.0
Address 2 balance:  0.0
== bought coffee ==
Address 0 balance:  9999.99877086625
Address 1 balance:  9998.999752902808629985
Address 2 balance:  3.0
== withdrawTips ==
Address 0 balance:  10002.998724967892122376
Address 1 balance:  9998.999752902808629985
Address 2 balance:  0.0
== memos ==
At 1652033688, Carolina (0x70997970C51812dc3A010C7d01b50e0d17dc79C8) said: "You're the best!"
At 1652033689, Vitto (0x3C44CdDdB6a900fa2b585dd299e03d12FA4293BC) said: "Amazing teacher"
At 1652033690, Kay (0x90F79bf6EB2c4f870365E785982E1f101E93b906) said: "I love my Proof of Knowledge"
在脚本的开始(就在合约 deploy 之后),注意地址 0 有 9999.99877086625 个 ETH。这是因为它作为默认的 hardhat 地址之一,开始时就有 10000 个 ETH,但它必须花很少的 ETH 来作为部署到本地的测试区块链上的 Gas 费用。
在第二步 == bought coffee == ,地址 1 购买了一杯咖啡。另外两个没有显示的钱包都购买了咖啡。总共购买了 3 杯咖啡,提示金额为 3.0 个 ETH。你可以看到,地址 2(代表合约地址),正持有 3.0 个 ETH。
在调用 withdrawTips() 函数后,== withdrawTips ==,合约回落到0 个 ETH,原来的部署者,也就是地址 0,现在已经赚了一些钱,余额是 10002.998724967892122376 个 ETH。
有趣吗!?你能想象你即将赚到的小费吗?我觉得很有趣。
现在,让我们实现一个独立的部署脚本,以保持真正的部署简单,同时也准备部署到 Goerli 测试网上!
使用 Alchemy 和 MetaMask 将你的 BuyMeACoffe.sol 智能合约部署到 以太坊 Goerli 测试网上
让我们创建一个新的文件 scripts/deploy.js(译著:在 scripts 文件夹里面新建一个 deploy.js 文件),它将是很简单的,只是为了将我们的合约部署到指定的区块链网络上(假如你没有注意到,我们将会选择 Goerli 测试网)。
deploy.js文件看起来应该是这样的:
// scripts/deploy.js

const hre = require("hardhat");

async function main() {
  // We get the contract to deploy.
  const BuyMeACoffee = await hre.ethers.getContractFactory("BuyMeACoffee");
  const buyMeACoffee = await BuyMeACoffee.deploy();

  await buyMeACoffee.deployed();

  console.log("BuyMeACoffee deployed to:", buyMeACoffee.address);
}

// We recommend this pattern to be able to use async/await everywhere
// and properly handle errors.
main()
  .then(() => process.exit(0))
  .catch((error) => {
    console.error(error);
    process.exit(1);
  });
回顾一下项目结构,我们现在有一个智能合约和两个 hardhat 脚本:
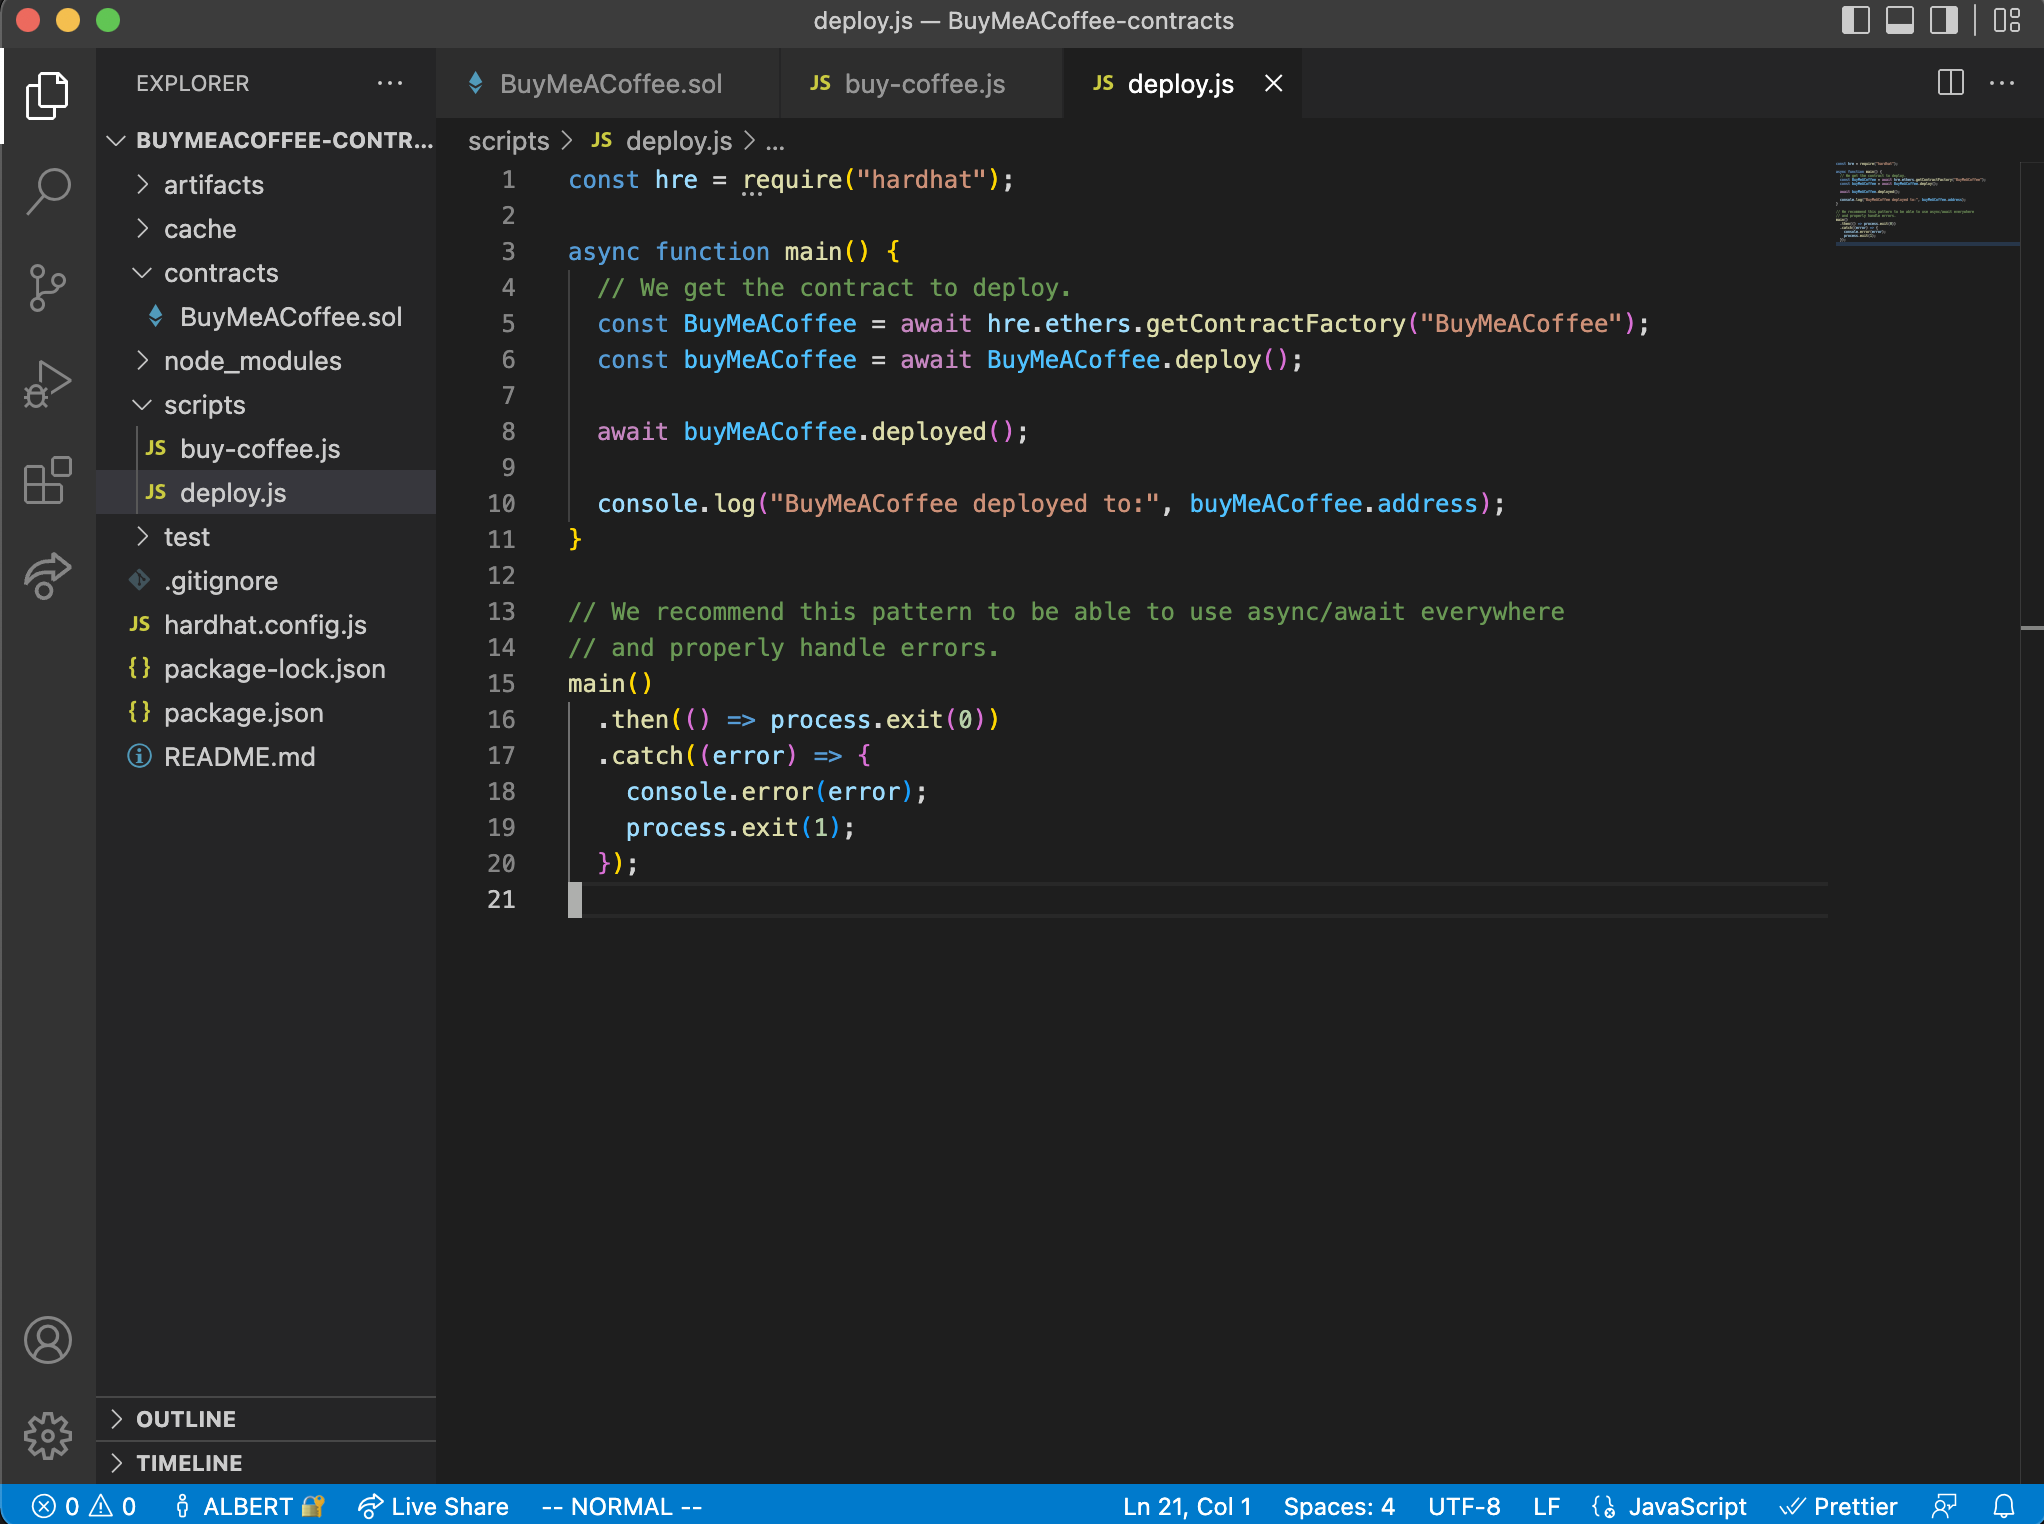
现在有了 deploy.js,如果你运行以下命令:
npx hardhat run scripts/deploy.js
你会看到打印出来的一行信息:
BuyMeACoffee deployed to: 0x5FbDB2315678afecb367f032d93F642f64180aa3
有趣的是,如果你一次又一次地运行它,你每次都会看到完全相同的部署地址:
thatguyintech@albert BuyMeACoffee-contracts % npx hardhat run scripts/deploy.js
BuyMeACoffee deployed to: 0x5FbDB2315678afecb367f032d93F642f64180aa3
thatguyintech@albert BuyMeACoffee-contracts % npx hardhat run scripts/deploy.js
BuyMeACoffee deployed to: 0x5FbDB2315678afecb367f032d93F642f64180aa3
thatguyintech@albert BuyMeACoffee-contracts % npx hardhat run scripts/deploy.js
BuyMeACoffee deployed to: 0x5FbDB2315678afecb367f032d93F642f64180aa3
为什么会这样?这是因为当你运行脚本时,Hardhat 工具使用的默认 “测试网” 是一个仅仅运行在本地的开发用测试网,就在你的电脑中。它是快速和确定的,对于一些快速的合理性检查是很好用的。
然而,为了实际部署到一个在互联网上运行的测试网,其节点遍布世界各地,我们需要改变 Hardhat 配置文件,设置一些选项。
这就是 hardhat.config.json 文件的作用。
在我们深入研究之前,先说一句注意事项:
📘配置是很难的!保守你的秘密!
有各种各样的小细节可能出错,而且事情一直在变化。最危险的是私钥,例如,你的 MetaMask 钱包私钥和你的 Alchemy URL。
如果你遇到一些错误或例外情况,请检查 Ethereum StackExchange、Alchemy Discord,或通过谷歌搜索相关错误。
永远不要分享你的秘密!你的私钥,你的代币等!
当你打开你的 hardhat.config.js 文件时,你会看到一些部署代码的样本。删除它,然后把这个版本粘贴进去:
// hardhat.config.js

require("@nomicfoundation/hardhat-toolbox");
require("dotenv").config()

// You need to export an object to set up your config
// Go to https://hardhat.org/config/ to learn more

const GOERLI_URL = process.env.GOERLI_URL;
const PRIVATE_KEY = process.env.PRIVATE_KEY;

/**
 * @type import('hardhat/config').HardhatUserConfig
 */
module.exports = {
  solidity: "0.8.4",
  networks: {
    goerli: {
      url: GOERLI_URL,
      accounts: [PRIVATE_KEY]
    }
  }
};
这里有几件事要做:
- 通过在配置文件的顶部导入
@nomicfoundation/hardhat-toolbox和dotenv,我们整个 Hardhat 项目都可以访问这些依赖项。 - 我知道我们还没有介绍
dotenv,这是一个重要的工具,我们稍后再谈。 process.env.GOERLI_URL和process.env.PRIVATE_KEY是我们访问环境变量的方法,可以在配置文件中使用,同时不暴露相关私钥。- 在
modules.exports里面,我们使用的是 solidity 编译器版本0.8.4。不同的编译器版本支持不同的功能和语法集,所以将这个版本与我们的BuyMeACoffee.sol智能合约顶部的pragma声明相匹配很重要。- 如果你回到那个文件,你可以交叉检查
pragma solidity ^0.8.0;的声明。在这种情况下,即使数字不完全匹配,也没关系,因为^符号意味着任何大于或等于0.8.0的版本都可以运行。
- 如果你回到那个文件,你可以交叉检查
- 同样在
modules.exports中,我们定义了一个networks设置,包含了名为goerli的一个测试网配置。现在在我们进行部署之前,我们需要确保安装最后一个工具,即dotenv模块。顾名思义,dotenv帮助我们将.env文件与我们项目的其他部分连接起来,让我们把它设置好。
到命令行,安装 dotenv:
npm install dotenv
在项目的根目录建立一个名为 .env 的文件(译著:项目跟目录,就是指 hardhat.config.js 的那一层),然后在里面设置我们需要的参数:
译著:
请将以下内容替换成对应的值
另外,建议新建一个钱包作为开发专用的钱包,原因单纯是风险管理。
Hardhat 需要使用你的钱包私钥来把我们的合约签署然后部署到链上,这就跟 MetaMask 需要我们的钱包私钥来为交易签署一样,没有经过签署的交易是提交不到上链的。
签署这个动作在本地进行,HardHat 和 Alchemy 都不会知道你的私钥。
请确保包含私钥的文件或代码(这里示范的 .env)都不要上传到网络上,在网络上的任何位置都有暴露的风险。
GOERLI_URL=https://eth-goerli.alchemyapi.io/v2/【你的Alchemy API KEY】
GOERLI_API_KEY=【你的 Alchemy API Key】
PRIVATE_KEY=【你的 MetaMask 钱包私钥】
你会注意到我没有泄漏任何我自己的秘密。是的,安全第一。你可以放心建立这个文件,只要项目的目录下还有一个名为 .gitignore 的文件,这能确保你不会一不小心的把文件加入到 Git(译著:以及 GitHub 等地方)。确保 .env 是在你的 .gitignore 文件中。
node_modules
.env
coverage
coverage.json
typechain

#Hardhat files
cache
artifacts
另外,为了获得你所需要的环境变量,你可以使用以下资源。
GOERLI_URL- 在 Alchemy 上注册一个账户,创建一个 Ethereum -> Goerli 应用程序,并获得它的 HTTP URLGOERLI_API_KEY- 从你的同一个 Alchemy Ethereum Goerli 应用程序中获取,或者直接从 HTTP URL 的最后一部分中获得,这就是你的 API KEYPRIVATE_KEY- 按照 MetaMask的说明 导出你的私钥
现在,随着 dotenv 安装成功和写好 .env 文件的内容,我们几乎已经准备好部署到 Goerli 测试网了。
我们需要做的最后一件事是,确保你有一些 Goerli ETH。这是测试用的 ETH,允许你在 Goerli 测试网上练习,这有点像建立以太坊应用程序的练习区,这样你就不必在以太坊主网上花真钱了。
到 https://www.goerlifaucet.com,用你的 Alchemy 账户登录,获得一些免费的测试 ETH。
现在我们可以部署了!
运行部署脚本,这次添加一个特殊的参数,使用 Goerli 网络:
npx hardhat run scripts/deploy.js --network goerli
如果你在这里遇到任何错误,例如 “Error HH8“,那么我强烈建议你在谷歌和 Stack Overflow 或 Ethereum Stackexchange 上搜索解决方案。当你的 hardhat.config.js、.env 或 dotenv 模块没有正确设置时,遇到这些问题都很常见。
如果一切顺利,几秒钟后你应该能在命令行信息中看到你的合约地址:
BuyMeACoffee deployed to: 0xDBa03676a2fBb6711CB652beF5B7416A53c1421D
🎉 恭喜! 🎉
你现在有一个合约部署到 Goerli 测试网。你可以在 Goerli etherscan 区块链浏览器上通过粘贴你的地址来查看它:https://goerli.etherscan.io/
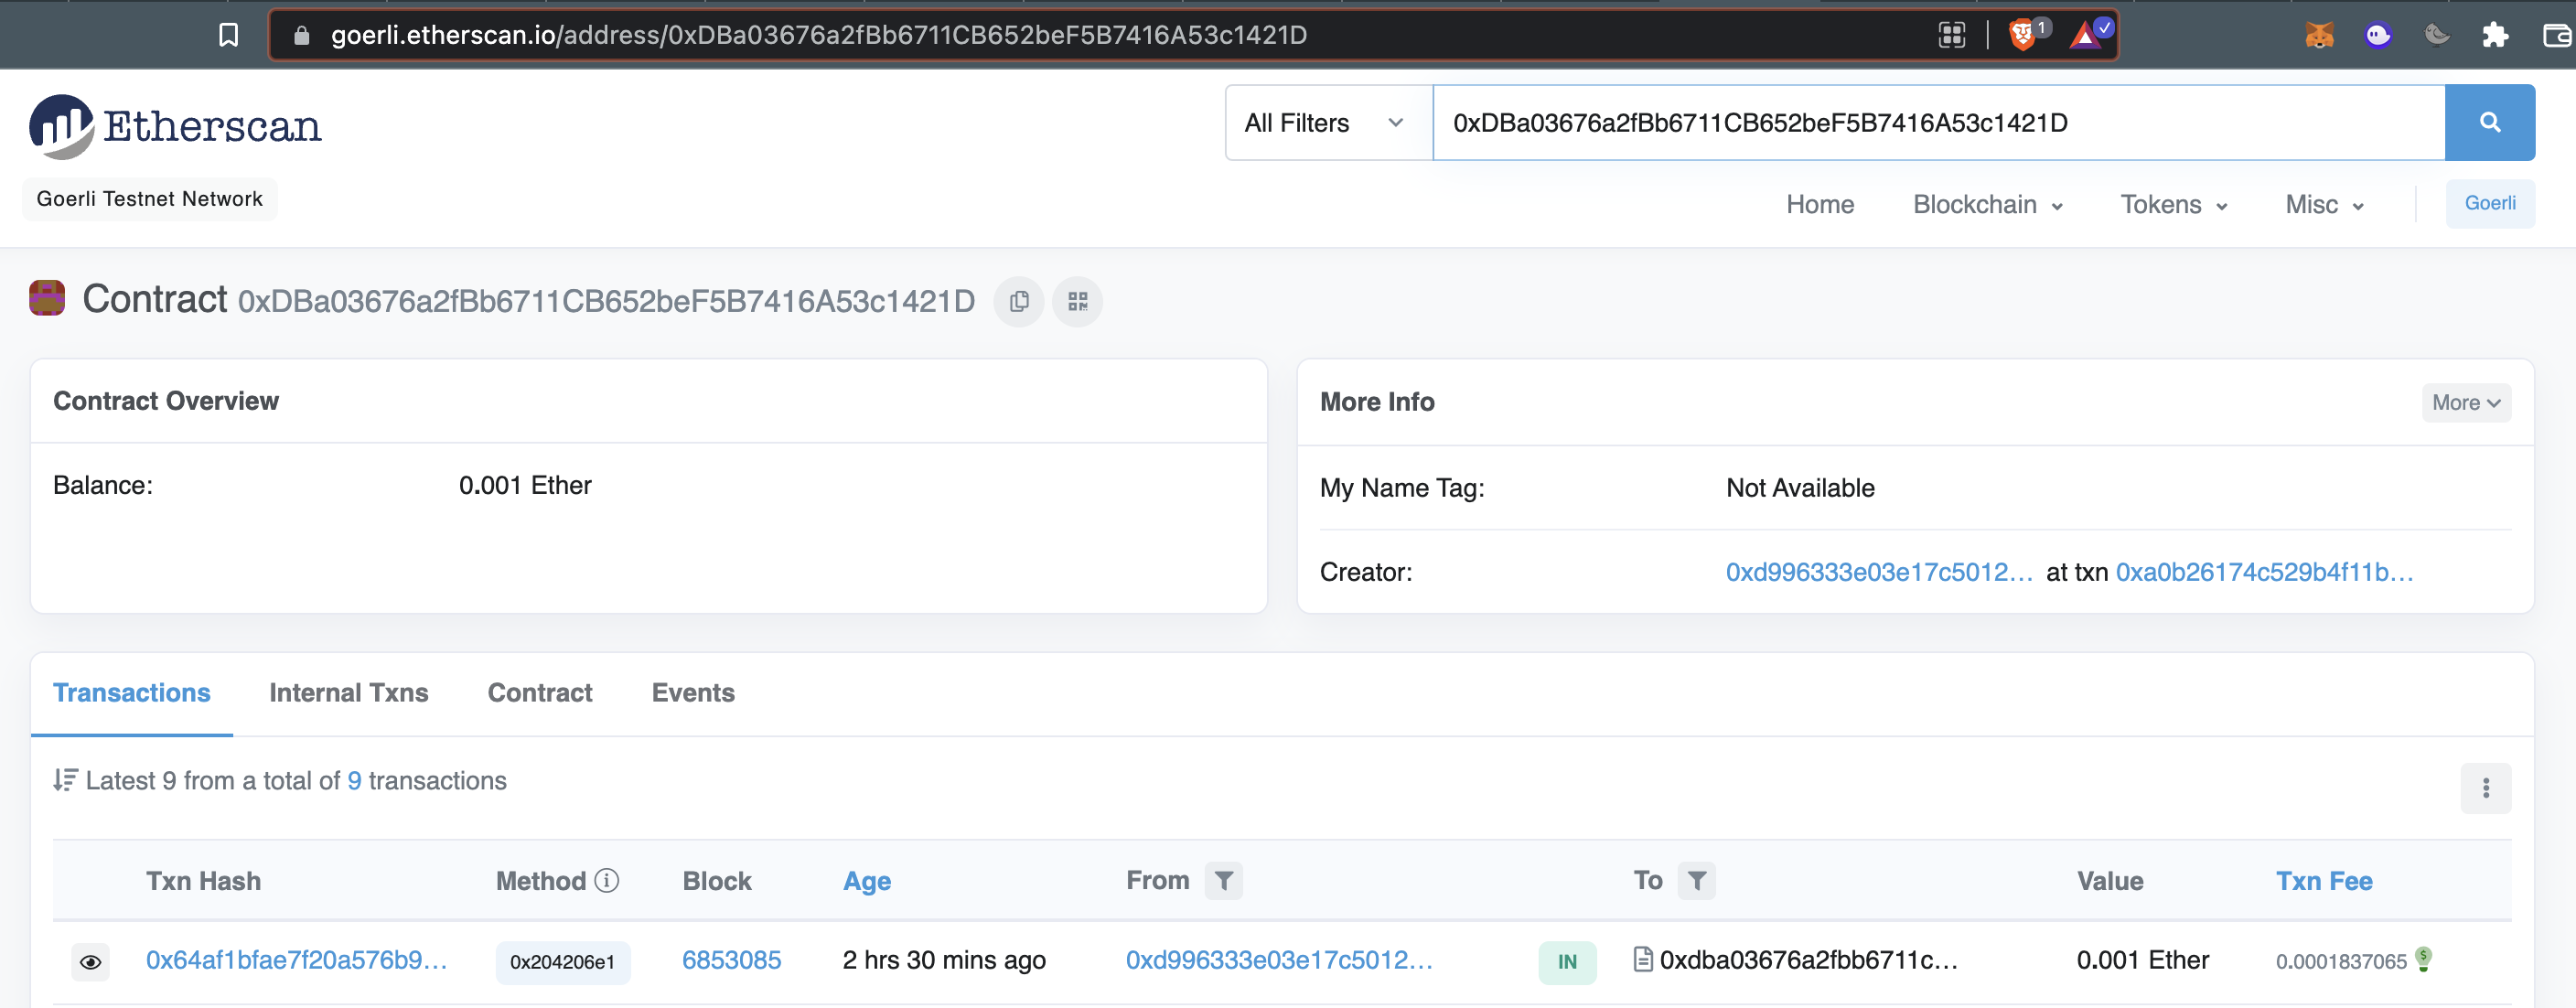
在我们进入教程的前端网站(dapp)部分之前,让我们再准备一个以后要用到的脚本,即 withdraw.js (提款)脚本。
实现 withdraw 脚本
withdraw 脚本以后当我们发布我们的网站时,我们需要一个方法来收集我们的朋友和粉丝给我们留下的所有很棒的信息和小费。我们可以再写一个 hardhat 脚本来完成这件事!
在 scripts/withdraw.js 创建一个文件:
// scripts/withdraw.js

const hre = require("hardhat");
const abi = require("../artifacts/contracts/BuyMeACoffee.sol/BuyMeACoffee.json");

async function getBalance(provider, address) {
  const balanceBigInt = await provider.getBalance(address);
  return hre.ethers.utils.formatEther(balanceBigInt);
}

async function main() {
  // Get the contract that has been deployed to Goerli.
  const contractAddress="替换为你部署了的合约地址";
  const contractABI = abi.abi;

  // Get the node connection and wallet connection.
  const provider = new hre.ethers.providers.AlchemyProvider("goerli", process.env.GOERLI_API_KEY);

  // Ensure that signer is the SAME address as the original contract deployer,
  // or else this script will fail with an error.
  const signer = new hre.ethers.Wallet(process.env.PRIVATE_KEY, provider);

  // Instantiate connected contract.
  const buyMeACoffee = new hre.ethers.Contract(contractAddress, contractABI, signer);

  // Check starting balances.
  console.log("current balance of owner: ", await getBalance(provider, signer.address), "ETH");
  const contractBalance = await getBalance(provider, buyMeACoffee.address);
  console.log("current balance of contract: ", await getBalance(provider, buyMeACoffee.address), "ETH");

  // Withdraw funds if there are funds to withdraw.
  if (contractBalance !== "0.0") {
    console.log("withdrawing funds..")
    const withdrawTxn = await buyMeACoffee.withdrawTips();
    await withdrawTxn.wait();
  } else {
    console.log("no funds to withdraw!");
  }

  // Check ending balance.
  console.log("current balance of owner: ", await getBalance(provider, signer.address), "ETH");
}

// We recommend this pattern to be able to use async/await everywhere
// and properly handle errors.
main()
  .then(() => process.exit(0))
  .catch((error) => {
    console.error(error);
    process.exit(1);
  });
你的项目结构应该是这样的:
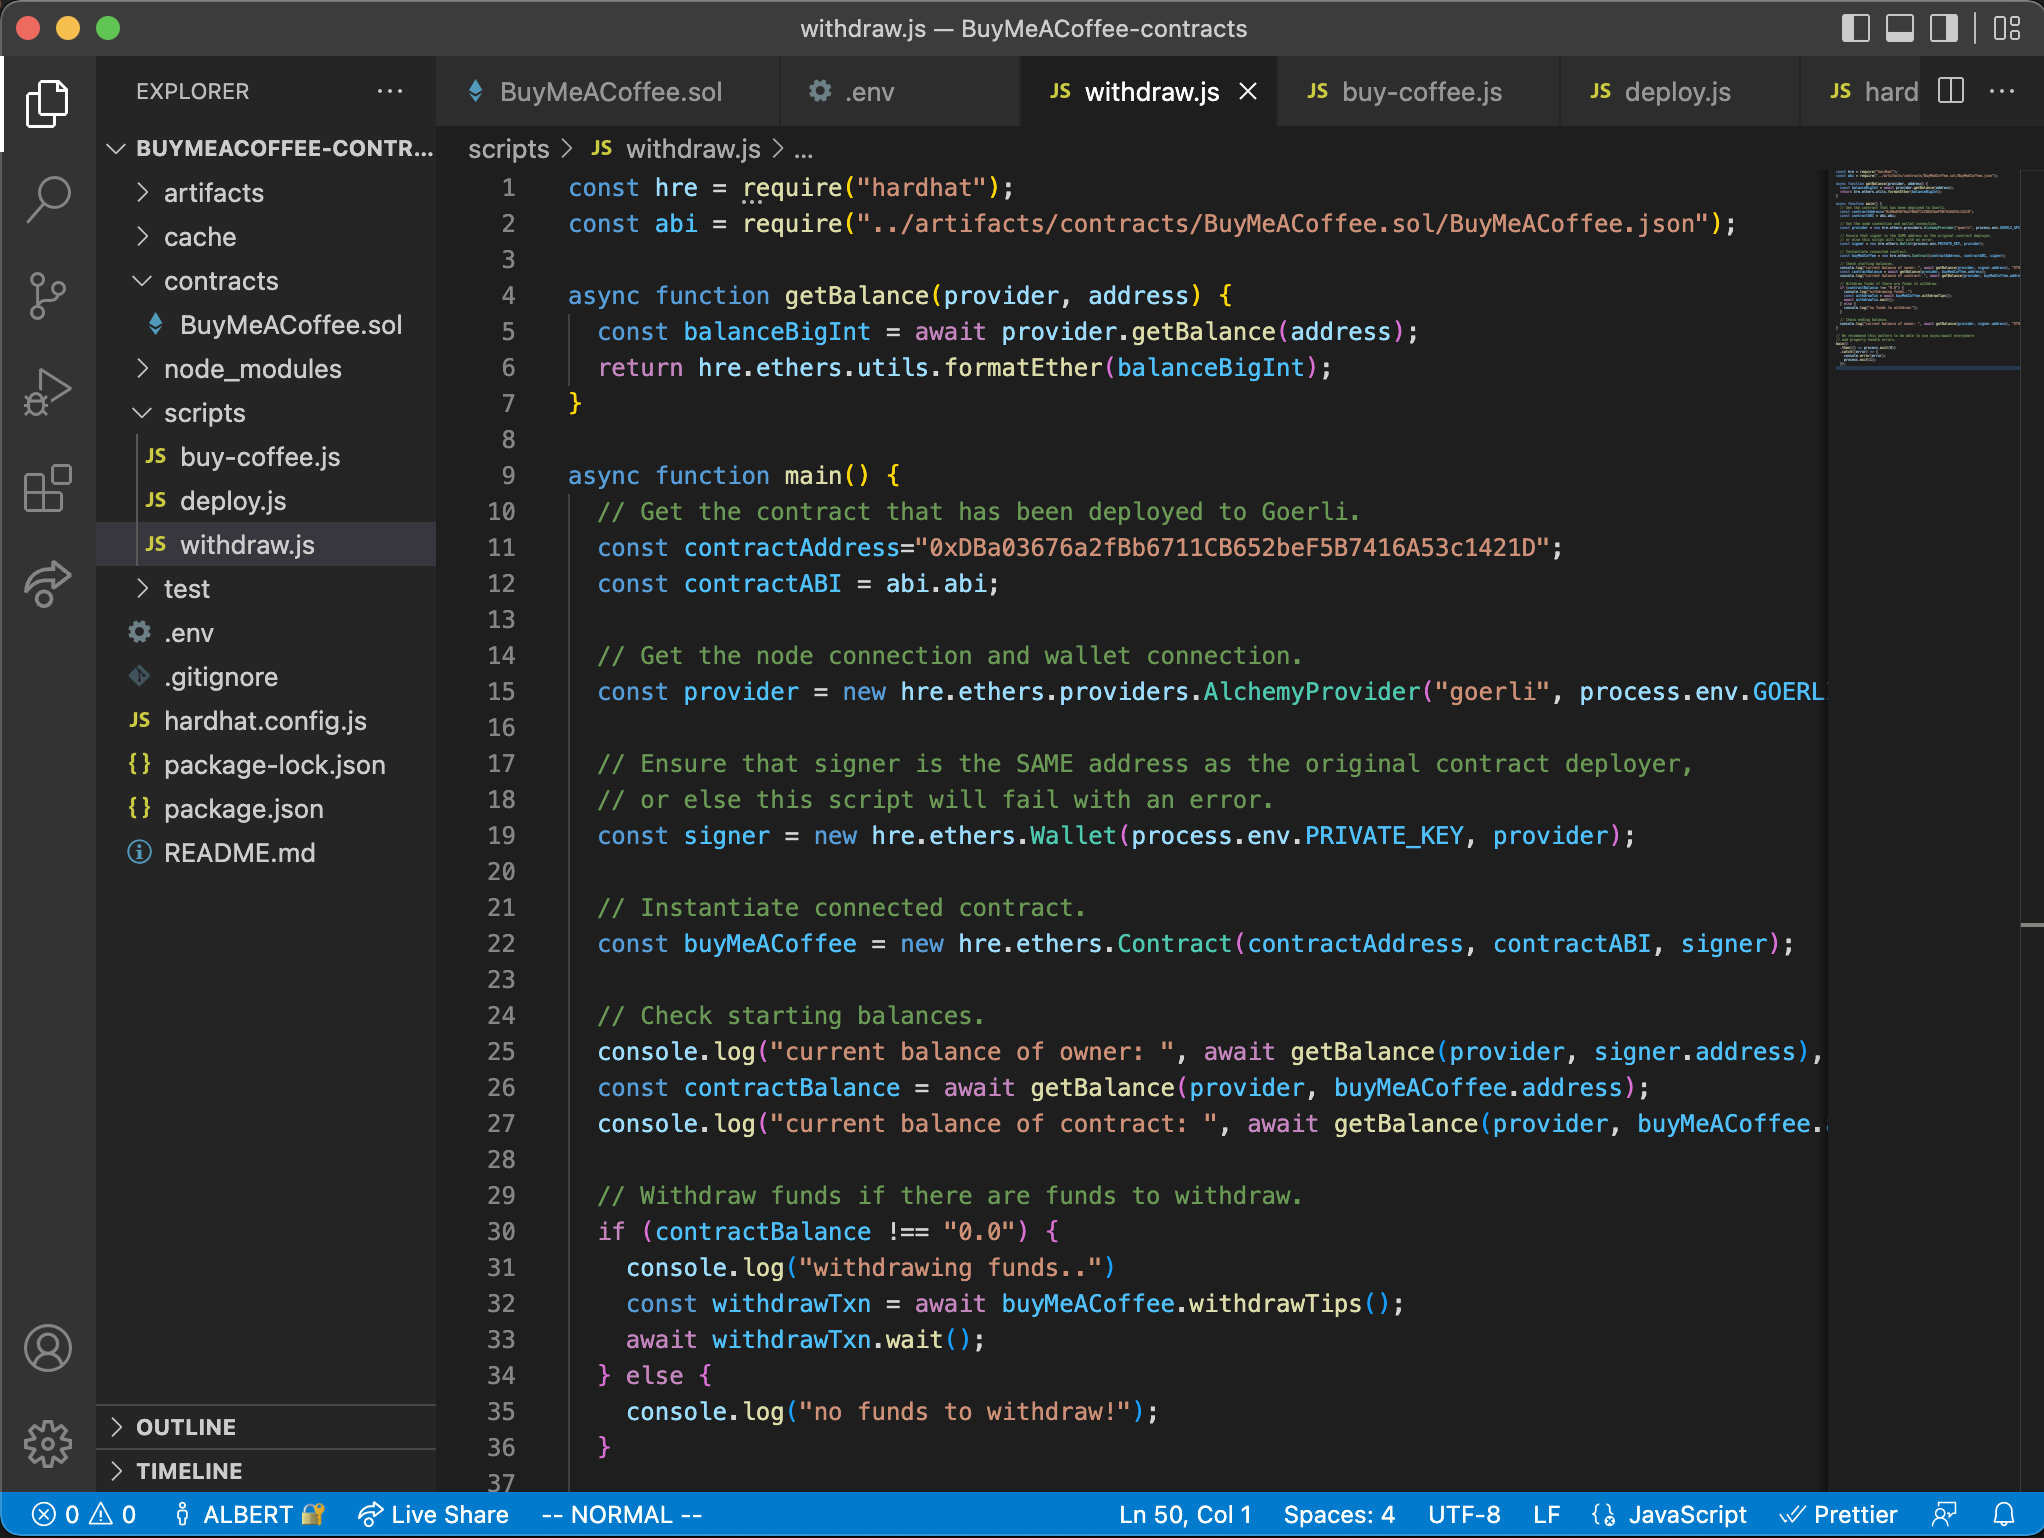
这个脚本最重要的部分是我们调用 withdrawTips() 函数,从合约余额中提出代币 (ETH),并把它送到所有者的钱包里:
// Withdraw funds if there are funds to withdraw.
  if (contractBalance !== "0.0") {
    console.log("withdrawing funds..")
    const withdrawTxn = await buyMeACoffee.withdrawTips();
    await withdrawTxn.wait();
  }
如果合约中没有资金,我们就避免尝试提款,以免不必要地花费 Gas 费用。
当你运行该脚本时,你会看到这样的输出:
thatguyintech@albert BuyMeACoffee-contracts % npx hardhat run scripts/withdraw.js
current balance of owner:  0.039608085986833815 ETH
current balance of contract:  0.001 ETH
withdrawing funds..
current balance of owner:  0.040562731986622163 ETH
注意,这次我们没有添加 --network goerli 参数,这是因为我们的脚本直接在逻辑中写了网络配置:
const provider = new hre.ethers.providers.AlchemyProvider(
    "goerli",
    process.env.GOERLI_API_KEY
);
很好,现在我们有了一个提取合约小费的方法!
让我们进入这个项目的前端部分,这样我们就可以和所有的朋友分享我们的小费页面了 :)
用 Replit 和 Ethers.js 构建前端的 Buy Me A Coffee 网站去中心化应用
对于这个网站部分,为了保持简单和干净,我们将使用一个很棒的工具来快速启动演示项目,称为 Replit IDE。
请访问我的示例项目,并 fork 它以创建你自己的副本进行修改:https://replit.com/@thatguyintech/BuyMeACoffee-Solidity-DeFi-Tipping-app
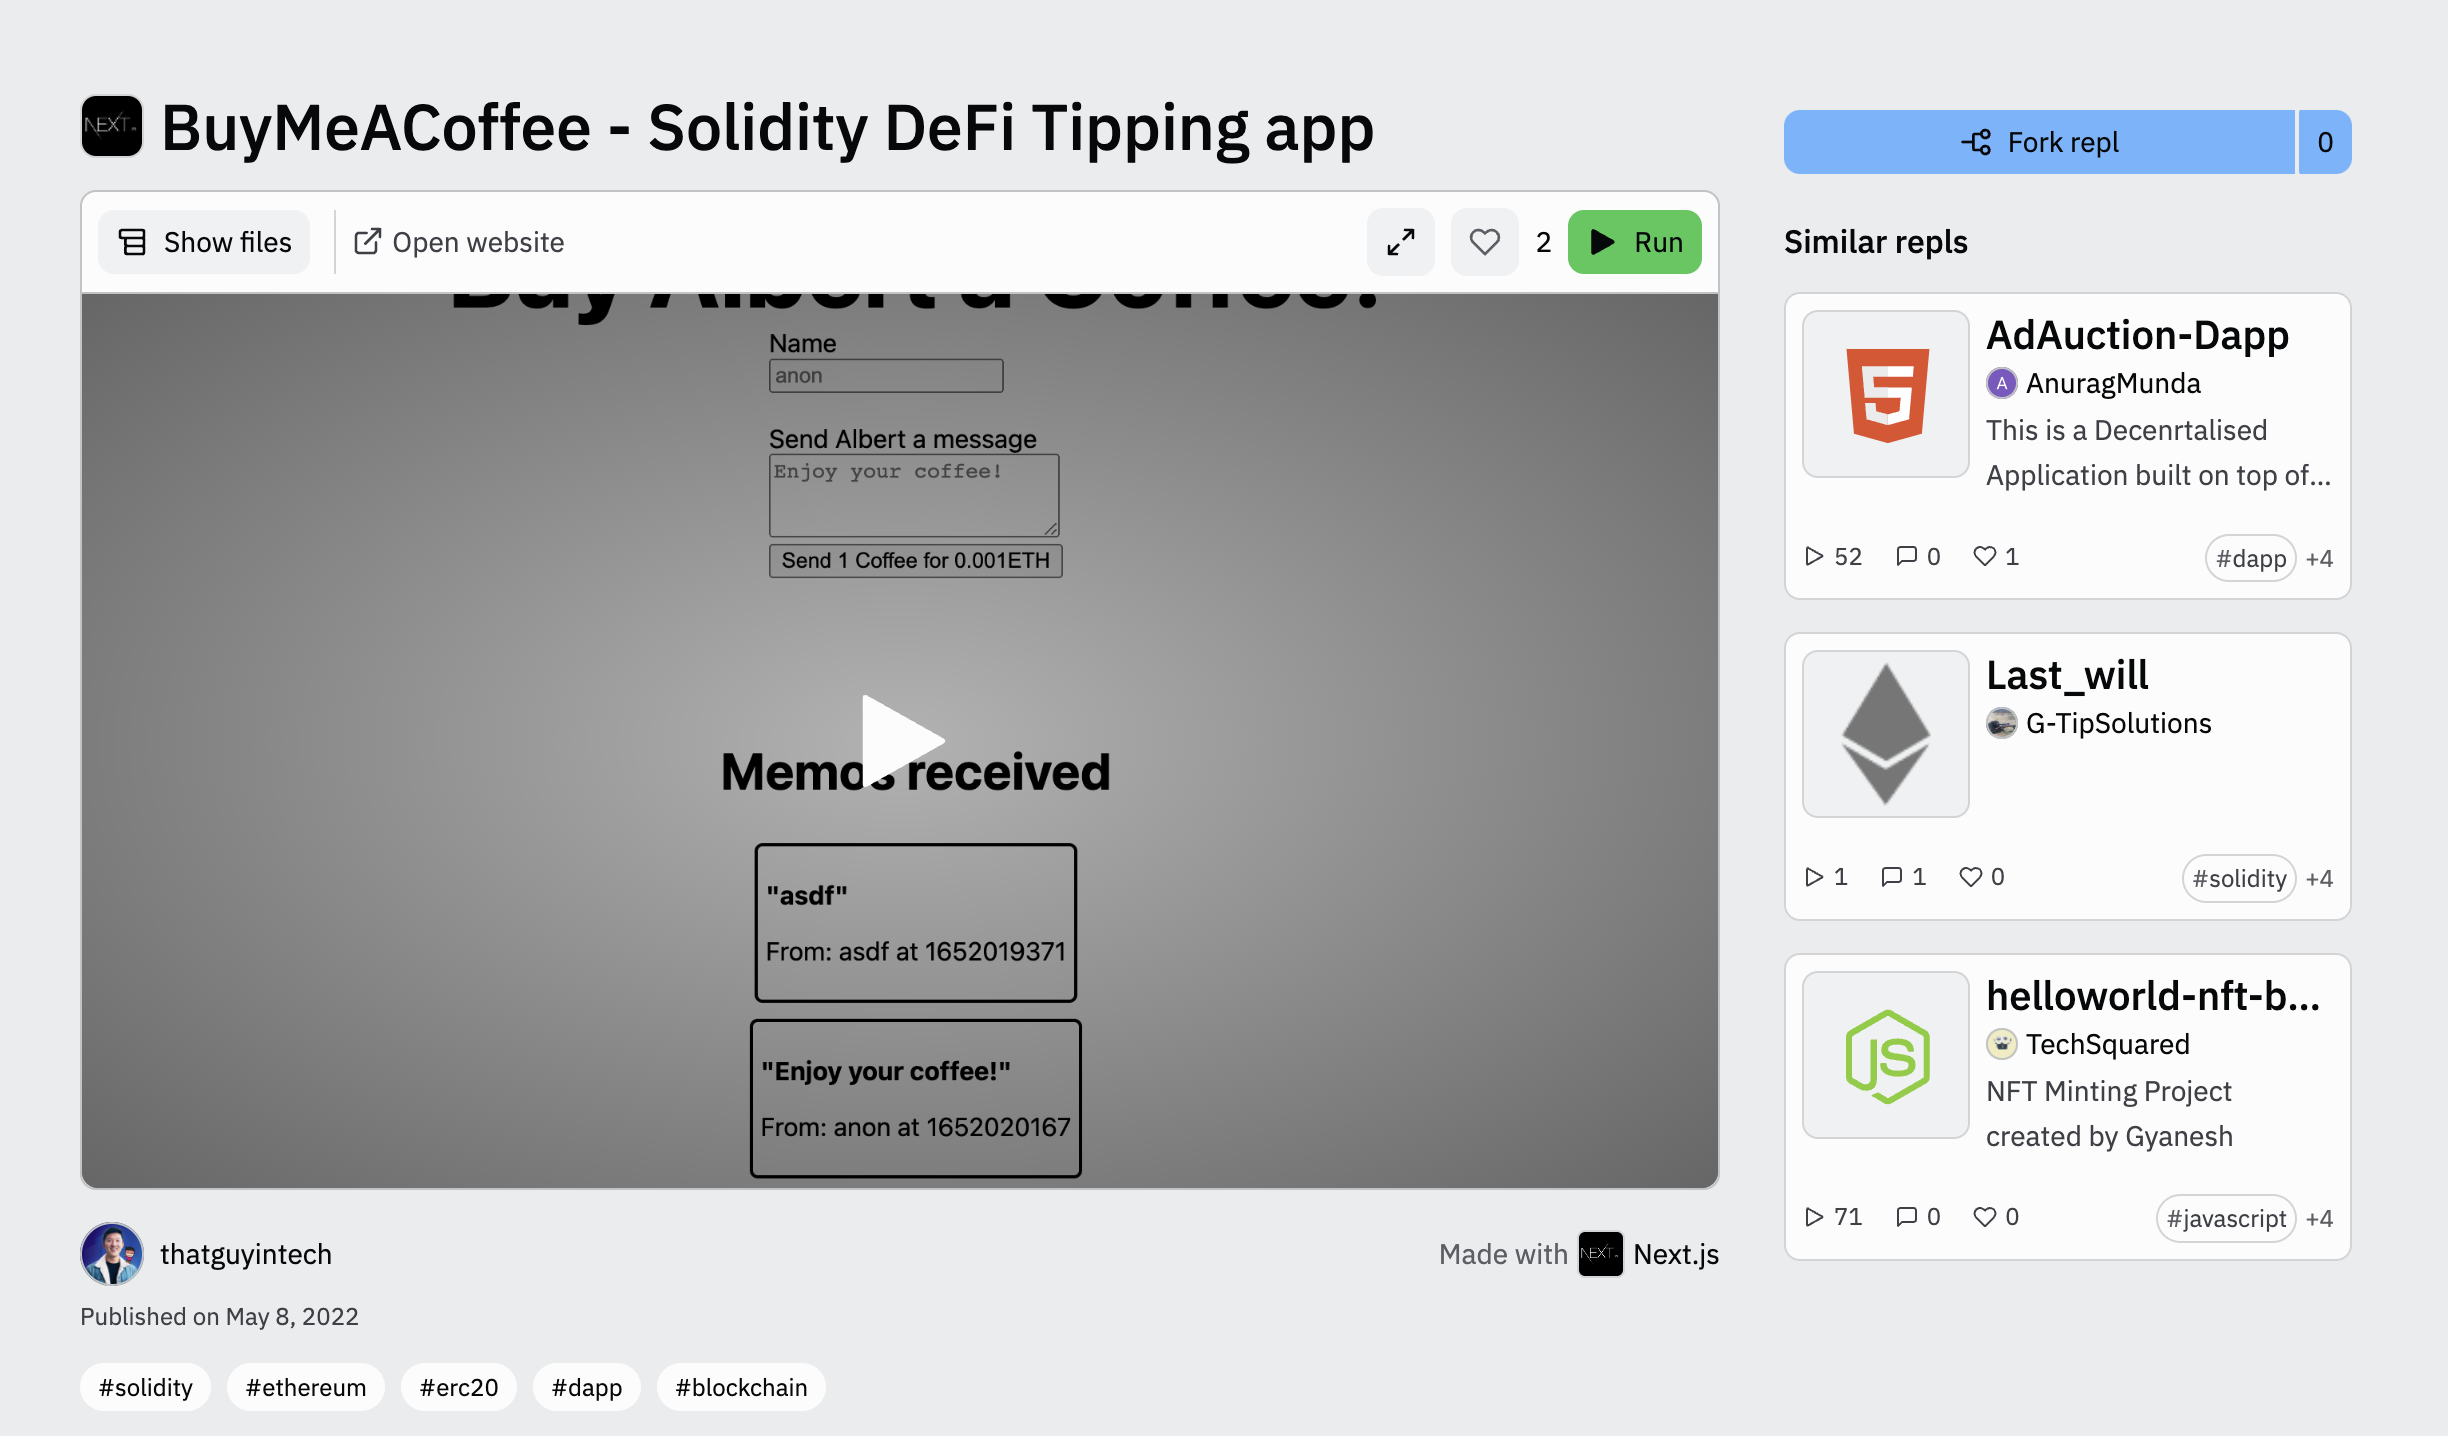
你也可以在这里查看完整的网站代码:https://github.com/alchemyplatform/RTW3-Week2-BuyMeACoffee-Website
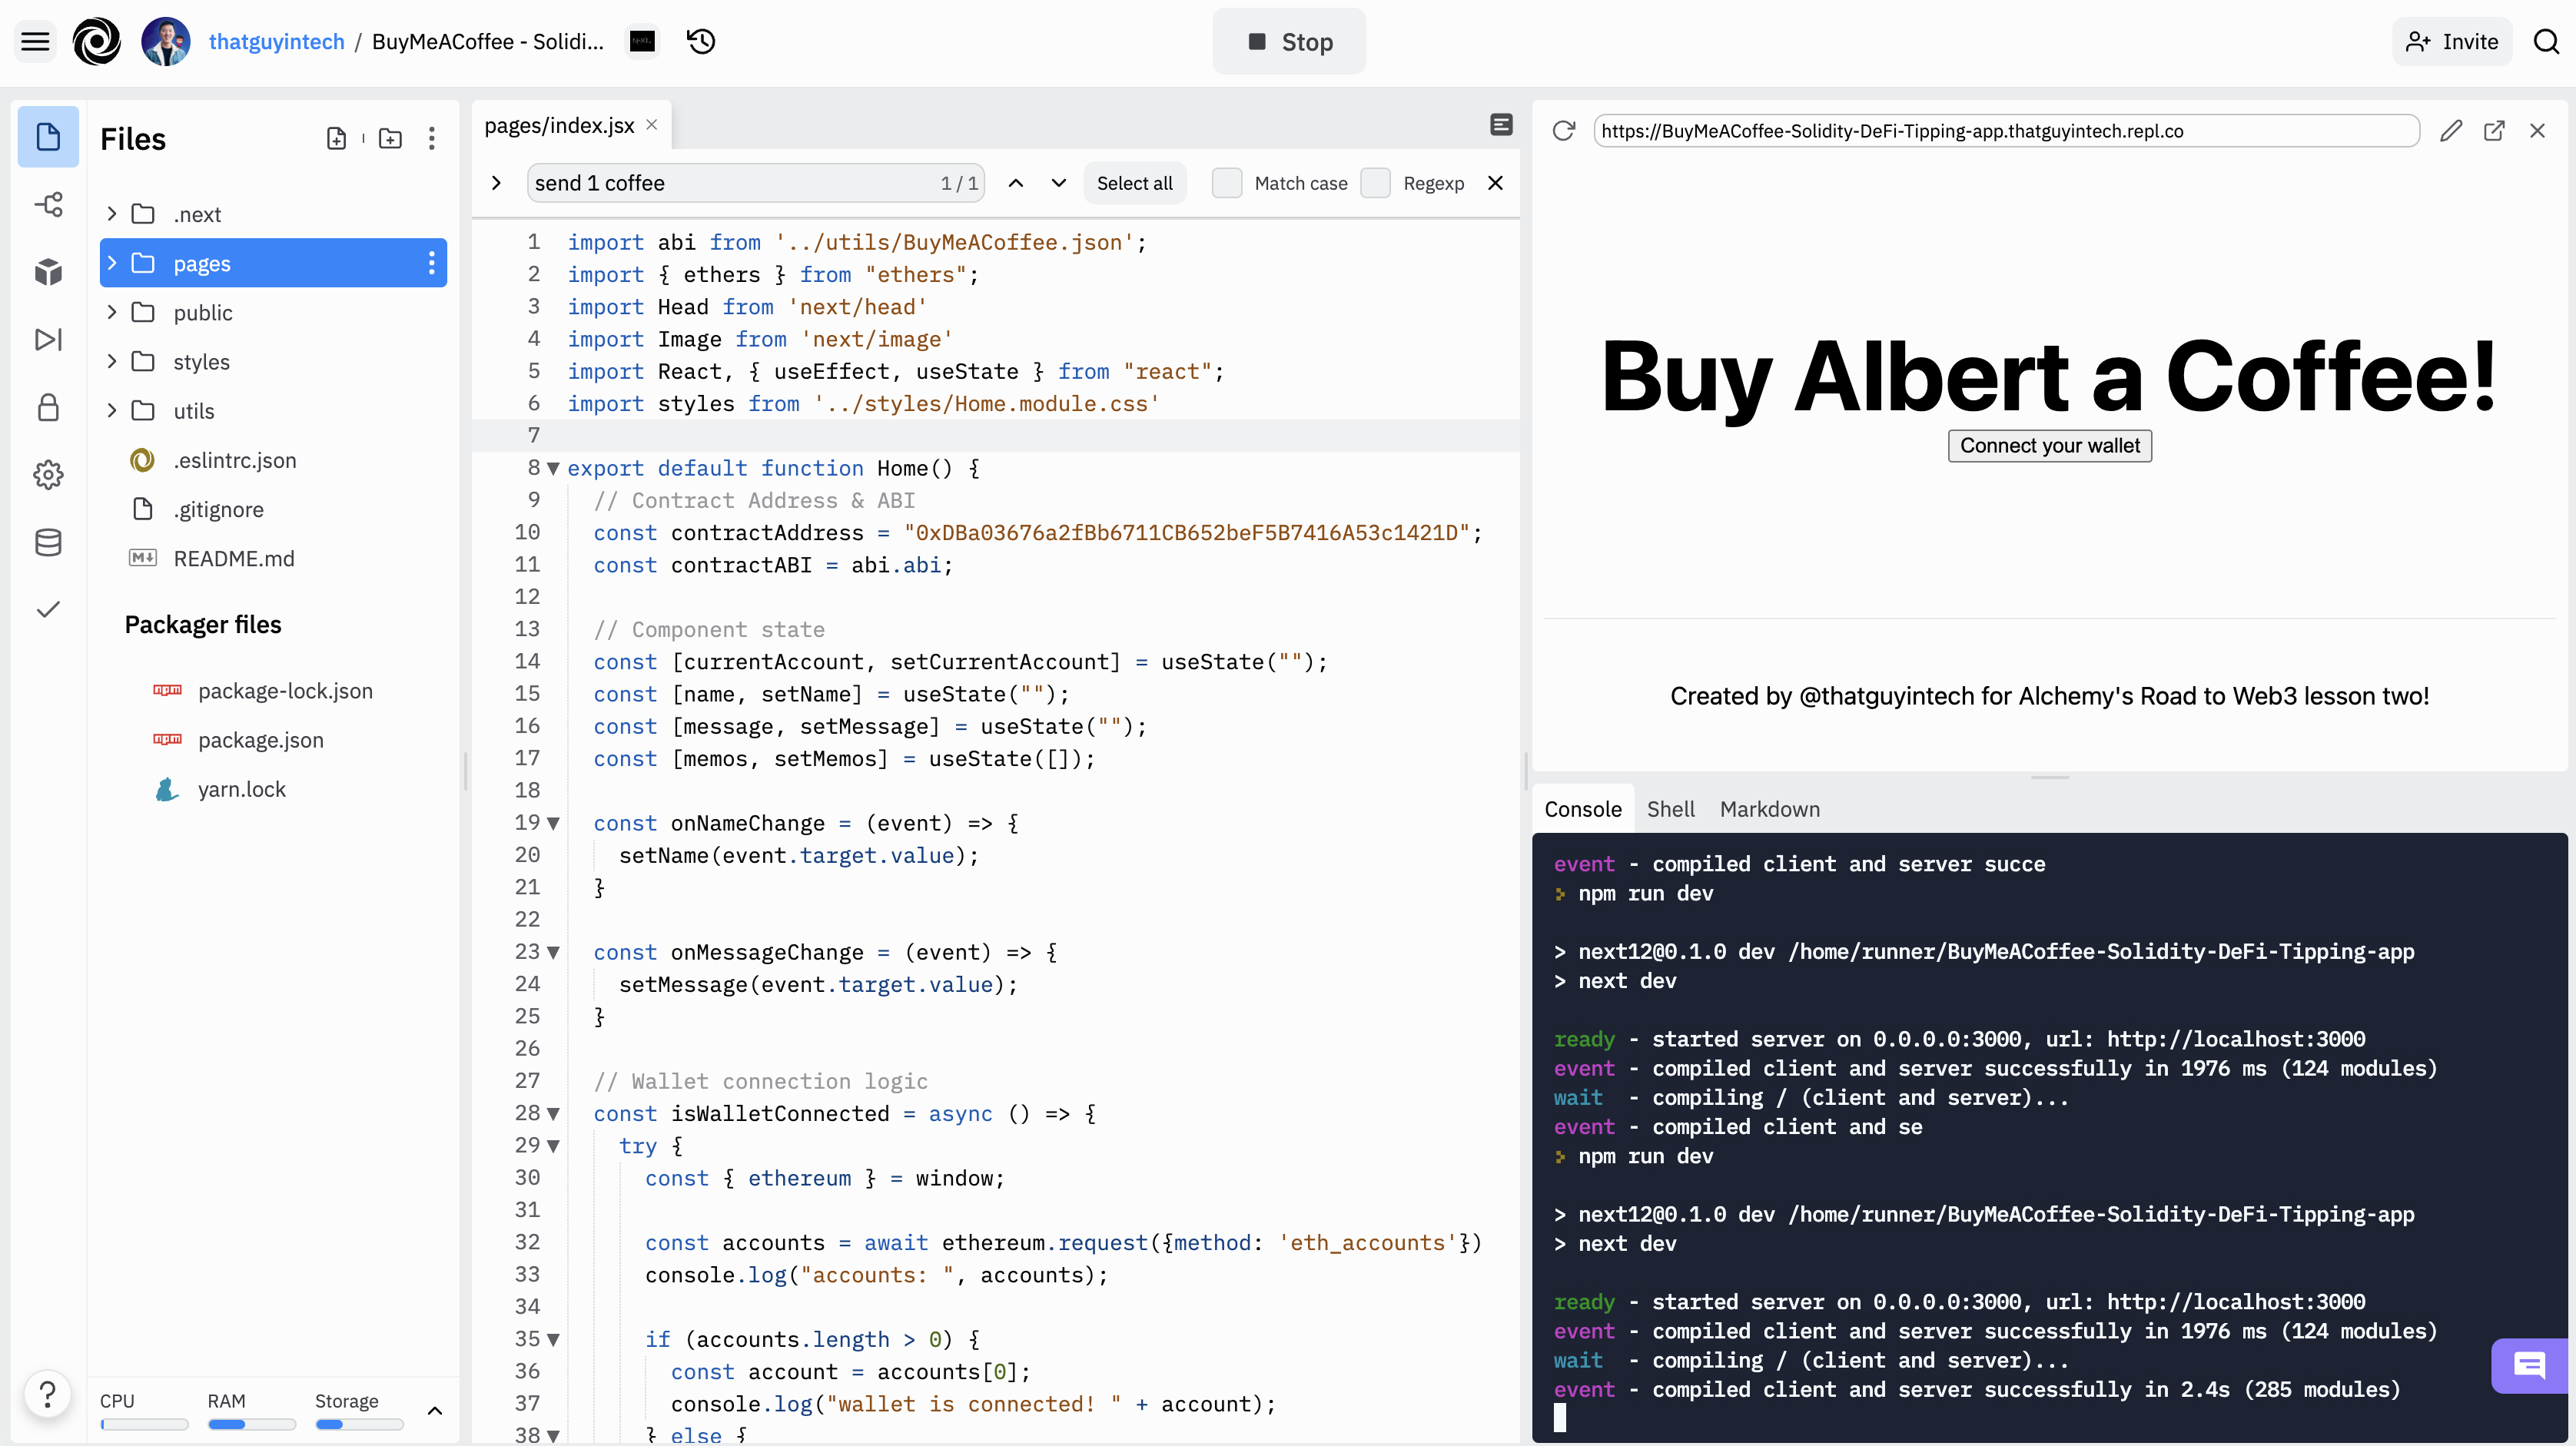
通过 Fork 复制后,你应该被带到一个 IDE 页面,在那里你可以:
- 查看 Next.js 网站应用的代码
- 访问控制台、终端 Shell 和 README.md 文件的预览
- 查看你的应用程序(支持热重载 - 修改代码后无需刷新就能看到最新版本)
它应该看起来像这样:
本教程的这一部分将是快速而有趣的 — 我们将更新几个变量,以便它与我们在项目的前几部分部署的智能合约相连接,并使它在网站上显示你自己的名字!
让我们先把所有的东西都连接起来,让它工作起来,然后我会向你解释每一部分的情况。
下面是我们需要做的改动:
- 更新
pages/index.js中的contractAddress。 - 更新
pages/index.js中的名字 (Albert) 为你自己的名字 - 确保合约 ABI 的内容与你在本机的
utils/BuyMeACoffee.json文件相同。
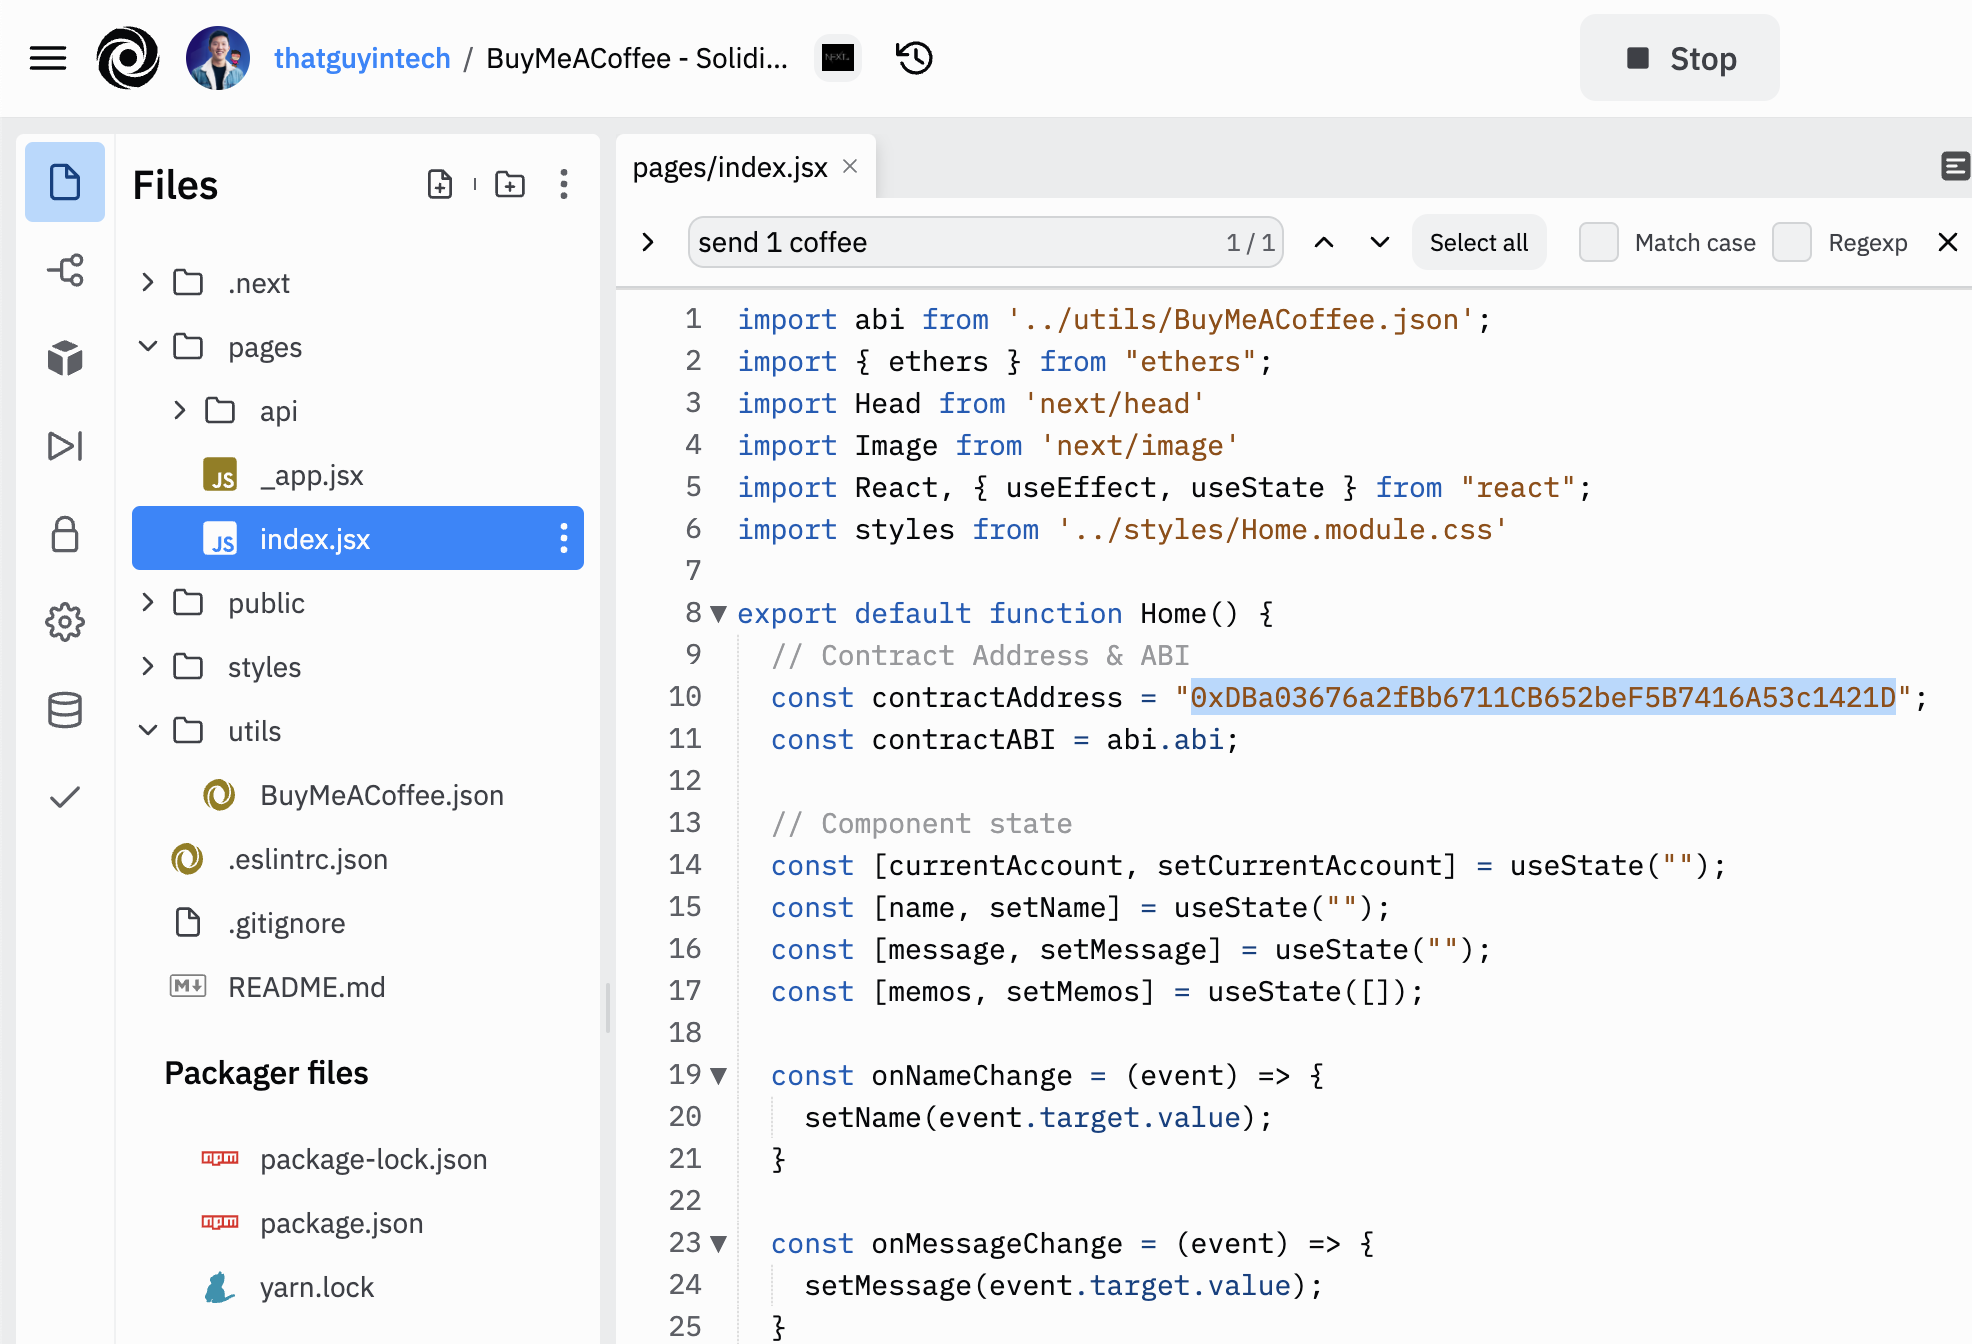
更新 pages/index.js 中的 contractAddress
你可以看到,contractAddress 变量已经有一个地址。这是我部署的一个合约实例,欢迎你使用,但如果你这样做...... 所有发送到你网站的小费都会转到我的地址 :)
你可以通过粘贴我们之前部署的 BuyMeACoffee.sol 智能合约时的地址来解决这个问题。
在 pages/index.js 中更新名字为自己的名字
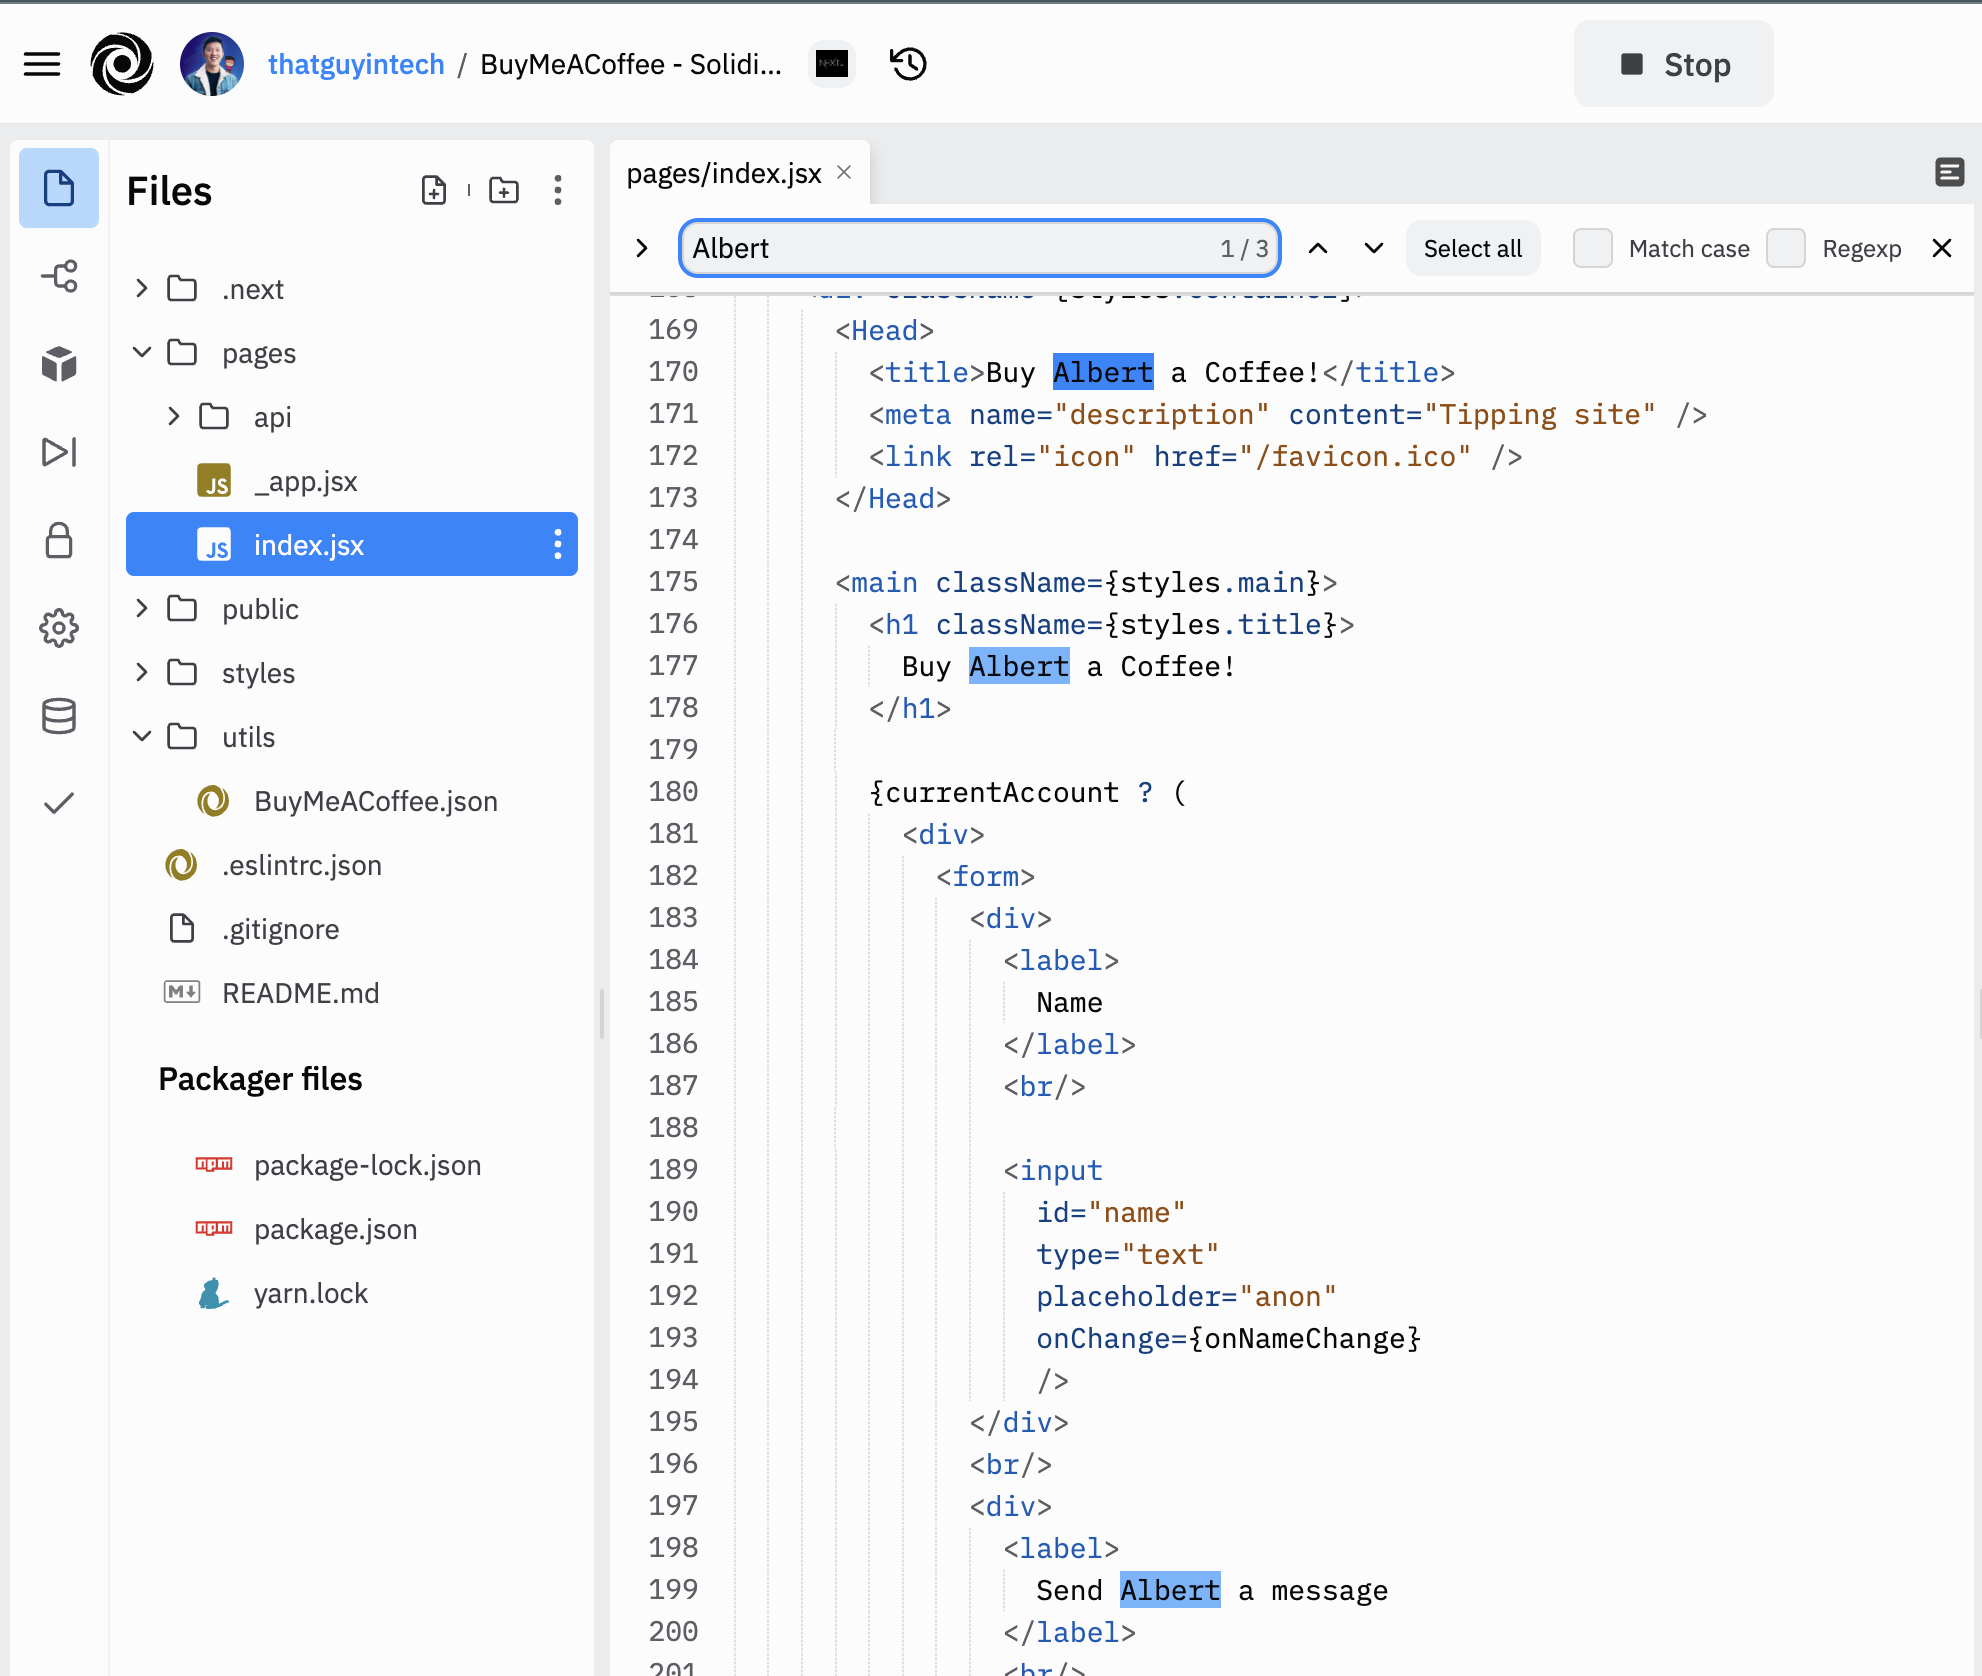
现在,网站上到处都是我的名字。找到所有使用 “Albert” 的地方,替换上你的名字/匿名资料/ENS 域名,或任何你想让人们称呼你的名称来替换它。
你可以用 cmd+F (Mac) 或 ctrl+F (Windows) 来寻找所有 Albert 并且替换掉。
确保合同 ABI 与本机的 utils/BuyMeACoffee.json 相同
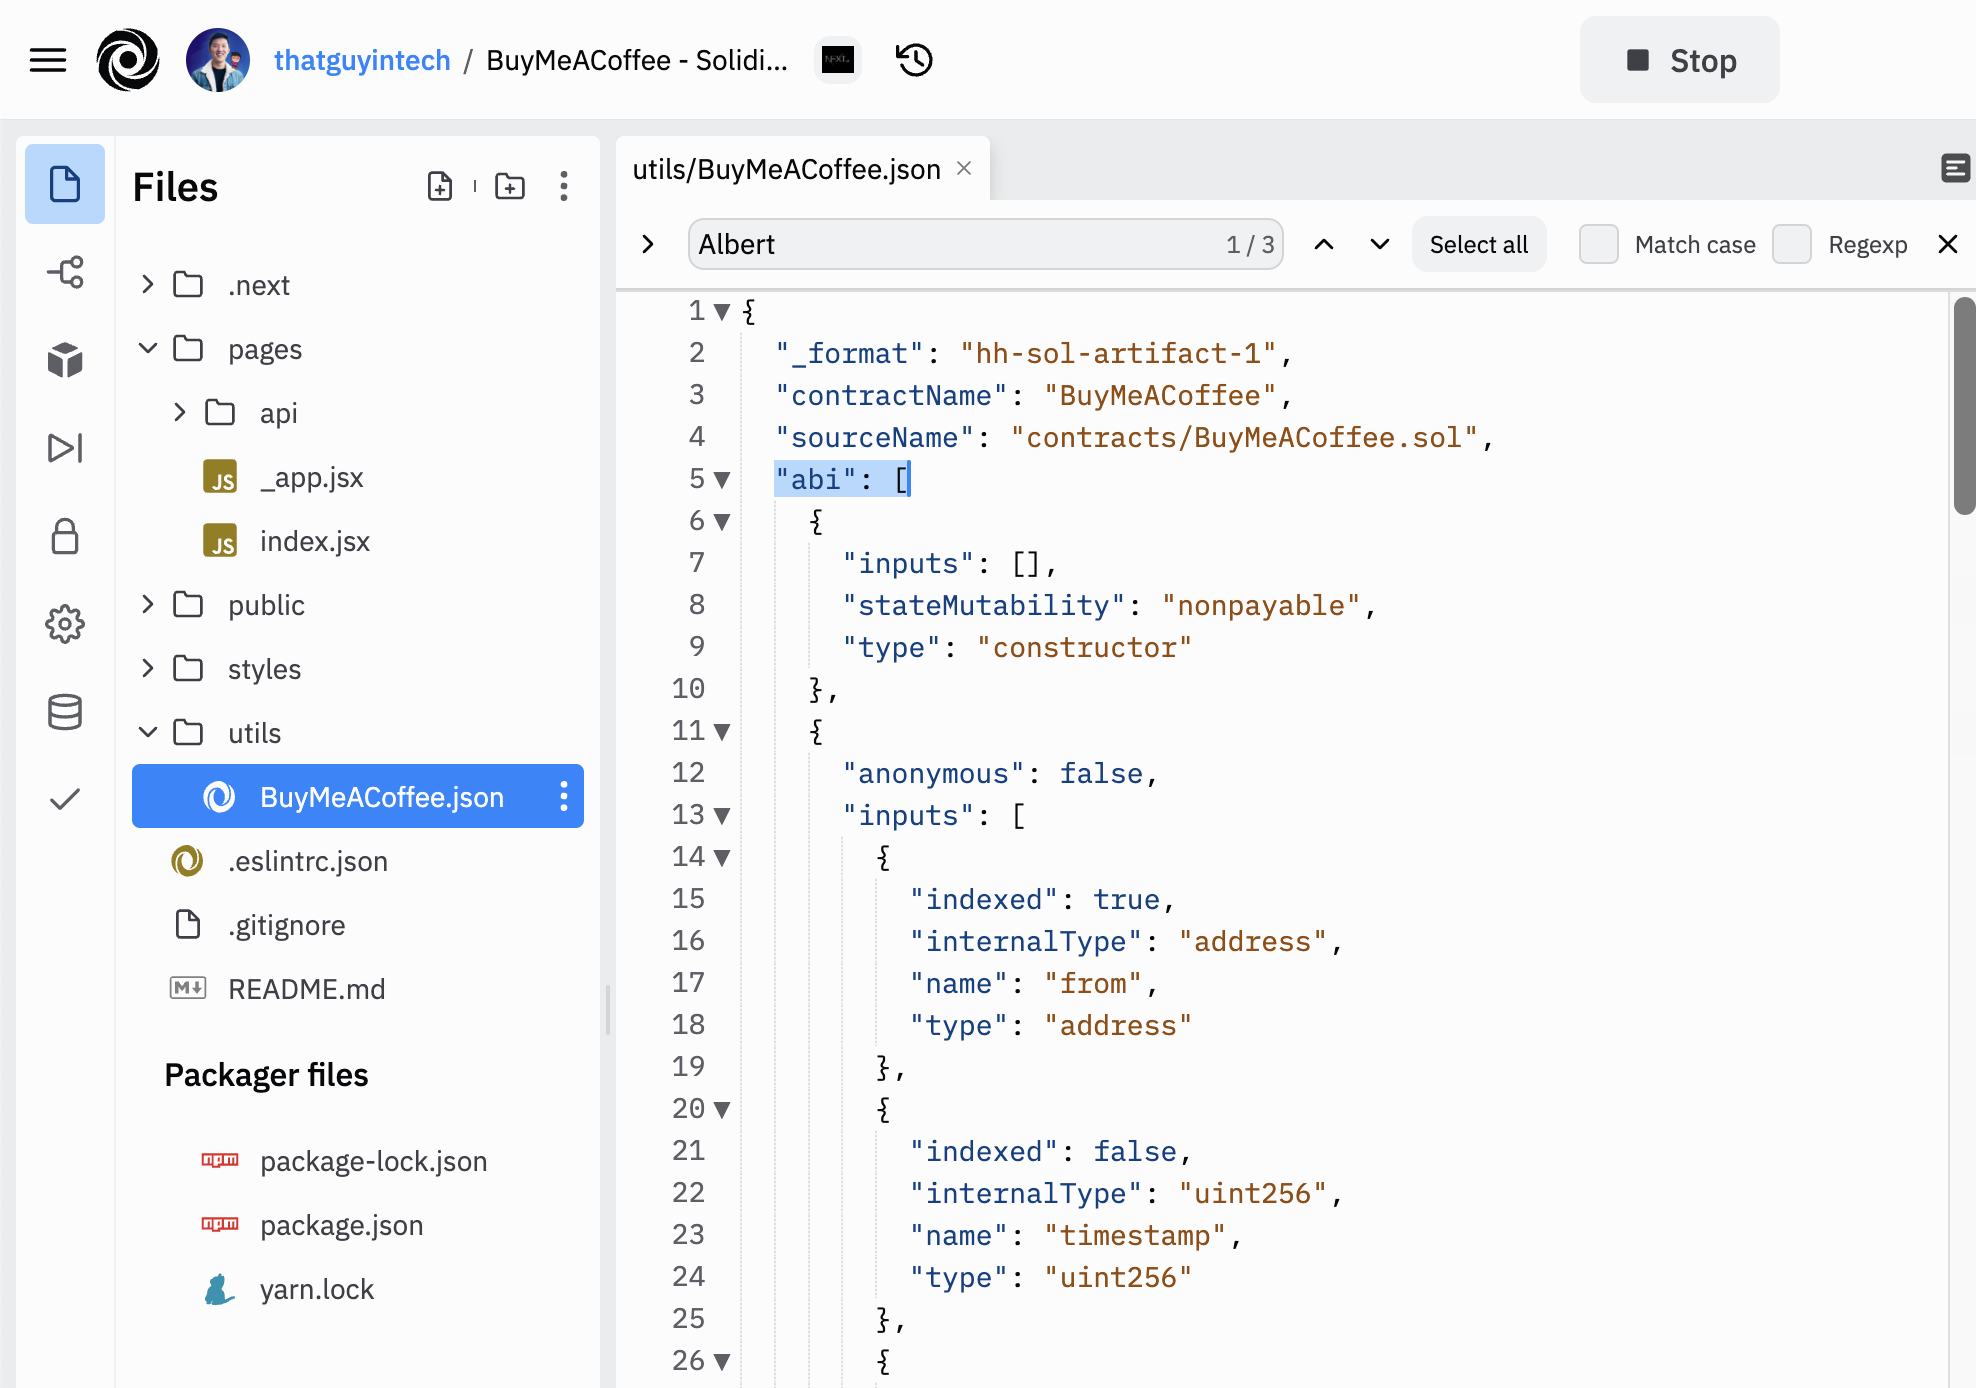
这也是一个需要检查的关键事项,特别是当你以后对你的智能合约进行修改时(在本教程的最后部分)。
ABI 是应用程序的二进制接口,它只是告诉我们的前端代码在智能合约上可以调用哪些功能的一种方式。ABI 是在智能合约编译时在一个 json 文件中生成的。你可以在智能合约文件夹中找到它,路径是 artifacts/contracts/BuyMeACoffee.sol/BuyMeACoffee.json。
每当你改变你的智能合约代码并重新部署时,你的 ABI 也会改变。把它复制过来并粘贴到 Replit 文件中: utils/BuyMeACoffee.json。
现在,如果应用程序还没有运行,你可以到命令行中使用 npm run dev 来启动一个测试服务器来测试你的改动。网站应该在几秒钟内就会加载。
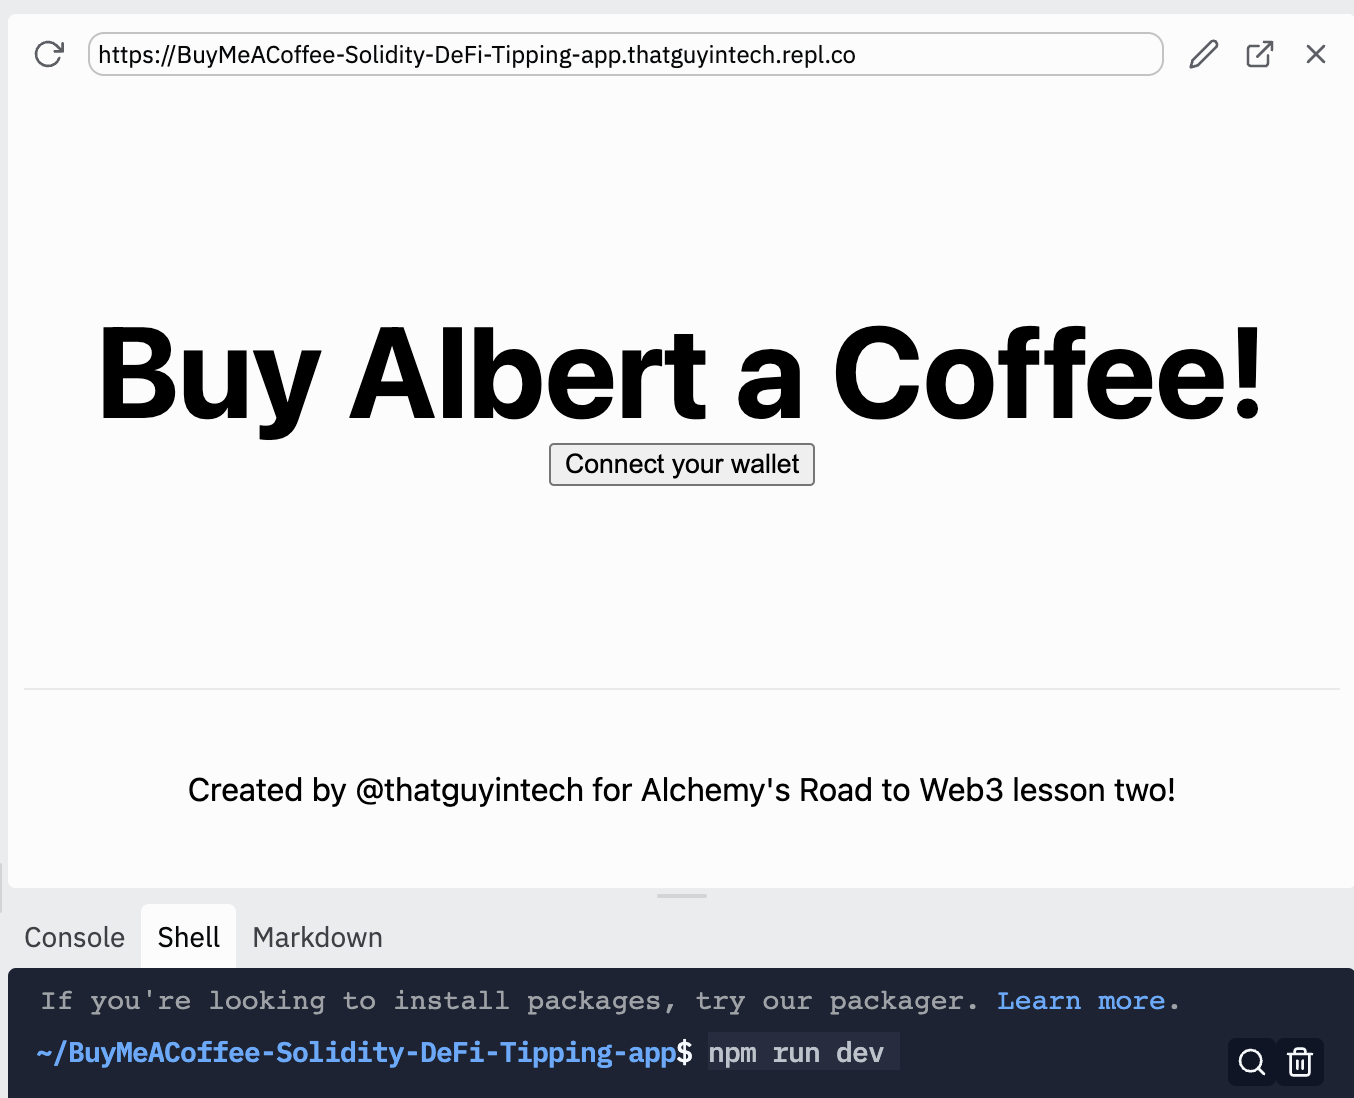
Replit 的厉害之处在于,一旦你建立了网站,你可以回到你的个人资料,找到 Replit 项目的链接,并将其发送给朋友,让他们访问你的小费页面。
现在让我们来参观一下网站和代码。你已经可以从上面的截图中看到,当你第一次访问网站时,它会检查你是否安装了 MetaMask,以及你的钱包是否连接到该网站。在你第一次访问时,你是还没连上钱包的,所以会出现一个按钮,要求你连接你的钱包。
在你点击 “Connect your wallet” 按钮后,会弹出一个 MetaMask 窗口,询问你是否要确认连接。连接钱包并不需要任何 Gas 费用或成本。
一经确定,你的钱包将与网站连接上,你将能够看到咖啡的提交表单,以及其他访客在较早的时候留下的信息。
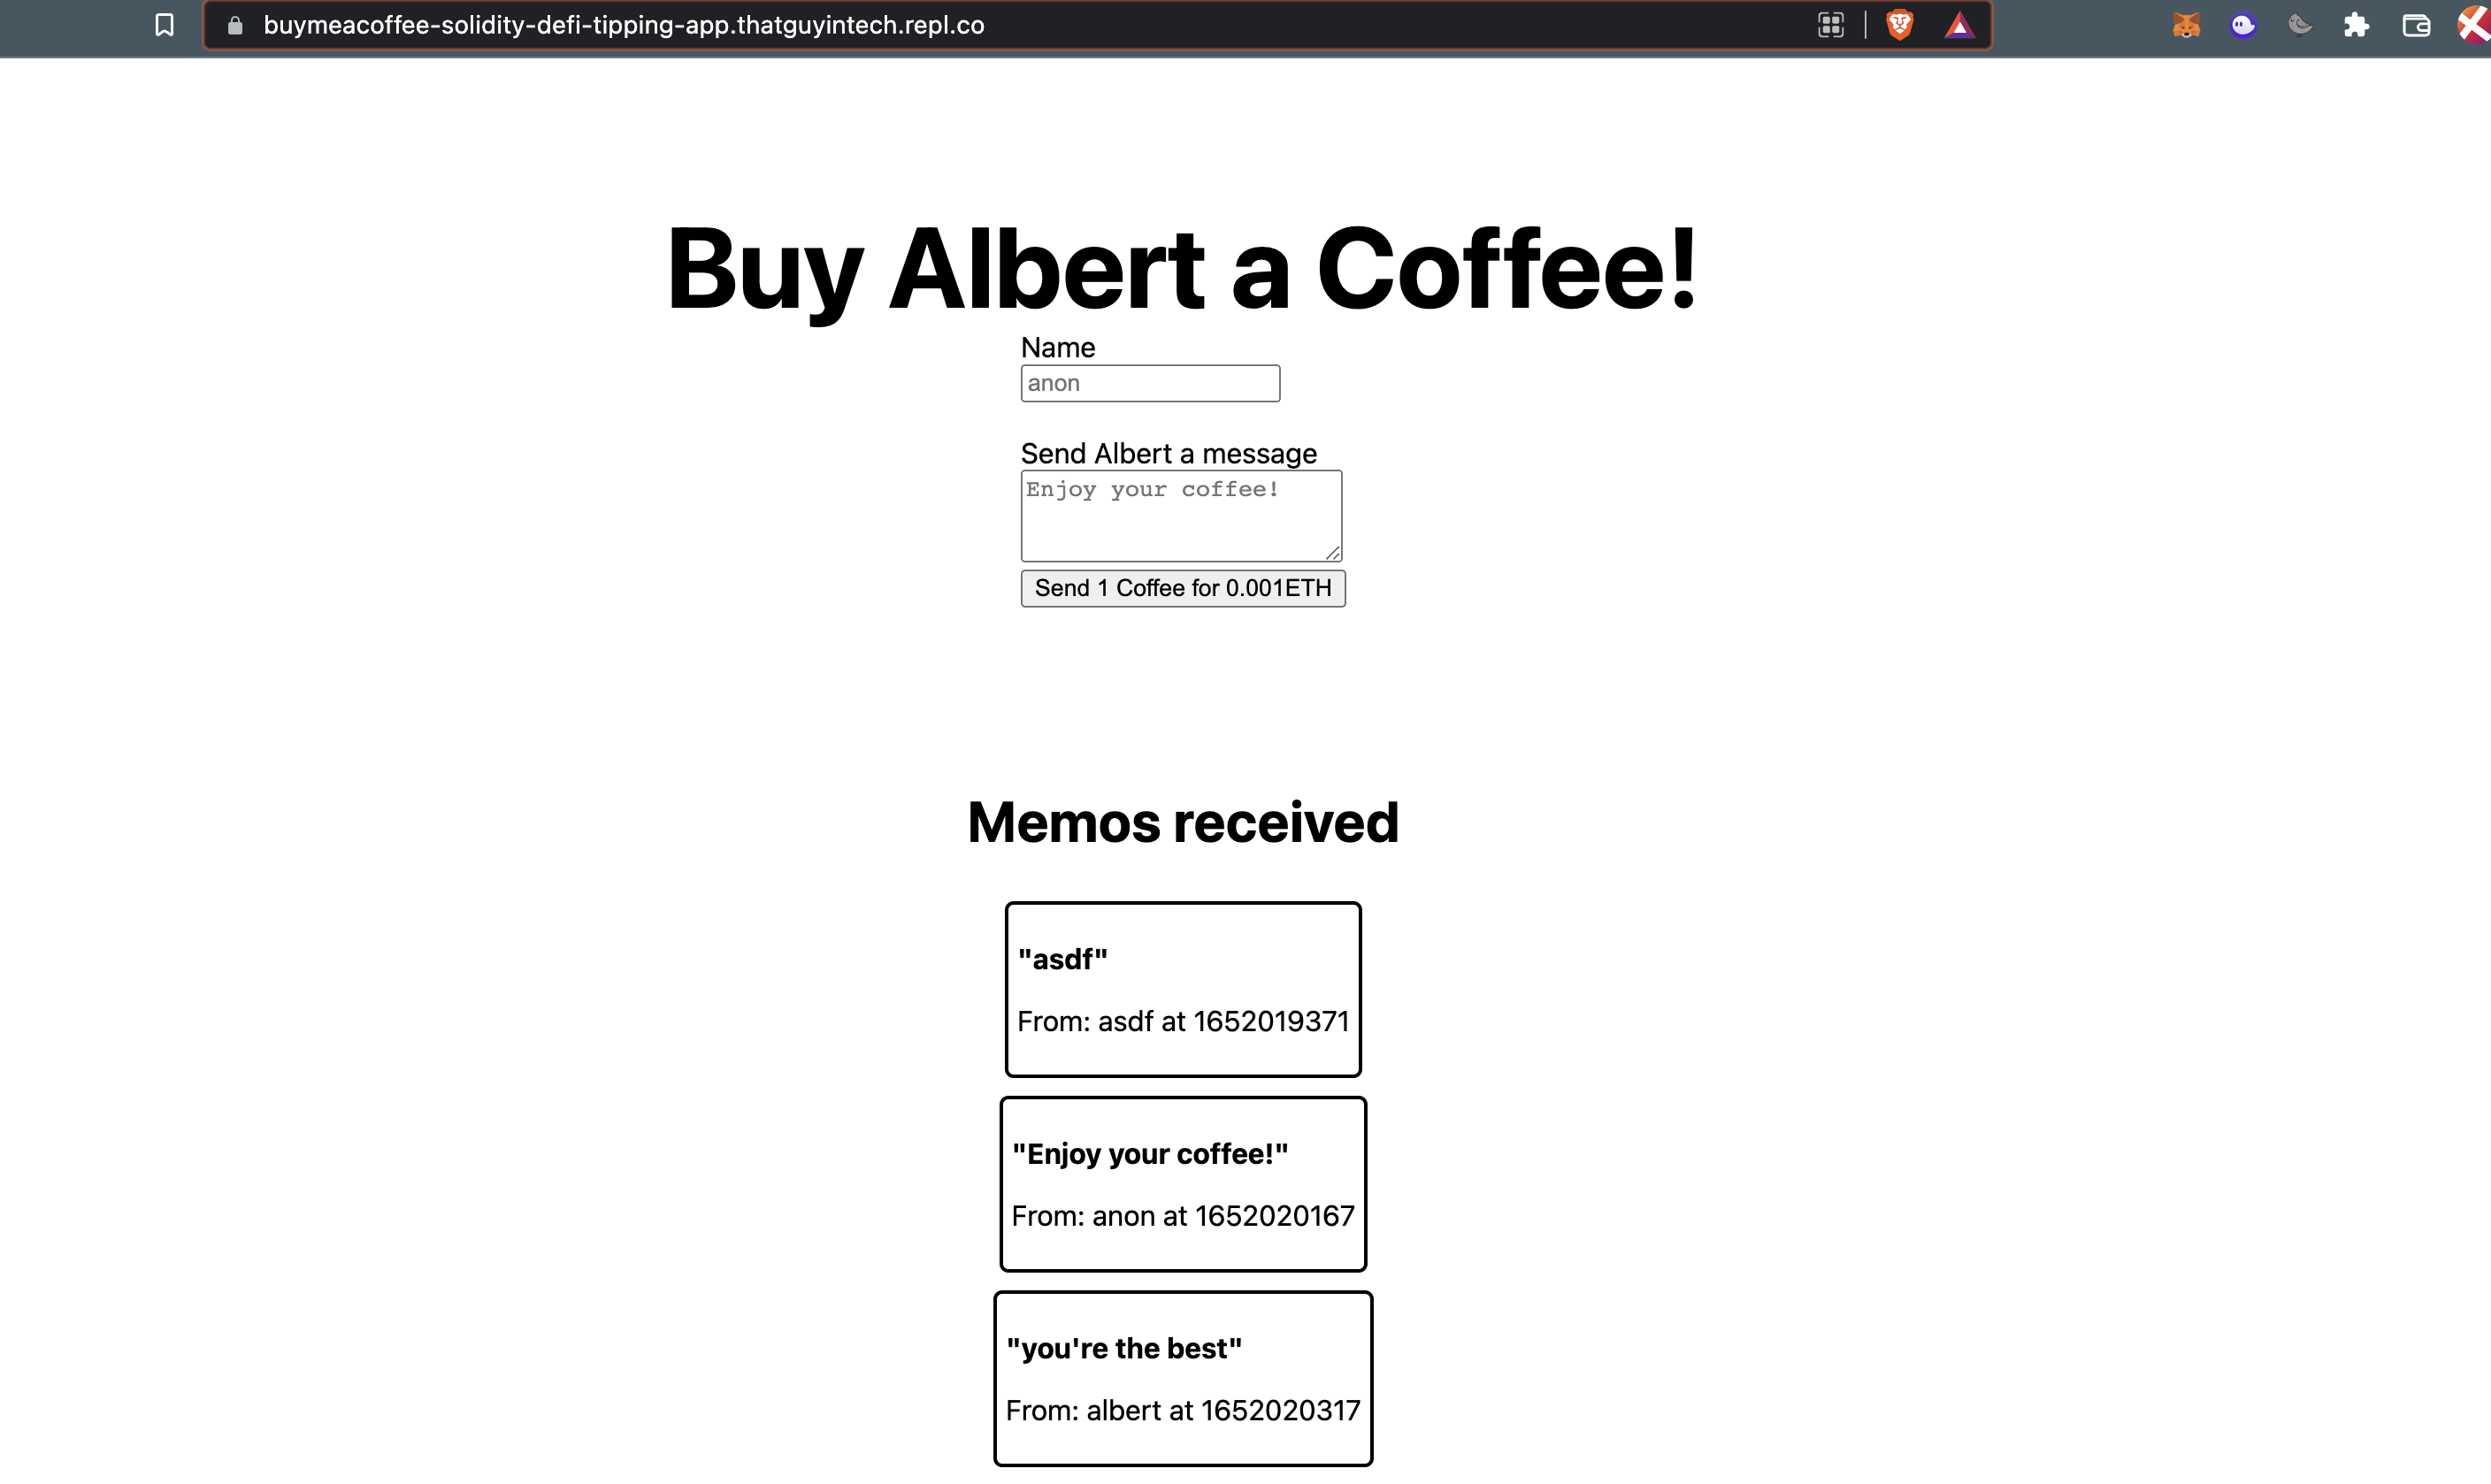
哇哦!这就是了!这就是整个项目了!
花点时间拍拍自己的背,反思一下你所走过的旅程!
来回顾一下:
- 我们使用 Hardhat 和 Ethers.js 来写代码、测试和部署一个自定义的 solidity 智能合约。
- 我们使用 Alchemy 和 MetaMask 将智能合约部署到 Goerli 的测试网。
- 我们实现了一个提款脚本,使我们能够接收我们的劳动成果。
- 我们通过使用 Ethers.js 加载合约 ABI,将一个用 Next.js、React 和 Replit 构建的前端网站连接到智能合约。
这里包括了很多东西!
挑战
好了,现在到了最精彩的部分了。我将给你留下一些挑战,让你自己去尝试,看看你是否完全理解了你在这里学到的东西。如需一些指导,请观看 YouTube 视频。
- 允许你的智能合约更新提款地址。
- 在你的智能合约新增一个函数
buyLargeCoffee以接受 “大杯咖啡”,价值为 0.003ETH ,并在前端网站上创建一个按钮 “以 0.003ETH 购买大杯咖啡”。
一旦你完成了你的挑战,请在 Twitter 上标记 @AlchemyPlatform 并使用标签#roadtoweb3 来宣传它!
我们一直在寻求意见改进这个学习之旅,请与我们分享您的意见 https://alchemyapi.typeform.com/roadtofeedback
Updated over 2 years ago
