How To Use JWTs For API Requests
Learn how to use JWTs ( JSON Web Tokens ) for making secure API requests with Alchemy.
Introduction
Welcome to this comprehensive guide on how to use JSON Web Tokens (JWTs) for API requests. JWTs can be used as a secure and flexible method for authorizing API requests, and they offer a range of features that make them ideal for this purpose. In this guide we will walk you through what JWTs are, why you should use them, and how to generate and use JWTs for making API requests.
What are JWTs
JWTs, or JSON Web Tokens, are a means of representing claims to be transferred between two parties. In simpler terms, they are a way for encoding information in a JSON format and upholding its integrity and authenticity through a digital signature.
JWTs consist of three parts: a header, a payload, and a signature ( header.payload.signature ). The header and payload are Base64Url encoded JSON strings, and they're separated by a period (.). The signature is generated by hashing the header and payload using a private key. This signature is verified with the associated public key.
Here's why JWTs are a great choice for making API requests:
-
Security: The signature in the JWT ensures that the token hasn't been tampered with during transit. When a server receives a JWT, it can verify the signature to ensure the token integrity and verify its signer.
-
Self-contained: JWTs can contain all the necessary information in themselves. They can carry all the necessary data like the permissions and authorizations granted to the token, the time when the token was created, the expiry date and time and other details.
-
Compact: Due to their compact size, JWTs can be sent through an HTTP header. Furthermore, the small size means less processing load on the server.
-
Flexibility: JWTs can be configured with expiration times, allowing for short lived tokens that get rotated regularly. This reduces the time valid tokens are exposed for before they get invalidated.
To learn more about JWTs and how they work, you can visit jwt.io.
How do JWTs Work with Alchemy?
If you've previously used Alchemy, you are probably in the habit of using API keys. However, with JSON Web Tokens (JWTs) the process changes slightly, providing you with more control and flexibility. In this setup, you generate your own JWTs which act as your API keys.
To do this, you will need to run your own backend server. The server will be responsible for generating and signing JWTs using your private key pair. Don't worry if this sounds complicated, we will guide you step-by-step through the process in the upcoming sections.
One key difference to remember when using JWTs with Alchemy: while API keys can be used either as a path parameter in the URL or in the HTTP request header, JWTs can only be used in the HTTP request header. This is a measure for enhanced security.
In the next sections we'll provide detailed instructions on setting up your server, generating JWTs, and making API requests to Alchemy using JWTs.
Setting up the Project
Before we proceed with generating JWTs, we need to set up a basic Node.js project where we can write and execute our code. Here's how to do it:
-
Install Node.js: If you haven't installed Node.js on your system, you can download and install it from the official Node.js website.
-
Create a new project: Create a new directory for your project and initialize the project by running the following commands in your terminal:
mkdir alchemy-tutorial
cd alchemy-tutorial
npm init -y
These commands will initialize a Node.js project and create a
package.jsonfile with default values. -
Install necessary libraries: To work with JWTs and to make API requests using them, you need the
jsonwebtokenandaxiosJS libraries installed in your project. Install them using the command below:npm install axios jsonwebtoken
You've now set up a simple Node.js project with the necessary dependencies installed. You're ready to start writing your code.
Generating a Public / Private Key Pair
The first step is to generate a public/private key pair. The public key will be uploaded to Alchemy dashboard, and the private key will be used to sign our JWTs.
We will use the Node.js built-in crypto module to generate the key pair. Create a new file called generateKeyPair.js and add the following code:
// Import the built-in crypto module for generating keys
const crypto = require('crypto');

// Import the built-in fs module for writing keys to files
const fs = require('fs');

// Define a function to generate the key pair
function generateKeyPair() {
    // Generate a new key pair using RSA algorithm with a modulus length of 2048 bits ( size of the key )
    // RSA is related to the RS256, RS384, RS512 algorithms. We support the following algorithms: RS256, RS384, RS512, ECDSA256, ECDSA384, ECDSA512.
    const { publicKey, privateKey } = crypto.generateKeyPairSync('rsa', {
        modulusLength: 2048,
    });

    // Write the private key to a file named 'private_key.pem'
    // The export function exports the key in the specified format (in this case, PKCS #1)
    // PKCS#1 is a standard format that represents an RSA private key. It is widely used and compatible with many libraries and services.
    fs.writeFileSync('private_key.pem', privateKey.export({
        type: 'pkcs1',
        format: 'pem'
    }));

    // Write the public key to a file named 'public_key.pem'
    // The export function exports the key in the specified format (in this case, SPKI)
    // We require the public key in 'spki' (Subject Public Key Info) format, as it's a standard format that
    // includes the algorithm identifier along with the key data , which is important for properly reading and using the key.
    fs.writeFileSync('public_key.pem', publicKey.export({
        type: 'spki',
        format: 'pem'
    }));

    // Log that the key pair was generated and saved to files
    console.log('Key pair generated and saved to files "private_key.pem" and "public_key.pem".');
}

// Execute the function to generate the key pair
generateKeyPair();
This script generates an RSA public/private key pair and saves it to the public_key.pem and private_key.pem files respectively. We are using .pem file extension because .pem files are used to store cryptographic keys. Please note that generated public key must be in the spki format as shown above.
To run this script, navigate to the directory containing the script in your terminal and run the command:
node generateKeyPair.js.
Setting up the Public Key in Alchemy Dashboard
The next step is to upload your public key onto the Alchemy dashboard. This is required because when you generate a new JWT (JSON Web Token) using your private key and then use it to make API requests, Alchemy will have the ability to confirm that the token was actually created by you. This confirmation is made by comparing your private key signature (used to generate the token) with the public key you've uploaded.
Follow the steps listed below to set up your public key:
-
Navigate to your Alchemy dashboard and click on the "JWT Public Keys" option in the navigation bar.

-
Next click "Import Public Key" and fill out the information about your public key:
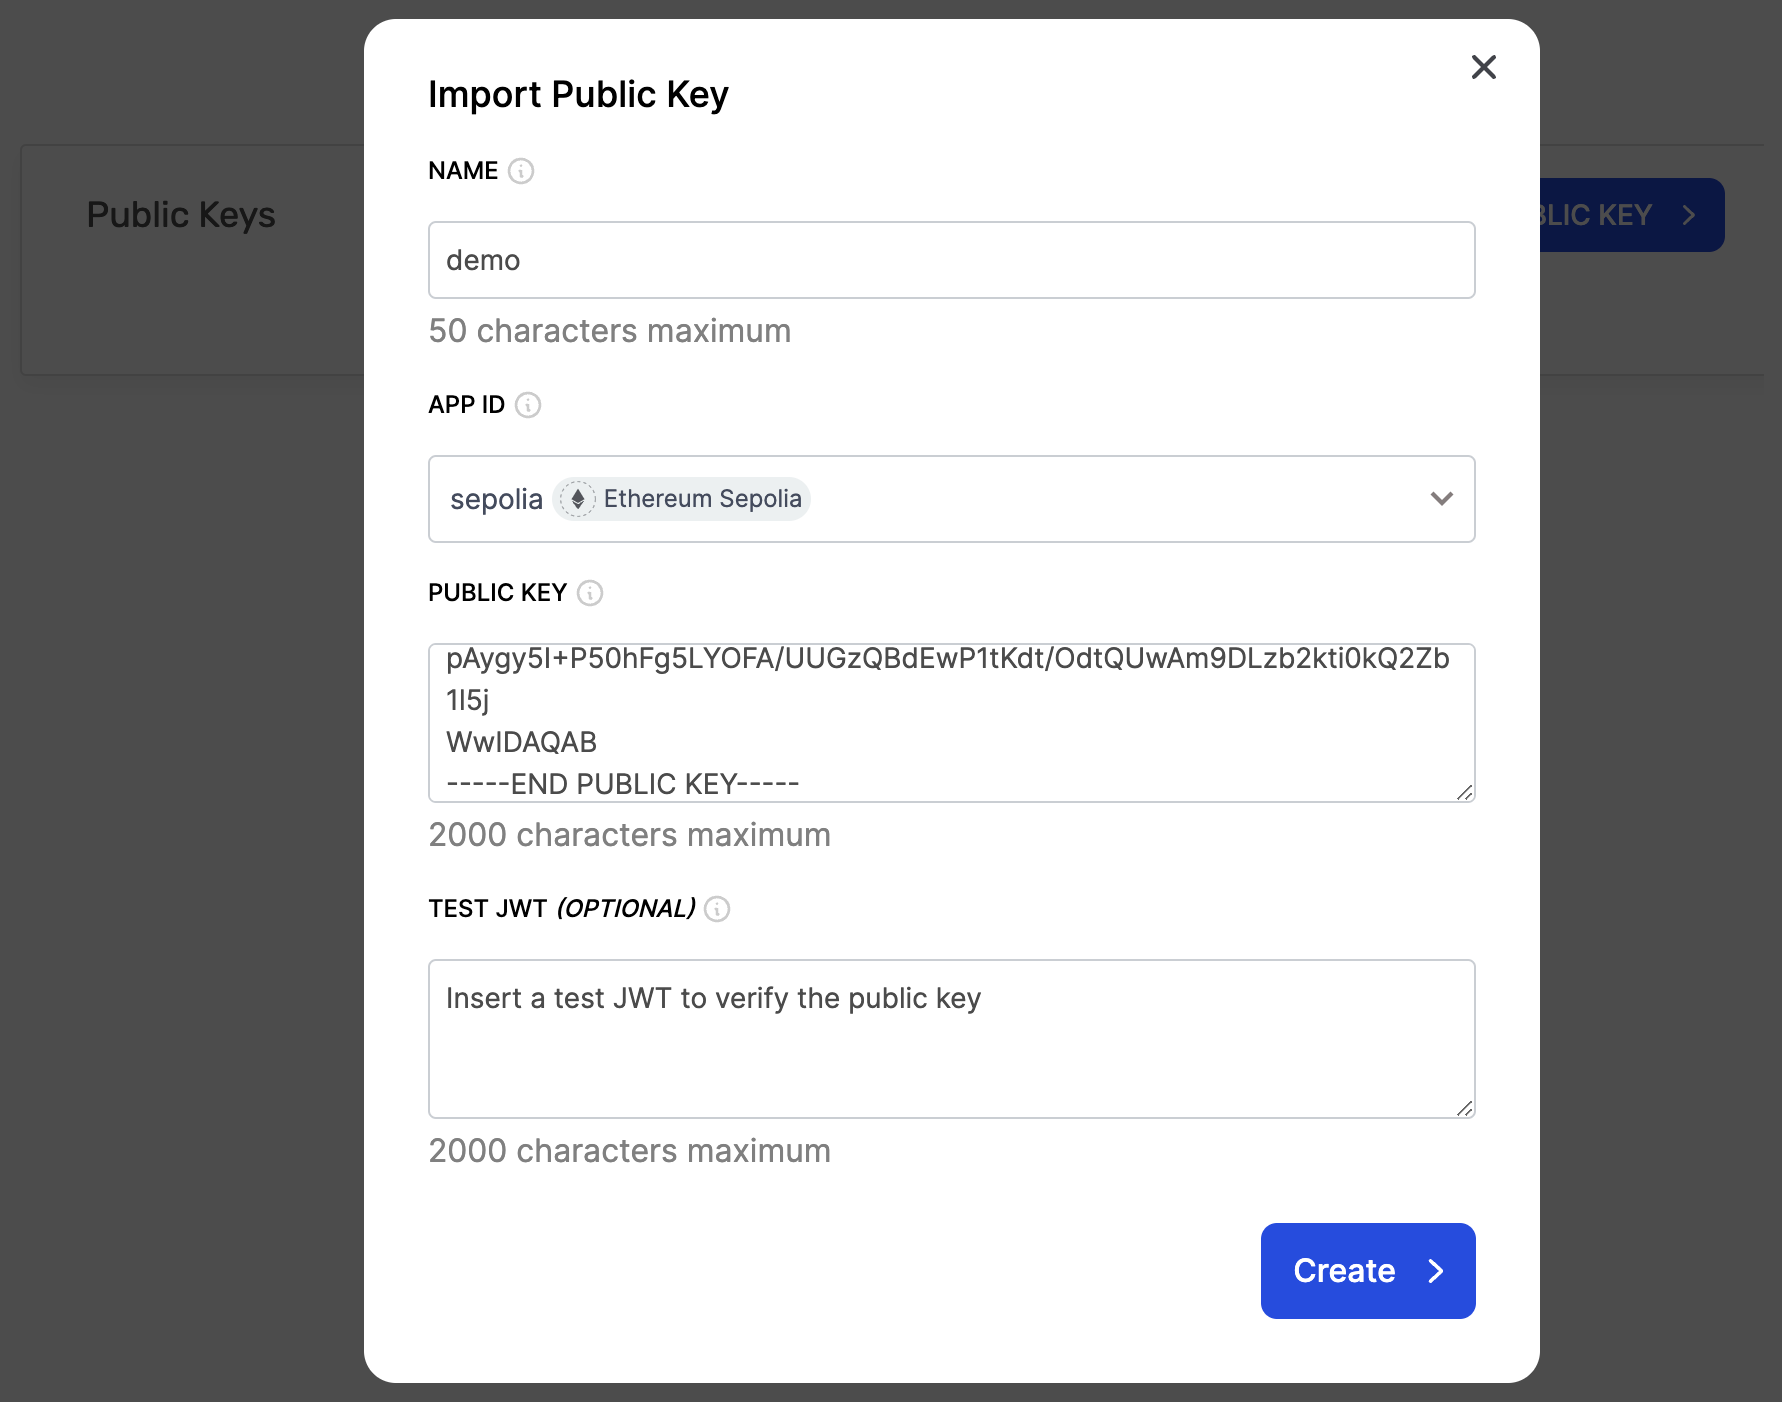
- Name: Choose a name for your public key.
- App ID: Choose an app to associate your public key with. This app should be on the network where you will be making the API requests using the JWT token.
- Public Key: Navigate to
public_key.pemfile in your project that contains the generated public key. Copy the contents of the file and paste in this field. Make sure there are no spaces or new line characters at the end. - Test JWT ( optional ): You can also generate a JWT and add it in this field to verify your public key. We will show you how to generate a JWT token in the next section so for now you can leave this field blank and hit the "create" button.
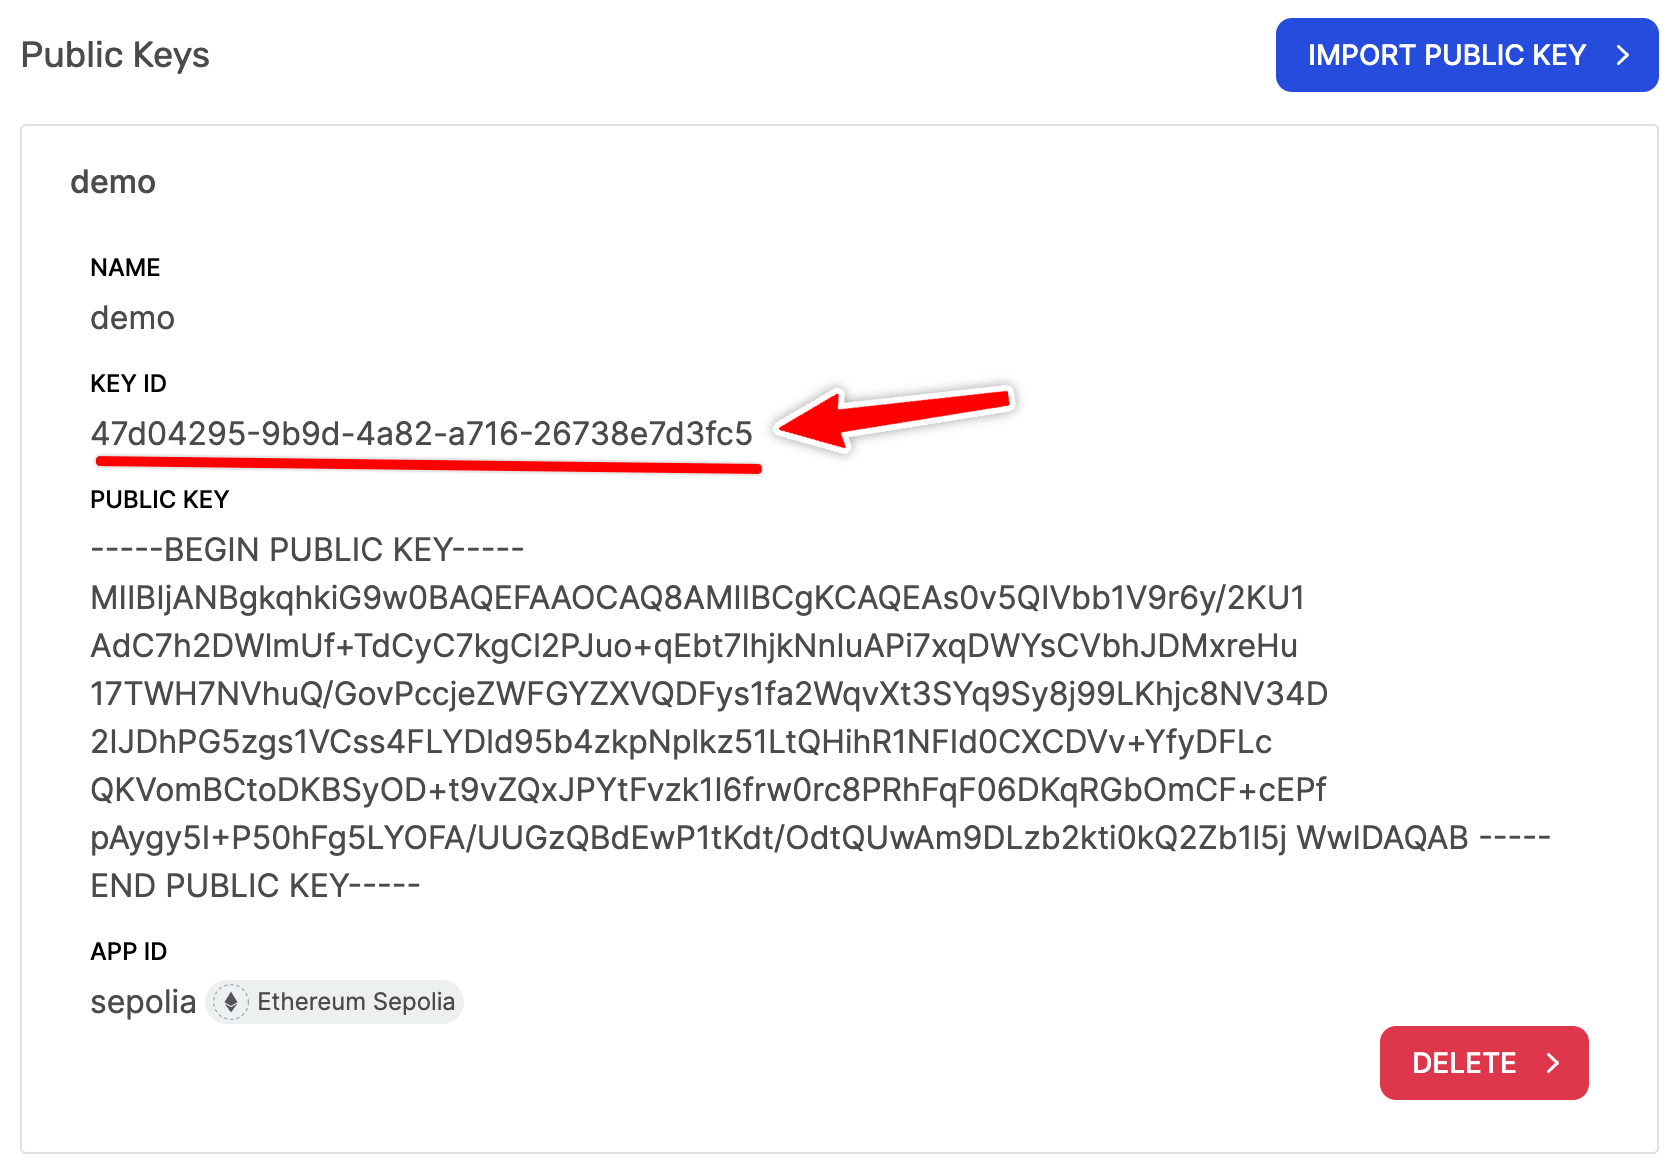
Once your public key is set up you should see a "Key Id" for your public key. Take note of this key id as we will require this in the next section.
Generating the JWT
After setting up the public key in your Alchemy dashboard you can start generating JWTs with your private key. For this, create a new file called generateJWT.js and add the following code to it:
// Import the built-in fs module for reading the private key from file
const fs = require('fs');

// Import the jsonwebtoken library for creating JWTs.
const jwt = require('jsonwebtoken');

// Key Id from Alchemy dashboard.
const KEY_ID = 'KEY_ID'; // Replace with your own Key Id

// Define a function to generate the JWT
function generateJWT() {
    // Read the private key from our 'private_key.pem' file
    const privateKey = fs.readFileSync('private_key.pem');

    // Define the options for signing the JWT
    // The "algorithm" field specifies the algorithm to use, which is 'RS256' (RSA with SHA-256)
    // This is one of the algorithms we support (others include RS384, RS512, ECDSA256, ECDSA384, ECDSA512)
    // The "expiresIn" field specifies when the token will expire, which is '10m' (10 minute) after being issued.
    // The shorter the expiration time, the more secure the token is.
    // In the "header" field we can add additional properties. In this case we're adding the "kid" filed which is the key id that is used by Alchemy to decided which public key should be used to verify the given JWT signature.
    // This should be the key id that you got from Alchemy Dashboard once you set up your key.
    const signOptions = {
        algorithm: 'RS256',
        expiresIn: '10m',
        header: {
            kid: KEY_ID,
        }
    };

    // Sign an empty payload using the private key and the sign options ( empty payload because we are not sending any additional info in the JWT )
    // The jwt.sign() function returns the JWT as a string
    const token = jwt.sign({}, privateKey, signOptions);

    // Log the newly created JWT
    console.log(token);
}

// Execute the function to generate the JWT
generateJWT();
Remember to replace KEY_ID with the key id from your public key details in Alchemy dashboard. This script generates a new JWT with the expiration time of 10 minute using the jsonwebtoken library. The JWT is signed using the private key we generated before and the signing algorithm used is RS256. The key id from public key details is also included in the header of JWT, this key id is used by Alchemy to decide which public key should be used to verify the JWT signature, since you can set up multiple public keys in your account.
Please note, while we are using RS256 algorithm to sign JWT in the script given above, Alchemy supports all of the following signing algorithms: RS256, RS384, RS512, ECDSA256, ECDSA384 and ECDSA512.
In the previous step ( while setting up your public key in the Alchemy dashboard ) if you wanted to add a test JWT to verify your public key, you could have generated a JWT in the same way as defined above. Only thing you need to change in that case is to remove the header containing key id from signing options as we are explicitly providing the public key so a key id is not required to identify the public key. Additionally, you will not even have a key id at that point because it is created when you set up the public key.
Run this script using the following command:
node generateJWT.js
This will create a new JWT with the expiration period of 10 minute and log it to console:
eyJhbGciOiJSUzI1NiIsInR5cCI6IkpXVCIsImtpZCI6IjAxZDFlMTZiLTNlYTEtNDI3NC04NDFiLWJlMDZhYzVlMTM0YiJ9.eyJpYXQiOjE2OTA5MDM5ODYsImV4cCI6MTY5MDkwNzU4Nn0.fBwFry4kC9W3rCLO-tZOvMZR3B5QZf9Y7Rn2nxfB0Rw1Qmq893ymZgWjEuylSHEN2EVbr40AICBSoigGsqseWmZ11WHxT-nBTqWcV5FP9IiAocaJLXa3xO_RQD4R0NyoHU_vpv1fFrj2LNjJm2sFDSu4y2Gn2W2wRBDSL8C7jVE9OqZ3sSgmmoIpwFWrU74cPnDmygBA2I-_x1G30pI74Ha1Ea3AsFxsipoWxrj_7UISYviGKbxzy_U3TzGIWDmG_gJHXy0hiZXvi6iYlh-3x6VfQFDx5_J-zx8k48ER4hi31EroB_vSjM0YGV_KUXWj2PBOsy65o4RnkQ5pgmPy3g
You can then use this JWT to make API requests by including it in the request header. An example of this is given in the next section.
Testing the JWT ( Optional )
Now that we have generated a JWT, we can test it to verify the app that this token is valid for. To do this, navigate to your "Alchemy Dashboard" → "JWT Public Keys" and paste the token in the "Test JWT" section, then press "Test JWT".
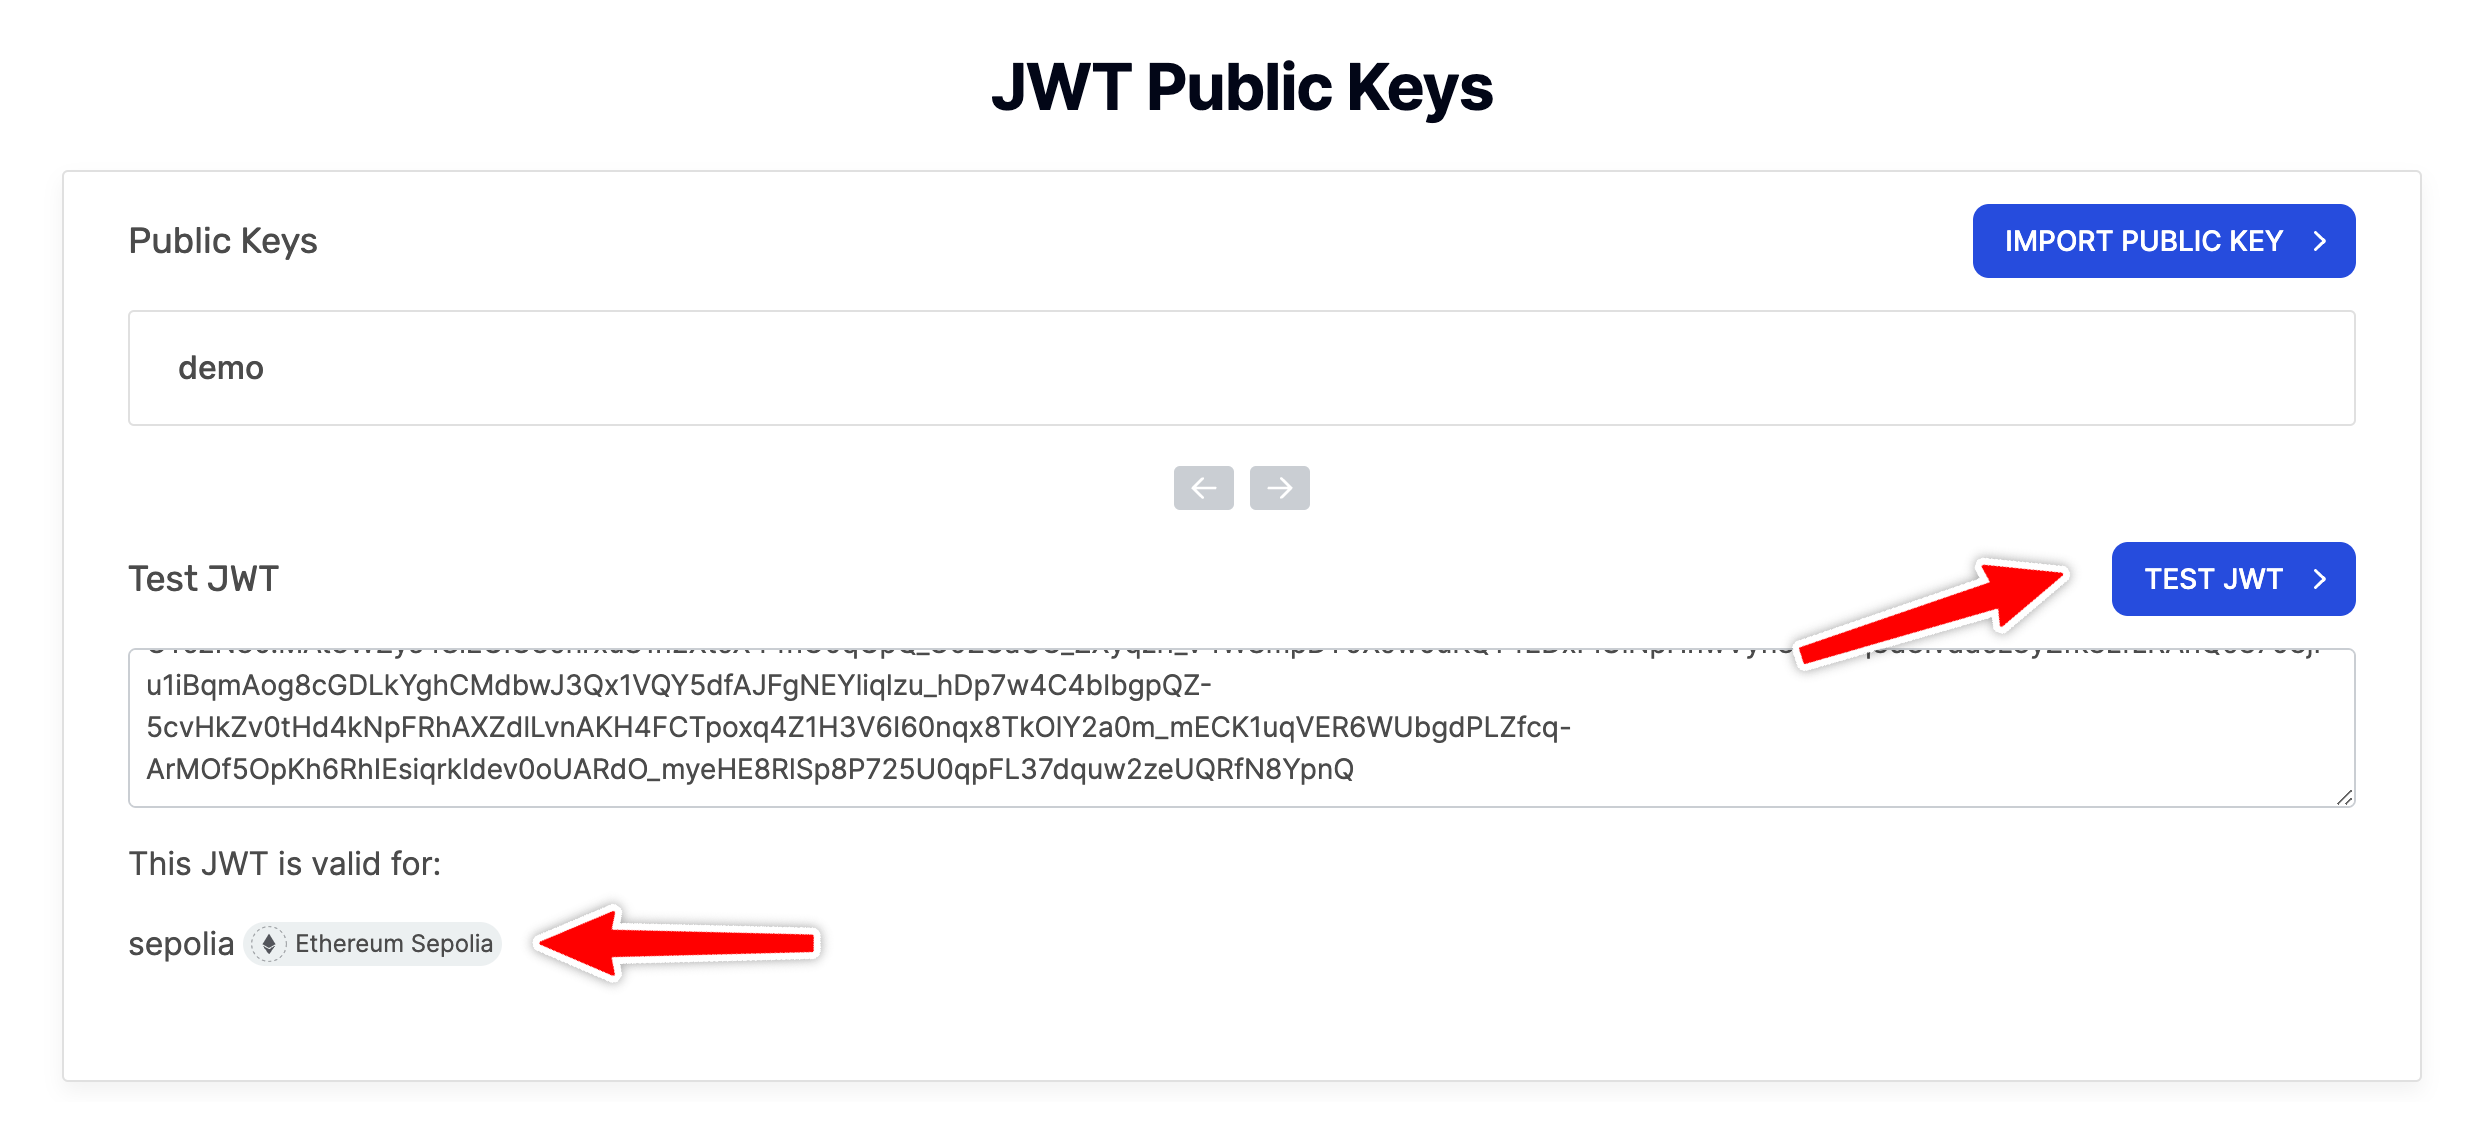
You will see the name of the app for which this token is valid. This is generally used for debugging your JWTs. In case, you have multiple apps associated with JWTs and you end up mixing your JWTs, you can always check the correct app here. In addition to that, you can also check the validity of JWTs.
Making an API Request with JWT
Finally, we are ready to make an API request using the generated JWT. For demo purposes, we will call the eth_blockNumber API on Ethereum Sepolia testnet ( the network our associated app is set up on ) using the JWT. Create a new file called requestData.js and add the following code:
const axios = require('axios'); // Import axios library

const JWT = "JWT"; // Replace with your JWT

// Set up data object for the request
const data = {
  method: 'eth_blockNumber', // Set request method
  params: [], // No parameters are required for eth_blockNumber
  id: 1,
  jsonrpc: "2.0"
}

// Set up headers object for the request
const headers = {
  'Content-Type': 'application/json', // Needed for a JSON-RPC request
  'Authorization': `Bearer ${JWT}`,
}

// Send POST request using axios
axios.post('https://eth-sepolia.g.alchemy.com/v2', data, { headers: headers })
  .then(response => console.log(response.data.result)) // Log response data
  .catch(error => console.error(error)); // Log any errors
Remember to replace JWT with the JWT generated in the previous steps. The script makes a request to the eth_blockNumber API method using axios. It includes JWT in the authorization header of the request to authenticate API calls. Finally it logs the response to console, which is number of the most recently mined block on network, represented as a hexadecimal string. If you find this header-based approach confusing, you can check out our guide on sending header-based requests that explains the benefits of this approach and how to use it in detail.
Finally run the script using the following command:
node requestData.js
It should log the most recently mined block number ( as a hexadecimal string ) to the console:
0x3d2329
Congratulations! You've successfully tested your scripts. By seeing the correct output in your terminal, you can confirm that your scripts are working as expected.
How do I avoid JWTs interfering with users experience connecting via Wallet Connect?
When the remaining time in the old JWT is no longer sufficient for UX reasons, create and rotate in a new JWT.
Conclusion
In this guide we walked you through the process of creating a public/private key pair, setting up the public key in Alchemy dashboard and generating JWTs to be used for API requests. JWTs provide additional security and flexibility options like expiration periods and the ability to create unlimited of them. This method requires a bit more work on your side but can be worth it if you need enhanced security.
Updated about 1 year ago