10. How to Create a Decentralized Twitter with Lens Protocol
There's been a lot of discussions lately about how much control social media giants like Facebook and Twitter have. Regardless of what your opinion on it is, I'd like to share an experiment with you that is super exciting.
This year, folks on the Aave team launched a project called Lens Protocol. It's one of the most exciting technologies to enter the web3 ecosystem lately because it uses blockchain technology to give the power and control of data back to the users who are generating it.
So I thought, why don't we all explore it together? It would be a fitting final lesson to combine everything you have learned so far 🙂.
In this lesson, you will learn:
- How to set up a Next.js app with an Apollo GraphQL client
- How to use the Lens protocol API to fetch profiles, posts, and other data stored on the Polygon blockchain
- An introduction to the MintKudos API -- so that you can integrate your PoK tokens in your dapp!
- An introduction to Lit Protocol -- in case you want to encrypt certain posts to only be shown to various community members
- How to deploy your decentralized social media app frontend website using Repl.it
- Multiple challenge options to extend this project!
Here is a Github Repo with an example of the finished project in case you need it to follow along <tbd>
Let's GOOOO!
(Video version coming soon!)
Step 0. Take a tour of the Lens Protocol ecosystem
Let's start by taking a look at what Lens Protocol has to offer!
If you visit the Lens website, you'll see two links immediately.
- Developer Garden - takes you to documentation and guides
- Join Discord - takes you to the community chat server
We'll visit the Developer Garden in a second, but before we do that, let's check out the menu bar options in the top right.

You can check out Apps that are already being built by the community!
Here, I'll draw your attention:
Apps - This link takes you to a list of community-built web applications, including ones like Lensfrens, Lenster, Phaver, Alps Finance, Refract, and more.
I want to take a quick moment to illustrate the power of Lens Protocol.
If you visit this profile page on lensfrens - https://www.lensfrens.xyz/thatguyintech.lens - you'll see my account, which should look something like this:
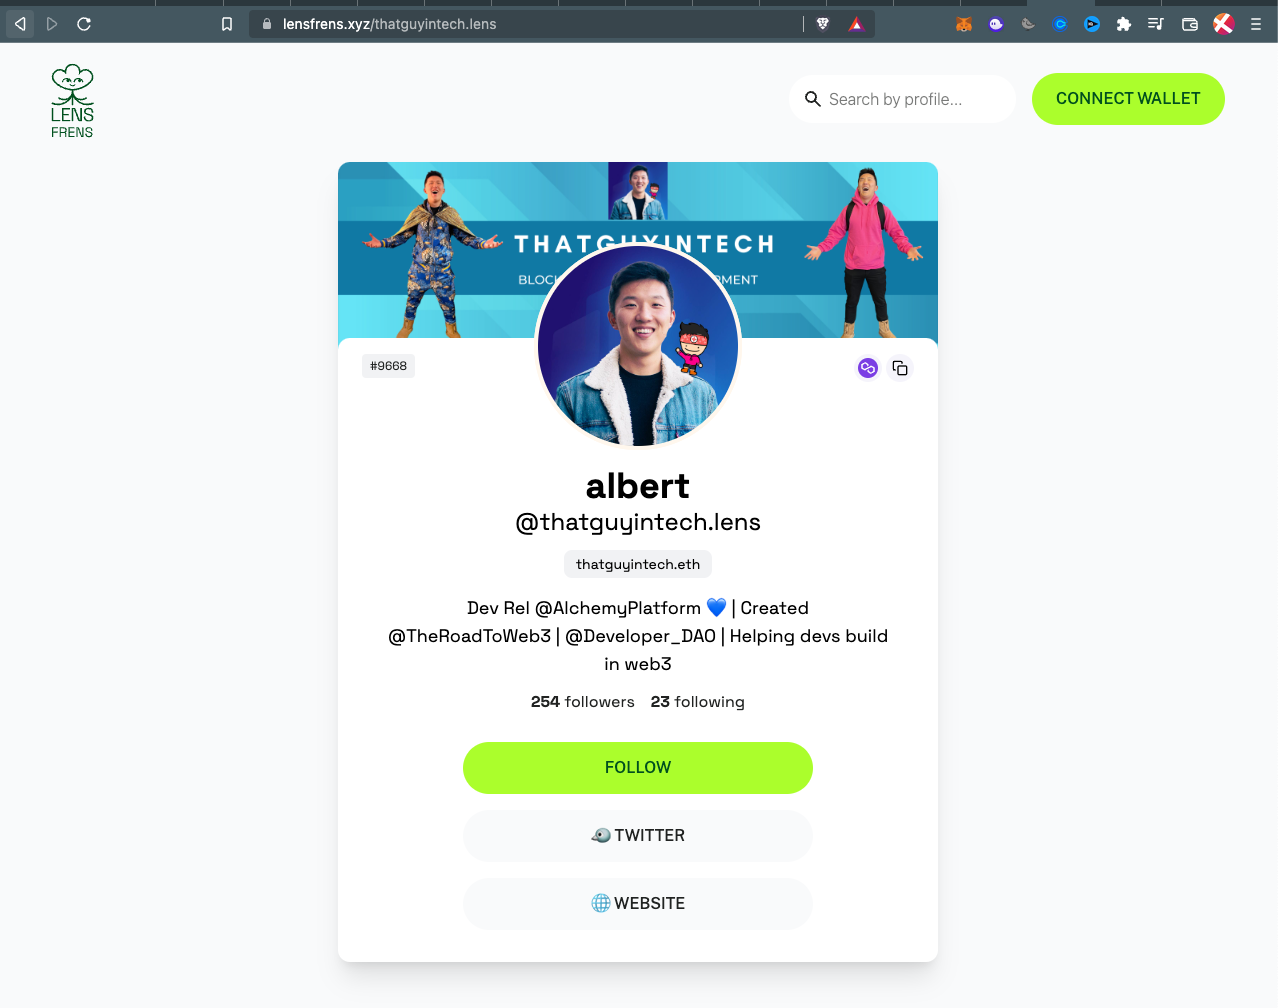
lensfrens
Now if you visit this completely different web application Lenster - https://lenster.xyz/u/thatguyintech.lens - you'll see me again, with the exact same profile data, except an entirely different experience, even including posts/comments/reactions from other profiles.
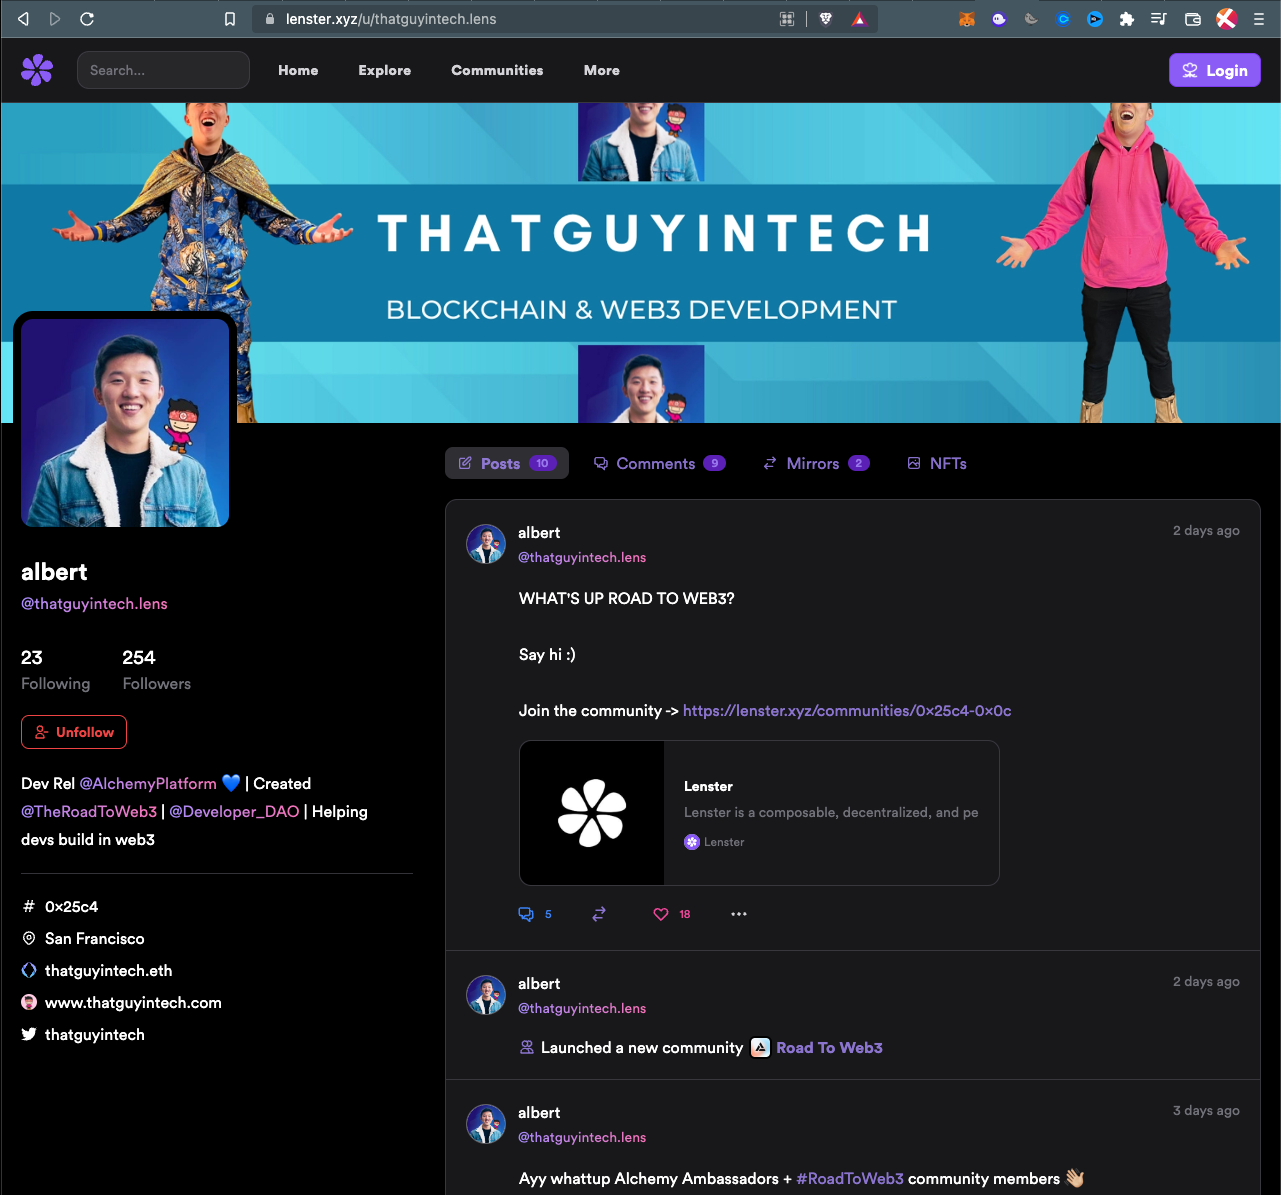
Lenster0
Nothing super mind-blowing so far, but stick with me here.
Check out the other apps:
- Phaver - Social mobile app with Lens support that ALSO lets you "stake" to curate other peoples' posts, thereby allowing people to earn money for their content.
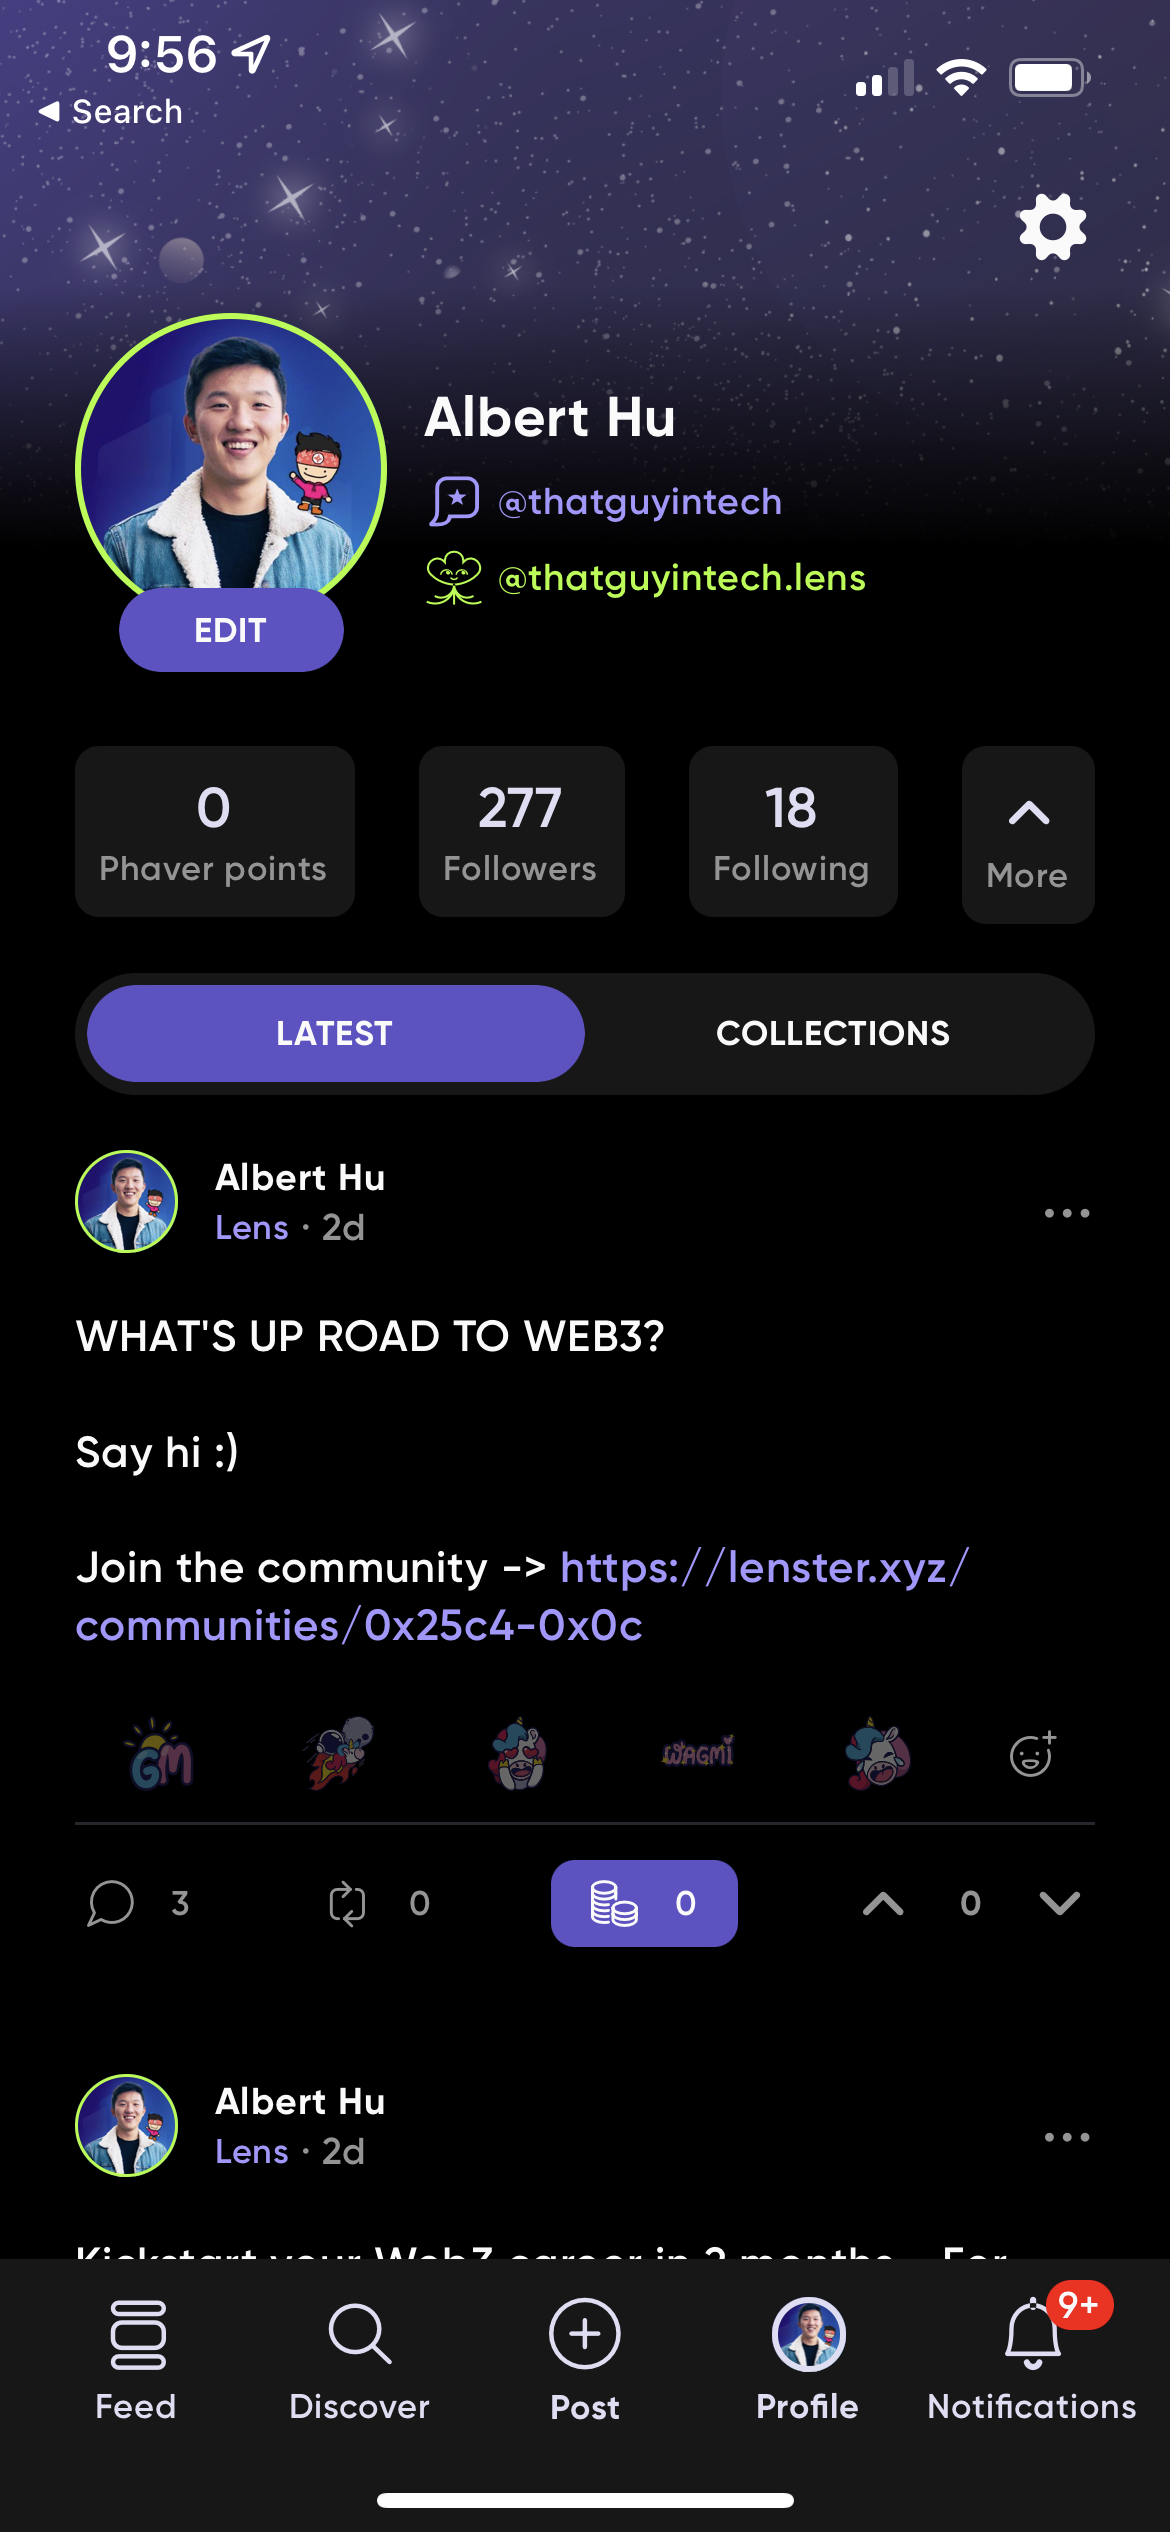
Phaver
- Refract - It's like Hacker News, except all the links and posts that are shared here are powered by Lens Protocol.
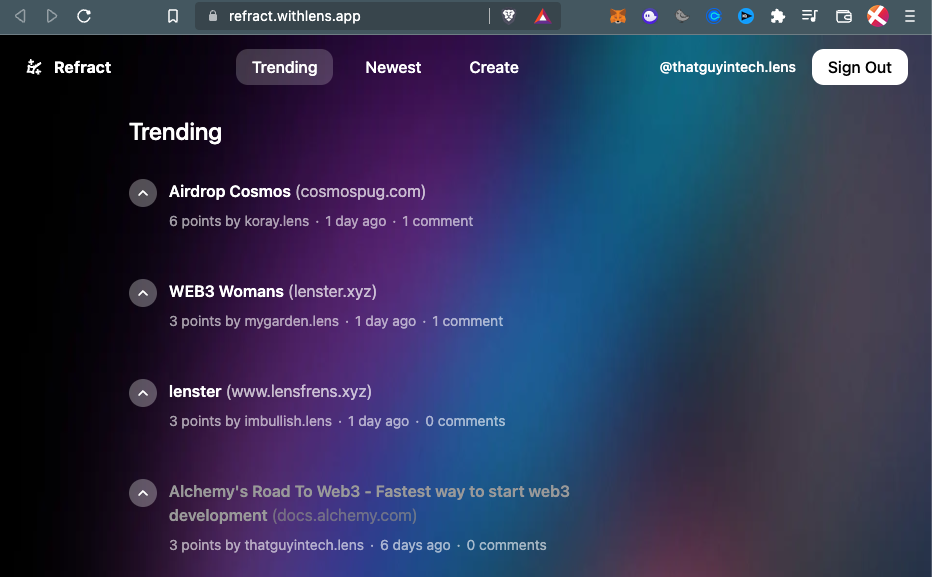
Refract
These apps are all built by different people, different teams, with different user experiences and product goals, but all the underlying data is the same, as if they all shared the same database and APIs.
How can that be?
Turns out, that a shared database and public API are exactly the fundamental ideas of Lens Protocol. That's why this technology has so much potential.
Every piece of data is an NFT.
Every post, every comment, every reaction, every FOLLOW. Each of these pieces of data is stored as a non-fungible token created by and controlled by you, the creator.
That means that the digital content and relationships we create as users are owned by us and can be taken to any application built on top of the protocol!
Now let's dig in!
Step 1. Set up a Next.js application and install Apollo
Open a command line. Use the create-next-app to start a project that will be named road-to-lens
npx create-next-app road-to-lens
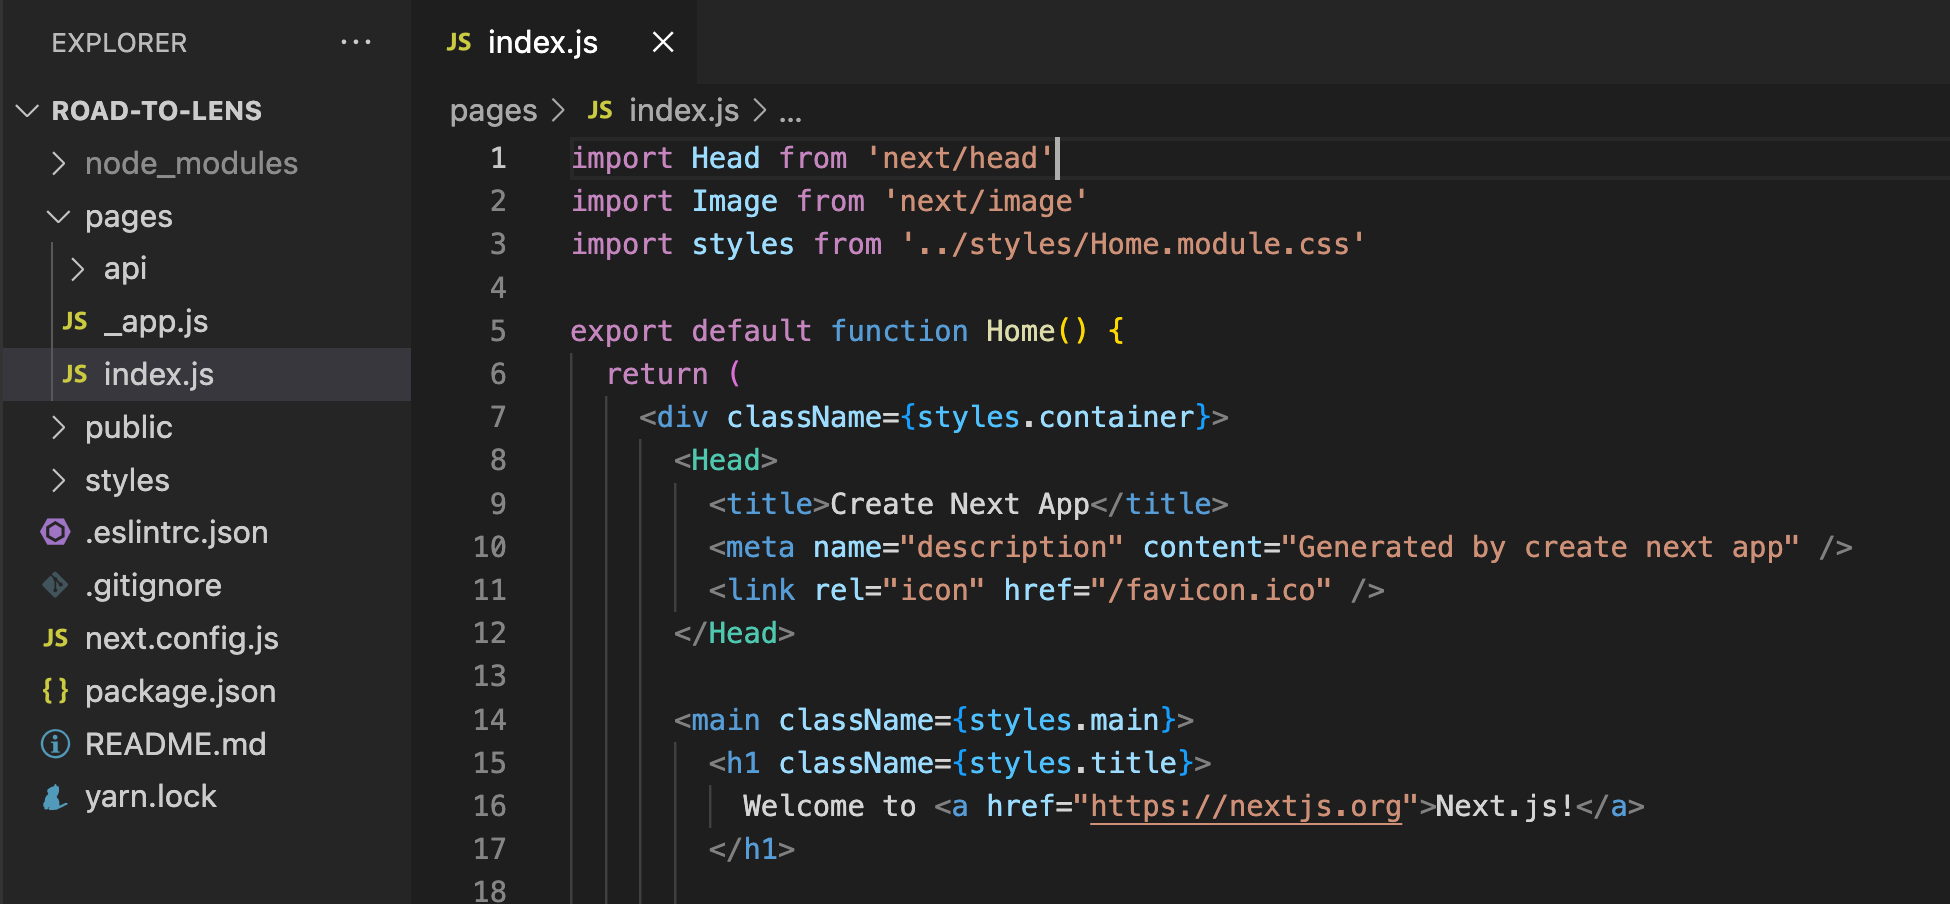
The generated repo will be called road-to-lens, and you should have the following directory structure:
thatguyintech@albert road-to-lens % tree -L 1
.
├── README.md
├── next.config.js
├── node_modules
├── package.json
├── pages
├── public
├── styles
└── yarn.lock
Let's also install our graphql client while we're here. We'll be using Apollo to query Lens Protocol for data.
npm install @apollo/client graphql
After this finishes, we can perform a sanity check by starting a local server and loading up the webpage:
thatguyintech@albert road-to-lens % npm run dev

> [email protected] dev
> next dev

ready - started server on 0.0.0.0:3000, url: http://localhost:3000
info  - SWC minify release candidate enabled. https://nextjs.link/swcmin
event - compiled client and server successfully in 4.2s (169 modules)
Loading up http://localhost:3000 should give you a basic template page that looks like this:
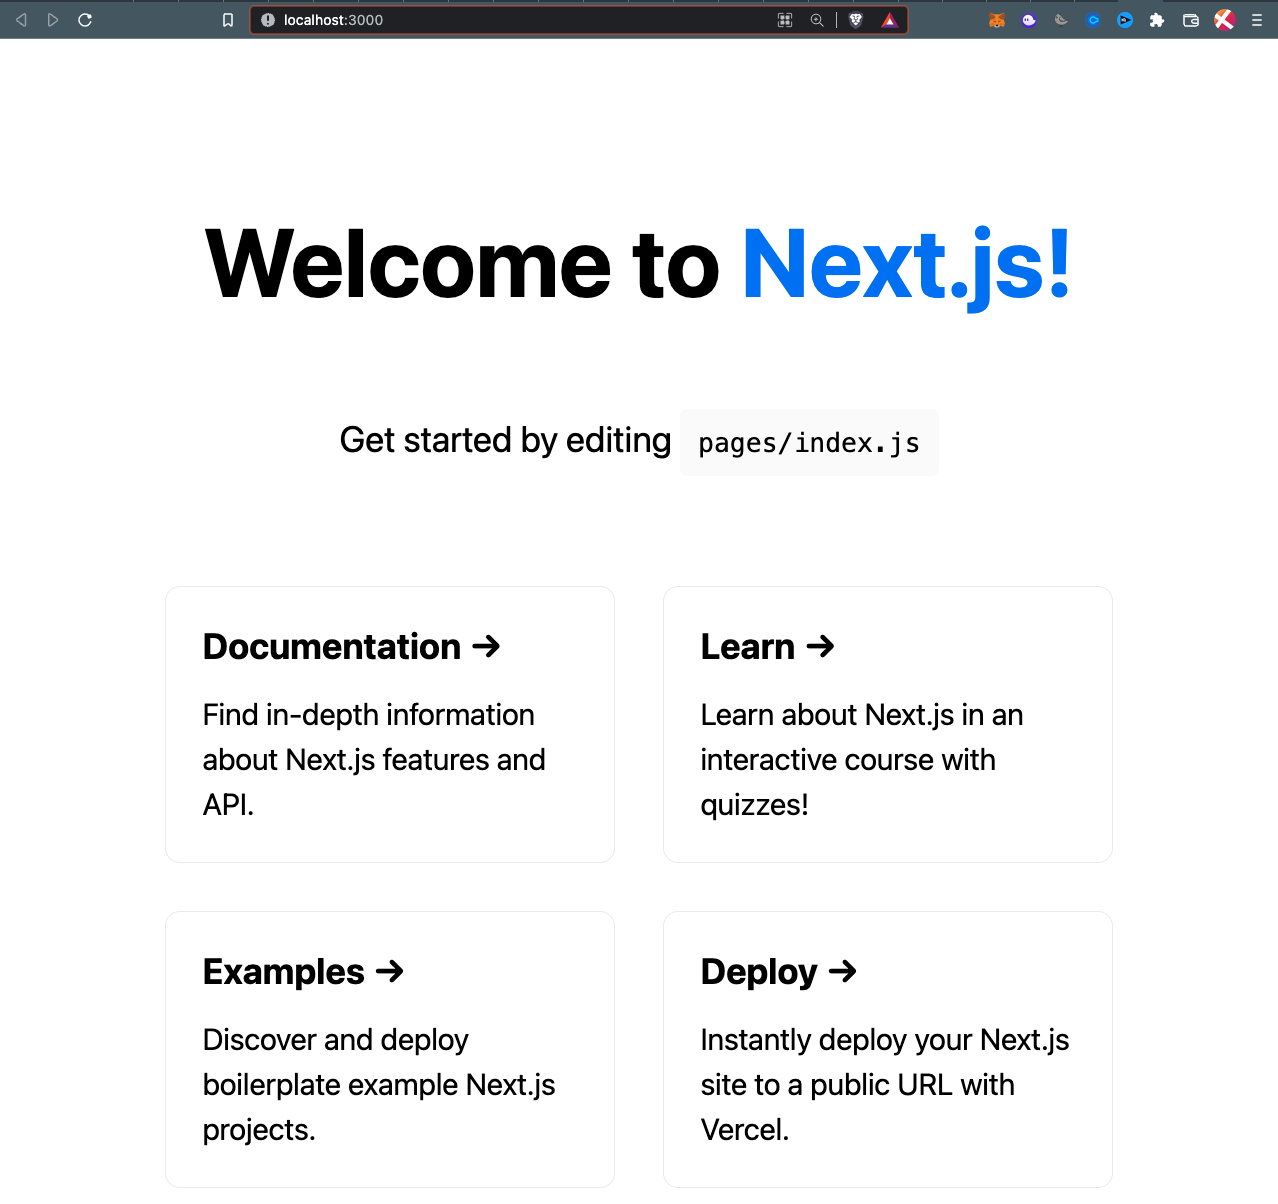
Step 2. Try Apollo GraphQL out on the index.js page with Recommended Profiles from Lens
Let's get acquainted with Apollo and GraphQL by loading recommended Lens profiles on the home page.
First, set up the Apollo provider to wrap our entire app so that we have access to methods like useQuery and useMutation later on.
Create a file in the top-level directory called apollo-client.js
thatguyintech@albert road-to-lens % touch apollo-client.js
We'll initialize a client here with the base url pointed at the Lens Matic Mainnet API:
// ./apollo-client.js

import { ApolloClient, InMemoryCache } from "@apollo/client";

const client = new ApolloClient({
    uri: "https://api.lens.dev",
    cache: new InMemoryCache(),
});

export default client;
With this GraphQL client initialized, we can import it in our /pages/_app.jsfile and use it to wrap our global app Component:
// pages/_app.js

import '../styles/globals.css'
import { ApolloProvider } from "@apollo/client";
import client from "../apollo-client";

function MyApp({ Component, pageProps }) {
  return (
    <ApolloProvider client={client}>
      <Component {...pageProps} />
    </ApolloProvider>
  );
}

export default MyApp
You can see here we've added the <ApolloProvider client={client}> as a wrapper. This gives our entire app superpowers -- everywhere else we'll be able to use utility methods like useQuery and useMutation to fetch data from the Lens API and to send updates as well.
One last update before we can check back on localhost. Let's update /pages/index.js to make a query to fetch Recommended Profiles from Lens:
import { useQuery, gql } from "@apollo/client";

const recommendProfiles = gql`
  query RecommendedProfiles {
    recommendedProfiles {
          id
        name
        bio
        attributes {
          displayType
          traitType
          key
          value
        }
          followNftAddress
        metadata
        isDefault
        picture {
          ... on NftImage {
            contractAddress
            tokenId
            uri
            verified
          }
          ... on MediaSet {
            original {
              url
              mimeType
            }
          }
          __typename
        }
        handle
        coverPicture {
          ... on NftImage {
            contractAddress
            tokenId
            uri
            verified
          }
          ... on MediaSet {
            original {
              url
              mimeType
            }
          }
          __typename
        }
        ownedBy
        dispatcher {
          address
          canUseRelay
        }
        stats {
          totalFollowers
          totalFollowing
          totalPosts
          totalComments
          totalMirrors
          totalPublications
          totalCollects
        }
        followModule {
          ... on FeeFollowModuleSettings {
            type
            amount {
              asset {
                symbol
                name
                decimals
                address
              }
              value
            }
            recipient
          }
          ... on ProfileFollowModuleSettings {
          type
          }
          ... on RevertFollowModuleSettings {
          type
          }
        }
    }
  }
`;

export default function Home() {
  const {loading, error, data} = useQuery(recommendProfiles);

  if (loading) return 'Loading..';
  if (error) return `Error! ${error.message}`;

  return (
    <div>
      Hello
      {data.recommendedProfiles.map((profile, index) => {
        console.log(`Profile ${index}:`, profile);
        return (
          <div>
            <h1>{profile.name}</h1>
            <p>{profile.bio}</p>
            <div>{profile.attributes.map((attr, idx) => {
              if (attr.key === "website") {
                return <div><a href={`${attr.value}`}>{attr.value}</a><br/></div>
              } else if (attr.key === "twitter") {
                return <div><a href={`https://twitter.com/${attr.value}`}>@{attr.value}</a><br/></div>;
              }
              return(<div>{attr.value}</div>);
            })}</div>
          </div>
        );
      })}
    </div>
  )
}
We're doing a couple of key things with this change:
- Define a GraphQL query called
RecommendedProfiles. - Fetch a list of profiles by calling
useQuerywith theRecommendedProfilesquery -> which gets returned in thedatavariable. - Display some profile information such as
data.profile.name,data.profile.bio, anddata.profile.attributes.
Go back to http://localhost:3000/ (make sure your local server is running), and then voilá, you should see this really simple list of profiles!
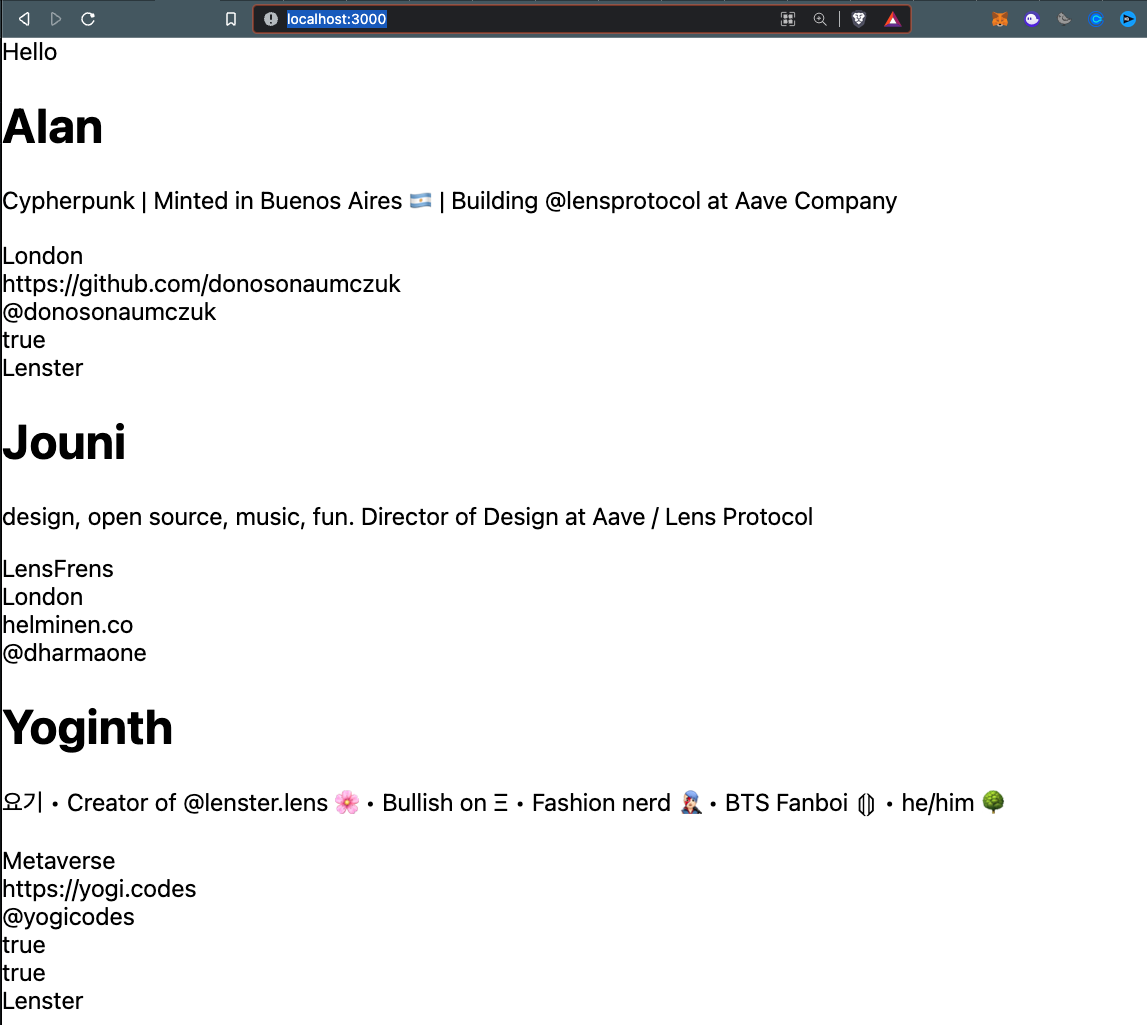
Ugly, but cool right?
If you want to pause here and do some more exploration, you can add a console.log statement in your /pages/index.js file to see some more of the data that's returned from the GraphQL query.
For example, by adding console.log(data) , you'll be able to pull up the developer console on your browser and see the profile data.
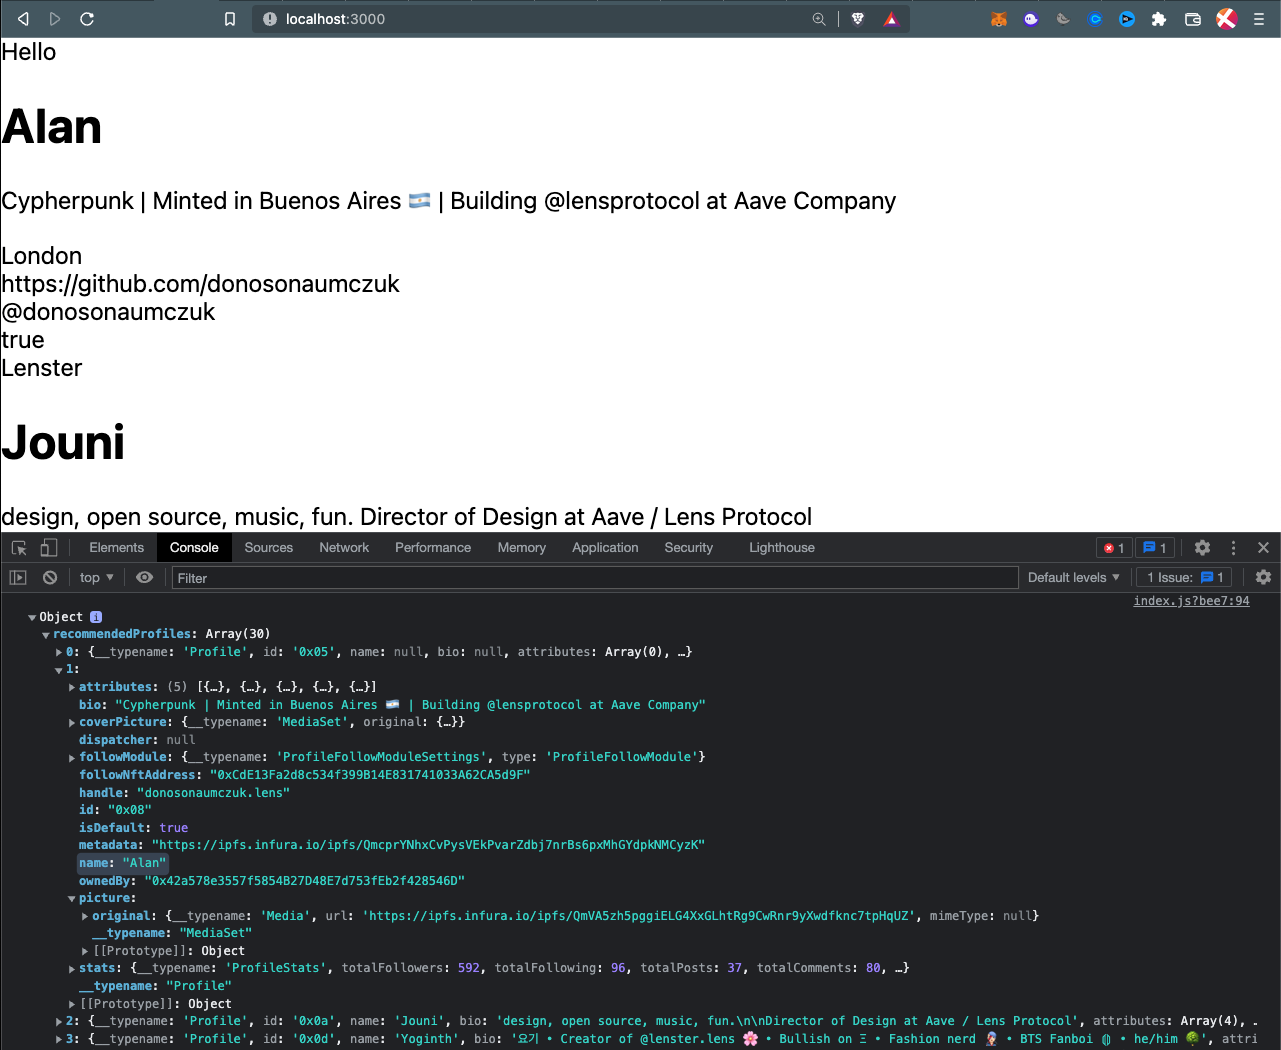
Check out the RecommendedProfiles response in console, or on the developer docs
We'll look at this data more later and clean up the page designs 🙂
and a reminder: all of that data is stored on the Polygon blockchain as NFTs!
What the Lens team is doing with their API is just indexing all the on-chain data so that it's easier for developers to fetch and build using the NFTs!
A quick sanity check at this point..
Your directory structure should look something like this:
thatguyintech@albert road-to-lens % tree -L 2
.
├── README.md
├── apollo-client.js      <- we created this
├── next.config.js
├── node_modules
├── package-lock.json
├── package.json
├── pages
│   ├── api
│   ├── _app.js           <- we modified this
│   └── index.js          <- we modified this
├── public
│   ├── favicon.ico
│   └── vercel.svg
├── styles
│   ├── Home.module.css
│   └── globals.css
└── yarn.lock
Step 2. Let's make the profiles list look nicer
In this part, we'll refactor our code to make it easier to navigate, and we'll style our components so that the UI looks much cleaner.
Starting with the refactor:
Here's our new /pages/index.js
import { useQuery } from "@apollo/client";
import recommendedProfilesQuery from '../queries/recommendedProfilesQuery.js';
import Profile from '../components/Profile.js';

export default function Home() {
  const {loading, error, data} = useQuery(recommendedProfilesQuery);

  if (loading) return 'Loading..';
  if (error) return `Error! ${error.message}`;

  return (
    <div>
      {data.recommendedProfilesQuery.map((profile, index) => {
        console.log(`Profile ${index}:`, profile);
        return <Profile key={profile.id} profile={profile} displayFullProfile={false} />;
      })}
    </div>
  )
}
We're moving the recommendProfilesQuery into a separate Graphql document in a new folder you need to create called queries:
mkdir queries
touch queries/recommendedProfilesQuery.js
and then copy the RecommendedProfiles doc over to this file:
// queries/recommendedProfilesQuery.js

import {gql} from '@apollo/client';

export default gql`
  query RecommendedProfiles {
    recommendedProfiles {
          id
        name
        bio
        attributes {
          displayType
          traitType
          key
          value
        }
          followNftAddress
        metadata
        isDefault
        picture {
          ... on NftImage {
            contractAddress
            tokenId
            uri
            verified
          }
          ... on MediaSet {
            original {
              url
              mimeType
            }
          }
          __typename
        }
        handle
        coverPicture {
          ... on NftImage {
            contractAddress
            tokenId
            uri
            verified
          }
          ... on MediaSet {
            original {
              url
              mimeType
            }
          }
          __typename
        }
        ownedBy
        dispatcher {
          address
          canUseRelay
        }
        stats {
          totalFollowers
          totalFollowing
          totalPosts
          totalComments
          totalMirrors
          totalPublications
          totalCollects
        }
        followModule {
          ... on FeeFollowModuleSettings {
            type
            amount {
              asset {
                symbol
                name
                decimals
                address
              }
              value
            }
            recipient
          }
          ... on ProfileFollowModuleSettings {
          type
          }
          ... on RevertFollowModuleSettings {
          type
          }
        }
    }
  }
`;
And then let's also create the Profile component that we introduced in the index.js page above ( import Profile from '../components/Profile.js';)
We should organize it into a new directory called components.
mkdir components
touch components/Profile.js
And then just copy this structure in:
// components/Profile.js

import Link from "next/link";
export default function Profile(props) {
  const profile = props.profile;

  // When displayFullProfile is true, we show more info.
  const displayFullProfile = props.displayFullProfile;

  return (
    <div className="p-8">
      <Link href={`/profile/${profile.id}`}>
        <div className="max-w-md mx-auto bg-white rounded-xl shadow-md overflow-hidden md:max-w-2xl">
          <div className="md:flex">
            <div className="md:shrink-0">
              {profile.picture ? (
                <img
                  src={
                    profile.picture.original
                      ? profile.picture.original.url
                      : profile.picture.uri
                  }
                  className="h-48 w-full object-cover md:h-full md:w-48"
                />
              ) : (
                <div
                  style={{
                    backgrondColor: "gray",
                  }}
                  className="h-48 w-full object-cover md:h-full md:w-48"
                />
              )}
            </div>
            <div className="p-8">
              <div className="uppercase tracking-wide text-sm text-indigo-500 font-semibold">
                {profile.handle}
                {displayFullProfile &&
                  profile.name &&
                  " (" + profile.name + ")"}
              </div>
              <div className="block mt-1 text-sm leading-tight font-medium text-black hover:underline">
                {profile.bio}
              </div>
              <div className="mt-2 text-sm text-slate-900">{profile.ownedBy}</div>
              <p className="mt-2 text-xs text-slate-500">
                following: {profile.stats.totalFollowing} followers:{" "}
                {profile.stats.totalFollowers}
              </p>
            </div>
          </div>
        </div>
      </Link>
    </div>
  );
}
This Profile component accepts props as an input, and expects the props object to have a profile field that includes all the information we might want to display when we render the component.
While we're here, we added the profile picture and follower/following counts as well!
Now, once again, let's check our work. Checking our work often is a good habit because it allows us to catch bugs quickly
Make sure your server is running:
thatguyintech@albert road-to-lens % npm run dev

> [email protected] dev
> next dev

ready - started server on 0.0.0.0:3000, url: http://localhost:3000
And go visit localhost: http://localhost:3000/
You should see something like this:
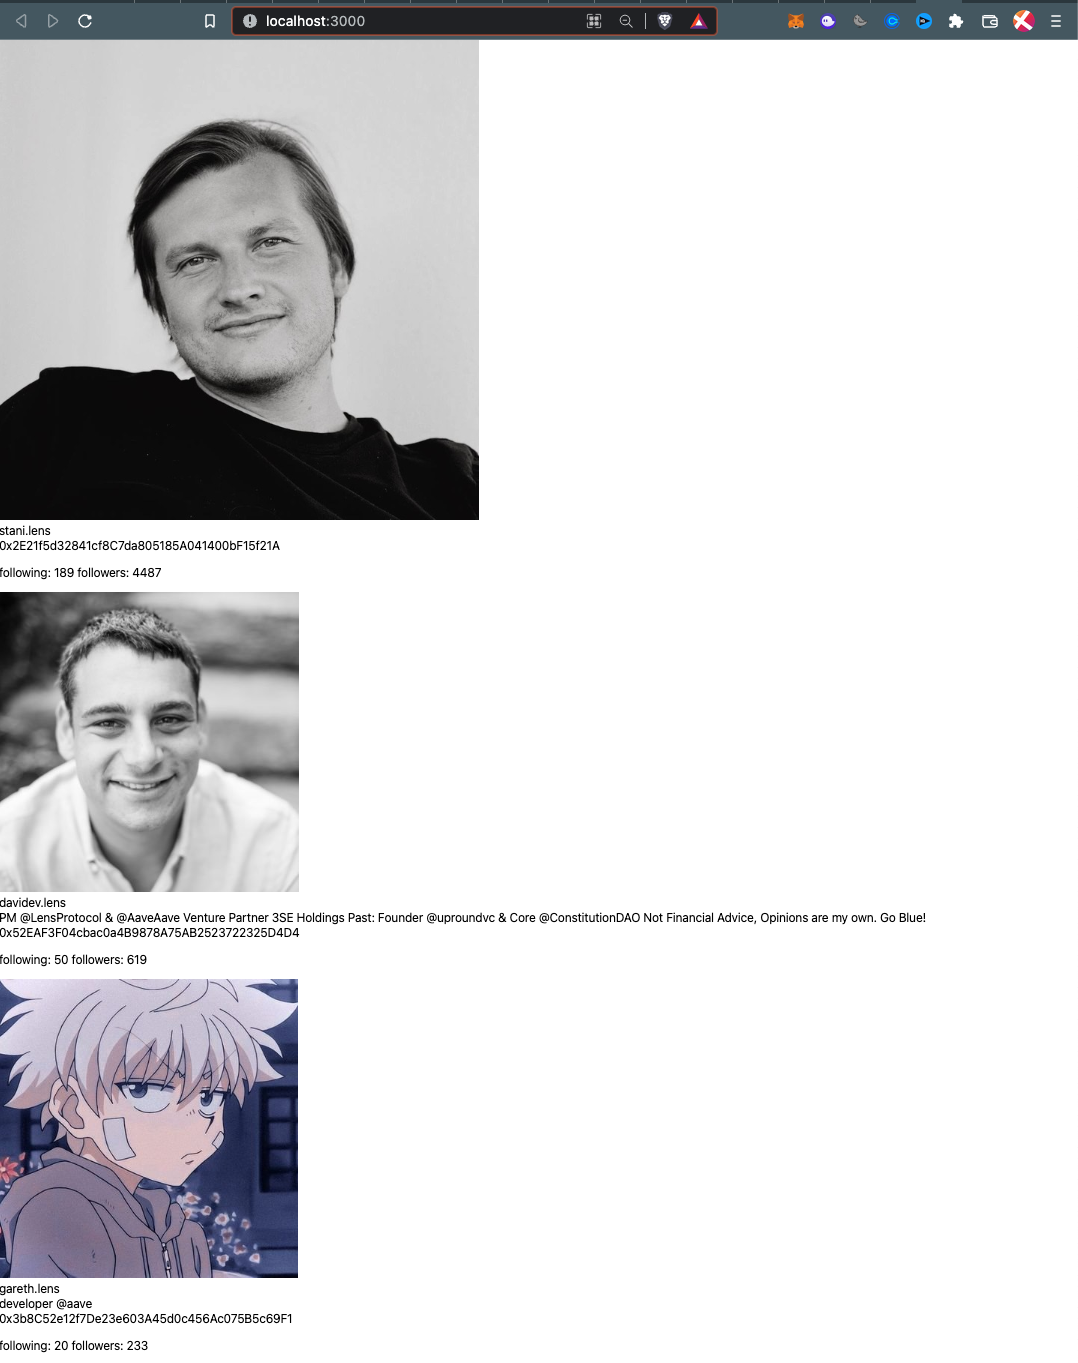
It's still not that good looking yet, but hey we have photos!
Before we finish this step, let's take advantage of the CSS we included in the Profile component.
If you've never used Tailwind CSS before, these tags:
uppercase tracking-wide text-sm text-indigo-500 font-semibold
all come from the utility-first fundamentals of Tailwind's design (see docs).
So really all we have to do here is install Tailwind, as per their installation instructions:
npm install -D tailwindcss postcss autoprefixer
npx tailwindcss init -p
Copy these configs so that Tailwind knows which paths to load styles for in our project. We want everything in the pages folder and components folder to be covered, so we use these paths:
// tailwind.config.js

module.exports = {
  content: [
    "./pages/**/*.{js,ts,jsx,tsx}",
    "./components/**/*.{js,ts,jsx,tsx}",
  ],
  theme: {
    extend: {},
  },
  plugins: [],
}
Now we wrap up by adding the Tailwind directives to our CSS file:
/* ./styles/globals.css */
@tailwind base;
@tailwind components;
@tailwind utilities;
And then re-start the server and see how it looks now!
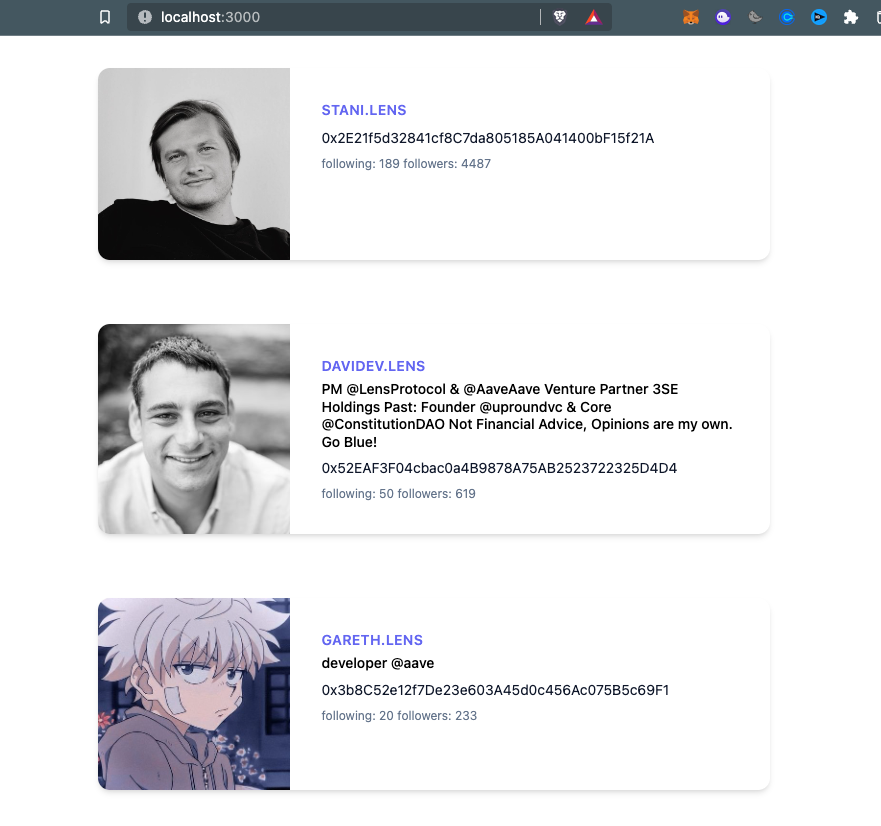
much better looking after styling with Tailwind CSS
It looks amazing. Even has drop-shadows and everything 🙂
Now.. some of you may have noticed that I included some <Link>s in the Profile component, and then when you click on one of the profiles, it links to a new page!
For example, clicking on DAVIDEV.LENS's card takes us to http://localhost:3000/profile/0x16 and shows a 404 error.
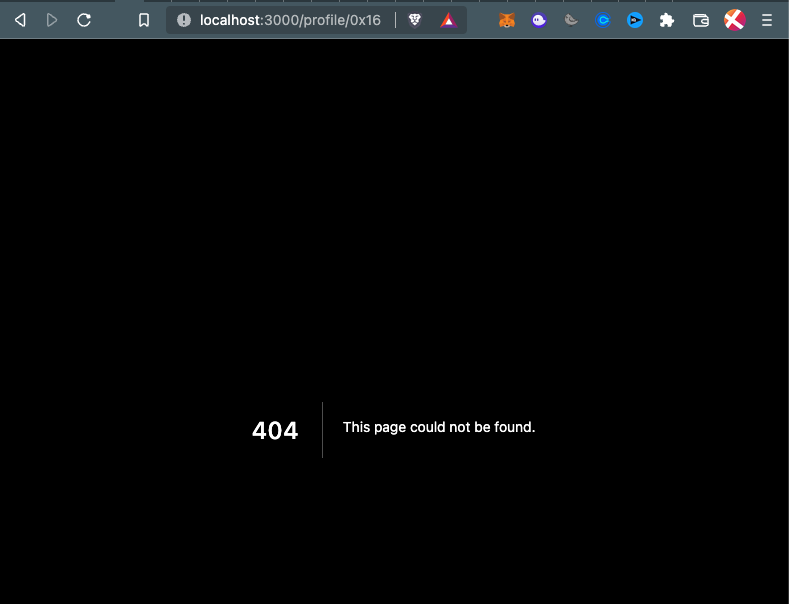
404! oh no
Have no fear, in the next step let's build out this page and make a second GraphQL query to fetch Publications (aka "posts" like on other social media platforms).
Step 3. Create individual profile pages
One of the coolest things about building quickly with the Next.js framework is the routing! For our individual profile pages, all we have to do to create the page is to make a folder under the pages folder that has the same name as our Profile component. And then add an [id].js file that can be used for any dynamic id passed into the route!
Here's what I mean:
road-to-lens % mkdir pages/profile
road-to-lens % touch pages/profile/\[id\].js
We'll fill out the pages/profile/[id].js file in a second. But with this file structure in place, our Next.js app will be able to serve requests for URLs such as:
So let's finish this out by setting up a new GraphQL request to the Lens API to fetch profile information, and then we'll wrap up by building the component in the [id].js file.
For fetching individual profile info, let's create a GraphQL document as we did earlier for fetching the entire recommended profiles list:
road-to-lens % touch queries/fetchProfileQuery.js
// queries/fetchProfileQuery.js

import { gql } from '@apollo/client';

export default gql`
query($request: SingleProfileQueryRequest!) {
    profile(request: $request) {
        id
        name
        bio
        attributes {
          displayType
          traitType
          key
          value
        }
        followNftAddress
        metadata
        isDefault
        picture {
          ... on NftImage {
            contractAddress
            tokenId
            uri
            verified
          }
          ... on MediaSet {
            original {
              url
              mimeType
            }
          }
          __typename
        }
        handle
        coverPicture {
          ... on NftImage {
            contractAddress
            tokenId
            uri
            verified
          }
          ... on MediaSet {
            original {
              url
              mimeType
            }
          }
          __typename
        }
        ownedBy
        dispatcher {
          address
          canUseRelay
        }
        stats {
          totalFollowers
          totalFollowing
          totalPosts
          totalComments
          totalMirrors
          totalPublications
          totalCollects
        }
        followModule {
          ... on FeeFollowModuleSettings {
            type
            amount {
              asset {
                symbol
                name
                decimals
                address
              }
              value
            }
            recipient
          }
          ... on ProfileFollowModuleSettings {
            type
          }
          ... on RevertFollowModuleSettings {
            type
          }
        }
    }
  }
`;
Now let's use this query in the individual profile page!
// pages/profile/[id].js

import { useQuery } from "@apollo/client";
import { useRouter } from "next/router";
import fetchProfileQuery from "../../queries/fetchProfileQuery.js";

import Profile from "../../components/Profile.js";

export default function ProfilePage() {
  const router = useRouter();
  const { id } = router.query;

  console.log("fetching profile for", id);
  const { loading, error, data } = useQuery(fetchProfileQuery, {
    variables: { request: { profileId: id } },
  });

  if (loading) return "Loading..";
  if (error) return `Error! ${error.message}`;

  console.log("on profile page data: ", data);

  return <Profile profile={data.profile} displayFullProfile={true}/>
}
If you take a look at the file we've added, you'll see a familiar useQuery() call that takes in the fetchProfileQuery GraphQL document imported from "../../queries/fetchProfileQuery.js".
What's new is that we're also now introducing the useRouter() hook. This hook allows us to grab whatever the variable [id] value is from the query params in the url at runtime, and then use that in our code.
That means that if we have these URLs:
The useRouter() call would fetch the following ids for const { id } = router.query; :
- 0x9752
- 0x25c4
And then we use those ids to pass into the fetchProfileQuery so that we can grab just the profile of the person we're browsing through in the moment. You can find the full documentation for the Get Profile request here.
Ok. Hit save. Refresh the page! What do you see?
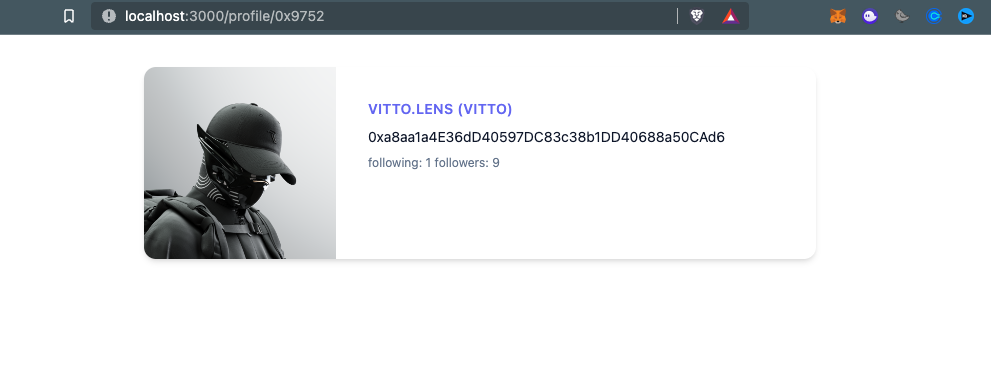
id: 0x9752
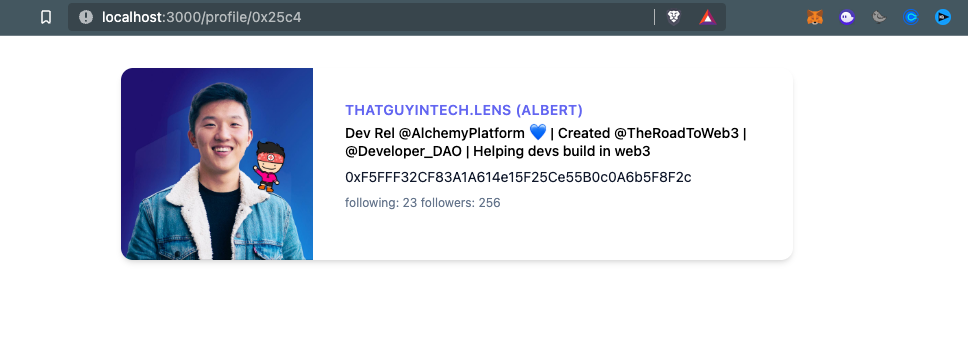
id: 0x25c4
It's Vitto and me!!
Alright if everything is going well for you so far -- make sure to celebrate this milestone (or ask for help if you're stuck).
Take a screenshot of a profile, and then:
- Share it on Twitter: https://twitter.com/TheRoadToWeb3
- Share it on Telegram: https://t.me/+kSVKod0rKbNkOTA5
- Share it in Discord: https://discord.gg/7HDgyH7u2v
You're more than halfway there!
Step 4. Load user posts on the profile page
Let's make the profile pages a little more interesting by fetching some of the posts that the user has made.
In Lens Protocol -- posts, comments, and mirrors (aka "re-tweets") -- are all classified under the Publications data model.
You can find the documentation for the Publication endpoints here. We will be focusing on the GET Publication operation.
Once again, let's follow the same order of:
- Set up the GraphQL query document.
- Update the profile page to use the new GraphQL query.
- Create a new component definition for "posts".
- Pass the data returned from Lens API into the new components.
- Test and debug the page!
1. Set up the GraphQL query document
This time we won't need a brand new document file. We can modify the query we started in fetchProfileQuery.js to also ask for publications in the same request. That's the power of GraphQL! Unlike REST API calls, you can request as much or as little as you want in a single request. Let's make this update to queries/fetchProfileQuery.js:
import { gql } from "@apollo/client";

export default gql`
  query (
    $request: SingleProfileQueryRequest!
    $publicationsRequest: PublicationsQueryRequest!
  ) {
    publications( request: $publicationsRequest) {
      items {
        __typename
        ... on Post {
          ...PostFields
        }
        ... on Comment {
          ...CommentFields
        }
        ... on Mirror {
          ...MirrorFields
        }
      }
      pageInfo {
        prev
        next
        totalCount
      }
    }
    profile(request: $request) {
      id
      name
      bio
      attributes {
        displayType
        traitType
        key
        value
      }
      followNftAddress
      metadata
      isDefault
      picture {
        ... on NftImage {
          contractAddress
          tokenId
          uri
          verified
        }
        ... on MediaSet {
          original {
            url
            mimeType
          }
        }
        __typename
      }
      handle
      coverPicture {
        ... on NftImage {
          contractAddress
          tokenId
          uri
          verified
        }
        ... on MediaSet {
          original {
            url
            mimeType
          }
        }
        __typename
      }
      ownedBy
      dispatcher {
        address
        canUseRelay
      }
      stats {
        totalFollowers
        totalFollowing
        totalPosts
        totalComments
        totalMirrors
        totalPublications
        totalCollects
      }
      followModule {
        ... on FeeFollowModuleSettings {
          type
          amount {
            asset {
              symbol
              name
              decimals
              address
            }
            value
          }
          recipient
        }
        ... on ProfileFollowModuleSettings {
          type
        }
        ... on RevertFollowModuleSettings {
          type
        }
      }
    }
  }

  fragment MediaFields on Media {
    url
    mimeType
  }

  fragment ProfileFields on Profile {
    id
    name
    bio
    attributes {
      displayType
      traitType
      key
      value
    }
    isFollowedByMe
    isFollowing(who: null)
    followNftAddress
    metadata
    isDefault
    handle
    picture {
      ... on NftImage {
        contractAddress
        tokenId
        uri
        verified
      }
      ... on MediaSet {
        original {
          ...MediaFields
        }
      }
    }
    coverPicture {
      ... on NftImage {
        contractAddress
        tokenId
        uri
        verified
      }
      ... on MediaSet {
        original {
          ...MediaFields
        }
      }
    }
    ownedBy
    dispatcher {
      address
    }
    stats {
      totalFollowers
      totalFollowing
      totalPosts
      totalComments
      totalMirrors
      totalPublications
      totalCollects
    }
    followModule {
      ... on FeeFollowModuleSettings {
        type
        amount {
          asset {
            name
            symbol
            decimals
            address
          }
          value
        }
        recipient
      }
      ... on ProfileFollowModuleSettings {
        type
      }
      ... on RevertFollowModuleSettings {
        type
      }
    }
  }

  fragment PublicationStatsFields on PublicationStats {
    totalAmountOfMirrors
    totalAmountOfCollects
    totalAmountOfComments
  }

  fragment MetadataOutputFields on MetadataOutput {
    name
    description
    content
    media {
      original {
        ...MediaFields
      }
    }
    attributes {
      displayType
      traitType
      value
    }
  }

  fragment Erc20Fields on Erc20 {
    name
    symbol
    decimals
    address
  }

  fragment CollectModuleFields on CollectModule {
    __typename
    ... on FreeCollectModuleSettings {
      type
      followerOnly
      contractAddress
    }
    ... on FeeCollectModuleSettings {
      type
      amount {
        asset {
          ...Erc20Fields
        }
        value
      }
      recipient
      referralFee
    }
    ... on LimitedFeeCollectModuleSettings {
      type
      collectLimit
      amount {
        asset {
          ...Erc20Fields
        }
        value
      }
      recipient
      referralFee
    }
    ... on LimitedTimedFeeCollectModuleSettings {
      type
      collectLimit
      amount {
        asset {
          ...Erc20Fields
        }
        value
      }
      recipient
      referralFee
      endTimestamp
    }
    ... on RevertCollectModuleSettings {
      type
    }
    ... on TimedFeeCollectModuleSettings {
      type
      amount {
        asset {
          ...Erc20Fields
        }
        value
      }
      recipient
      referralFee
      endTimestamp
    }
  }

  fragment PostFields on Post {
    id
    profile {
      ...ProfileFields
    }
    stats {
      ...PublicationStatsFields
    }
    metadata {
      ...MetadataOutputFields
    }
    createdAt
    collectModule {
      ...CollectModuleFields
    }
    referenceModule {
      ... on FollowOnlyReferenceModuleSettings {
        type
      }
    }
    appId
    hidden
    mirrors(by: null)
    hasCollectedByMe
  }

  fragment MirrorBaseFields on Mirror {
    id
    profile {
      ...ProfileFields
    }
    stats {
      ...PublicationStatsFields
    }
    metadata {
      ...MetadataOutputFields
    }
    createdAt
    collectModule {
      ...CollectModuleFields
    }
    referenceModule {
      ... on FollowOnlyReferenceModuleSettings {
        type
      }
    }
    appId
    hidden
    hasCollectedByMe
  }

  fragment MirrorFields on Mirror {
    ...MirrorBaseFields
    mirrorOf {
      ... on Post {
        ...PostFields
      }
      ... on Comment {
        ...CommentFields
      }
    }
  }

  fragment CommentBaseFields on Comment {
    id
    profile {
      ...ProfileFields
    }
    stats {
      ...PublicationStatsFields
    }
    metadata {
      ...MetadataOutputFields
    }
    createdAt
    collectModule {
      ...CollectModuleFields
    }
    referenceModule {
      ... on FollowOnlyReferenceModuleSettings {
        type
      }
    }
    appId
    hidden
    mirrors(by: null)
    hasCollectedByMe
  }

  fragment CommentFields on Comment {
    ...CommentBaseFields
    mainPost {
      ... on Post {
        ...PostFields
      }
      ... on Mirror {
        ...MirrorBaseFields
        mirrorOf {
          ... on Post {
            ...PostFields
          }
          ... on Comment {
            ...CommentMirrorOfFields
          }
        }
      }
    }
  }

  fragment CommentMirrorOfFields on Comment {
    ...CommentBaseFields
    mainPost {
      ... on Post {
        ...PostFields
      }
      ... on Mirror {
        ...MirrorBaseFields
      }
    }
  }
`;
Note that we did add a new query input arg: $publicationsRequest: PublicationsQueryRequest!. This is something we'll have to make sure we pass in as an input argument when we fire the query.
3. Update the profile page to use the new GraphQL query.
On the profile page, the only thing we really need to do for this step is to add the publication request for the posts that we want. The request itself should look like this:
publicationsRequest: {
  profileId: id,
  publicationTypes: ["POST"], // We really only want POSTs
},
So let's add it into the useQuery input argument options:
// pages/profile/[id].js

import { useQuery, useMutation } from "@apollo/client";
import { useRouter } from "next/router";
import fetchProfileQuery from "../../queries/fetchProfileQuery.js";
import Profile from "../../components/Profile.js";

export default function ProfilePage() {
  const router = useRouter();
  const { id } = router.query;

  console.log("fetching profile for", id);
  const { loading, error, data } = useQuery(fetchProfileQuery, {
    variables: {
      request: { profileId: id },
      publicationsRequest: {
        profileId: id,
        publicationTypes: ["POST"], // We really only want POSTs
      },
    },
  });

  if (loading) return "Loading..";
  if (error) return `Error! ${error.message}`;

  console.log("on profile page data: ", data);
  return (
    <div className="flex flex-col p-8 items-center">
      <Profile profile={data.profile} displayFullProfile={true} />
    </div>
  );
}
3. Create a new component definition for "posts".
We need a new React component to display the data retrieved regarding the user's posts. Let's create one in components/Post.js:
// components/Post.js
export default function Post(props) {
  const post = props.post;

  return (
    <div className="p-8">
      <div className="max-w-md mx-auto bg-white rounded-xl shadow-md overflow-hidden md:max-w-2xl">
        <div className="md:flex">
          <div className="p-8">
            <p className="mt-2 text-xs text-slate-500 whitespace-pre-line">
              {post.metadata.content}
            </p>
          </div>
        </div>
      </div>
    </div>
  );
}
If you compare this simple component with the Profile component, you'll see that they both follow a very simple pattern, which is that they accept a props object that has the data needed by the component to render certain parts of it.
In this case, we only really need one core piece of information from the posts:
post.metadata.content
Given that this metadata field was the only one we needed, you can actually go back to the GraphQL document later and delete fields that we aren't using in the end feature.
This component also uses Tailwind CSS to style.
4. Pass the data returned from Lens API into the new components
Back to the profile page (pages/profile/[id].js):
Now we can import the <Post/> component onto the profile page and use it to render all the posts we get back from the API.
import { useQuery, useMutation } from "@apollo/client";
import { useRouter } from "next/router";
import fetchProfileQuery from "../../queries/fetchProfileQuery.js";
import Profile from "../../components/Profile.js";
import Post from "../../components/Post.js";

export default function ProfilePage() {
  const router = useRouter();
  const { id } = router.query;

  console.log("fetching profile for", id);
  const { loading, error, data } = useQuery(fetchProfileQuery, {
    variables: {
      request: { profileId: id },
      publicationsRequest: {
        profileId: id,
        publicationTypes: ["POST"],
      },
    },
  });

  if (loading) return "Loading..";
  if (error) return `Error! ${error.message}`;

  return (
    <div className="flex flex-col p-8 items-center">
      <Profile profile={data.profile} displayFullProfile={true} />
      {data.publications.items.map((post, idx) => {
        return <Post key={idx} post={post}/>;
      })}
    </div>
  );
}
Notice near the bottom of the snippet that it was really these lines of code:
      {data.publications.items.map((post, idx) => {
        return <Post key={idx} post={post}}/>;
      })}
that are doing the heavy lifting in this step. But with it added, we should be able to try out our posts feature!
5. Test and debug
If all goes well, you should now be able to see posts populated under the profile card! 🎉
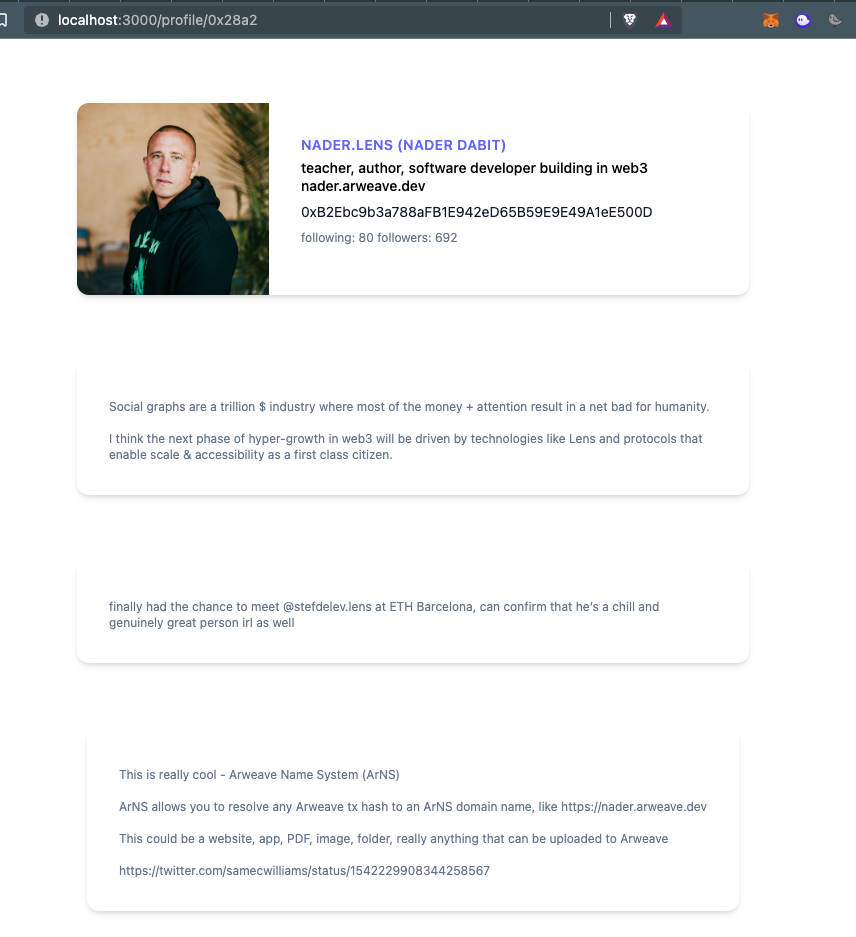
Congratulations, you're well on your way to becoming a decentralized social media developer :)
Other APIs and Resources
Hopefully, by this point, you've completed a number of the other Road To Web3 challenges and you enjoyed the process of getting to this point. This week's lesson was all about how to use APIs that are built on top of NFTs and a decentralized protocol.
I highly recommend you take time out to explore the Lens Documentation, try out different endpoints, and read through the sample code hosted in this repo:
Here are some other web3 apis on the cutting edge:
- The MintKudos PoK Tokens APIs - created by Kei @ Contribution Labs
- Lit Protocol SDK and tutorial - created by Deb @ Lit Protocol
With these tools and data access in your hands, I'm really excited to see what y'all come up with 🙂
A Web3 Yoga Social Network?
An exclusive hangout spot only for Road to Web3 PoK token holders?
A new-age online classroom where teachers get paid directly by students for the content and education piece by piece via your dapp?
The possibilities are endless 🔥
Challenges
This week's content is complex, so the challenge options I'm giving you are intentionally vague so that you can explore however you'd like. Pick at least one of the options below and see where you can get with it!
- Using the Lens API, query a new piece of information that was not covered in the tutorial and display it on your site.
- Using the Lens API, figure out how to do authentication and mutations for actions such as reacting, following, or creating new publications.
- Deploy your application to the world wide web, using a service like Repl.it or Vercel.
- Use the Lit Protocol SDK to token-gate access to your Lens protocol posts so that only MintKudos token holders can view them.
Congratulations!
You have successfully learned how to navigate, query, and build using the Lens Protocol! 🔥
Want the video version of this tutorial? Subscribe to the Alchemy YouTube channel and join our Discord community to find thousands of developers ready to help you out!
Updated almost 2 years ago

