How to set up the MetaMask SDK
Learn how to set up a full-stack application using React, ethers.js and the MetaMask SDK.

Build a Full-stack dApp using MetaMask SDK
If you want an awesome wallet experience, here is a guide on how to switch the native RPC endpoint on your MetaMask wallet to an Alchemy RPC endpoint - this will let you see analytics on your own wallet activity! 🔥
1. Introduction
This tutorial will cover how to:
- deploy a simple smart contract
- set up a front-end UI
- use the MetaMask SDK to establish a bridge connection between your front-end and a blockchain (Ethereum, Arbitrum, Sepolia, etc)
Feel free to write your own smart contract, otherwise we'll use a simple Faucet.sol smart contract as the defacto database to our React front-end as an easy example of how to power a website using a smart contract - how cool! Once we deploy a smart contract to the Sepolia test network, we'll use the powerful MetaMask SDK to establish a connection to our front-end. Here's a visual of the application stack you'll build in this tutorial:

Let's go! 🏃♀️
2. Pre-Requisites
This tutorial requires the following are installed in order to run a successful local development environment:
- Install Node.js. You need version
14.5.0or higher. - Install PNPM: To install PNPM, run the following command in Terminal:
npm install -g pnpm
Hint: If you're building React-based apps, you might want to consider using PNPM instead of NPM for package management. PNPM is more space-efficient than NPM, which means it can save you disk space and reduce installation times. Additionally, PNPM is supported by most React-based apps, so you can use it with tools like Create React App without any issues. This tutorial will use PNPM because pnpm is cool and fast! 🔥
3. Build the front-end
Set up using npx create-react-app
npx create-react-app- Open a terminal on your computer and
cdinto a directory of your choice
You'll see
cda lot in this tutorial!cdis a terminal command that stands forChange Directory. 👀
- Run
npx create-react-app my-dapp - After installation, your terminal should show, the next steps: run
cd my-dappand then runnpm start- this should start up your very own local development server!
Good looks! 🔥 You've just gotten the starter code React app up and running on http://localhost:3000/:

As the app says, let's edit the App.js file in the /src folder and connect this website to a smart contract already deployed Sepolia test network.
Customize and Style Application
The smart contract we'll integrate with is a Sepolia-based faucet smart contract. A faucet smart contract is cool because we can deposit some SepoliaETH to the smart contract and you can have your buddies withdraw to their own accounts - and we'll faciliate this with our brand new application of course!
Let's add some simple customizations and styling to our application:
- Copy-paste the following into your
App.jsfile:
import { useState } from "react";
import "./App.css";

function App() {
  const [walletBalance, setWalletBalance] = useState(0);
  const [faucetBalance, setFaucetBalance] = useState(0);
  return (
    <div className="container">
      <h1 className="title">
        My Faucet dApp! 🚰
        <span className="subtitle">
          This faucet allows you or your friends to withdraw .01 SepoliaETH per
          account!
        </span>
      </h1>
      <div className="balance-container">
        <h2 className="balance-item">Faucet Balance: {faucetBalance}Ξ</h2>
        <h2 className="balance-item">My Wallet Balance: {walletBalance} Ξ</h2>
      </div>
      <div className="button-container">
        <button className="button">Withdraw .01 ETH</button>
        <button className="button">Deposit .01 ETH</button>
      </div>
    </div>
  );
}

export default App;
This code forms the basic structure of your user-facing application. Notice, we are setting up two buttons:
Withdraw .01 ETHDeposit .01 ETH
But clicking them doesn't do anything just yet! We'll need to rig em up to the blockchain! ⚡️
- For css styling, copy-paste the following into your
App.cssfile:
.container {
  display: flex;
  flex-direction: column;
  align-items: center;
  margin: 2rem;
}

.title {
  font-size: 3rem;
  margin-bottom: 1rem;
  text-align: center;
}

.subtitle {
  display: block;
  font-size: 1rem;
  margin-top: 1rem;
}

.balance-container {
  display: flex;
  flex-direction: column;
  align-items: center;
  margin-bottom: 2rem;
}

.balance-item {
  font-size: 2rem;
  margin-right: 1rem;
}

.button-container {
  display: flex;
  justify-content: center;
  overflow: hidden;
  margin-top: 2rem;
  margin-bottom: 2rem;
}

.button {
  font-size: 1.5rem;
  padding: 1rem 2rem;
  background-color: #00bfff;
  color: white;
  border: none;
  border-radius: 0.5rem;
  cursor: pointer;
  transition: background-color 0.3s ease-in-out;
  margin-right: 1rem;
}

.button:last-child {
  margin-right: 0;
}

.button:hover {
  background-color: #0077b3;
}

.button:active {
  background-color: #005580;
}

@media screen and (max-width: 768px) {
  .title {
    font-size: 2rem;
  }

  .balance-item {
    font-size: 1.5rem;
  }

  .button {
    font-size: 1rem;
    padding: 0.5rem 1rem;
  }
}
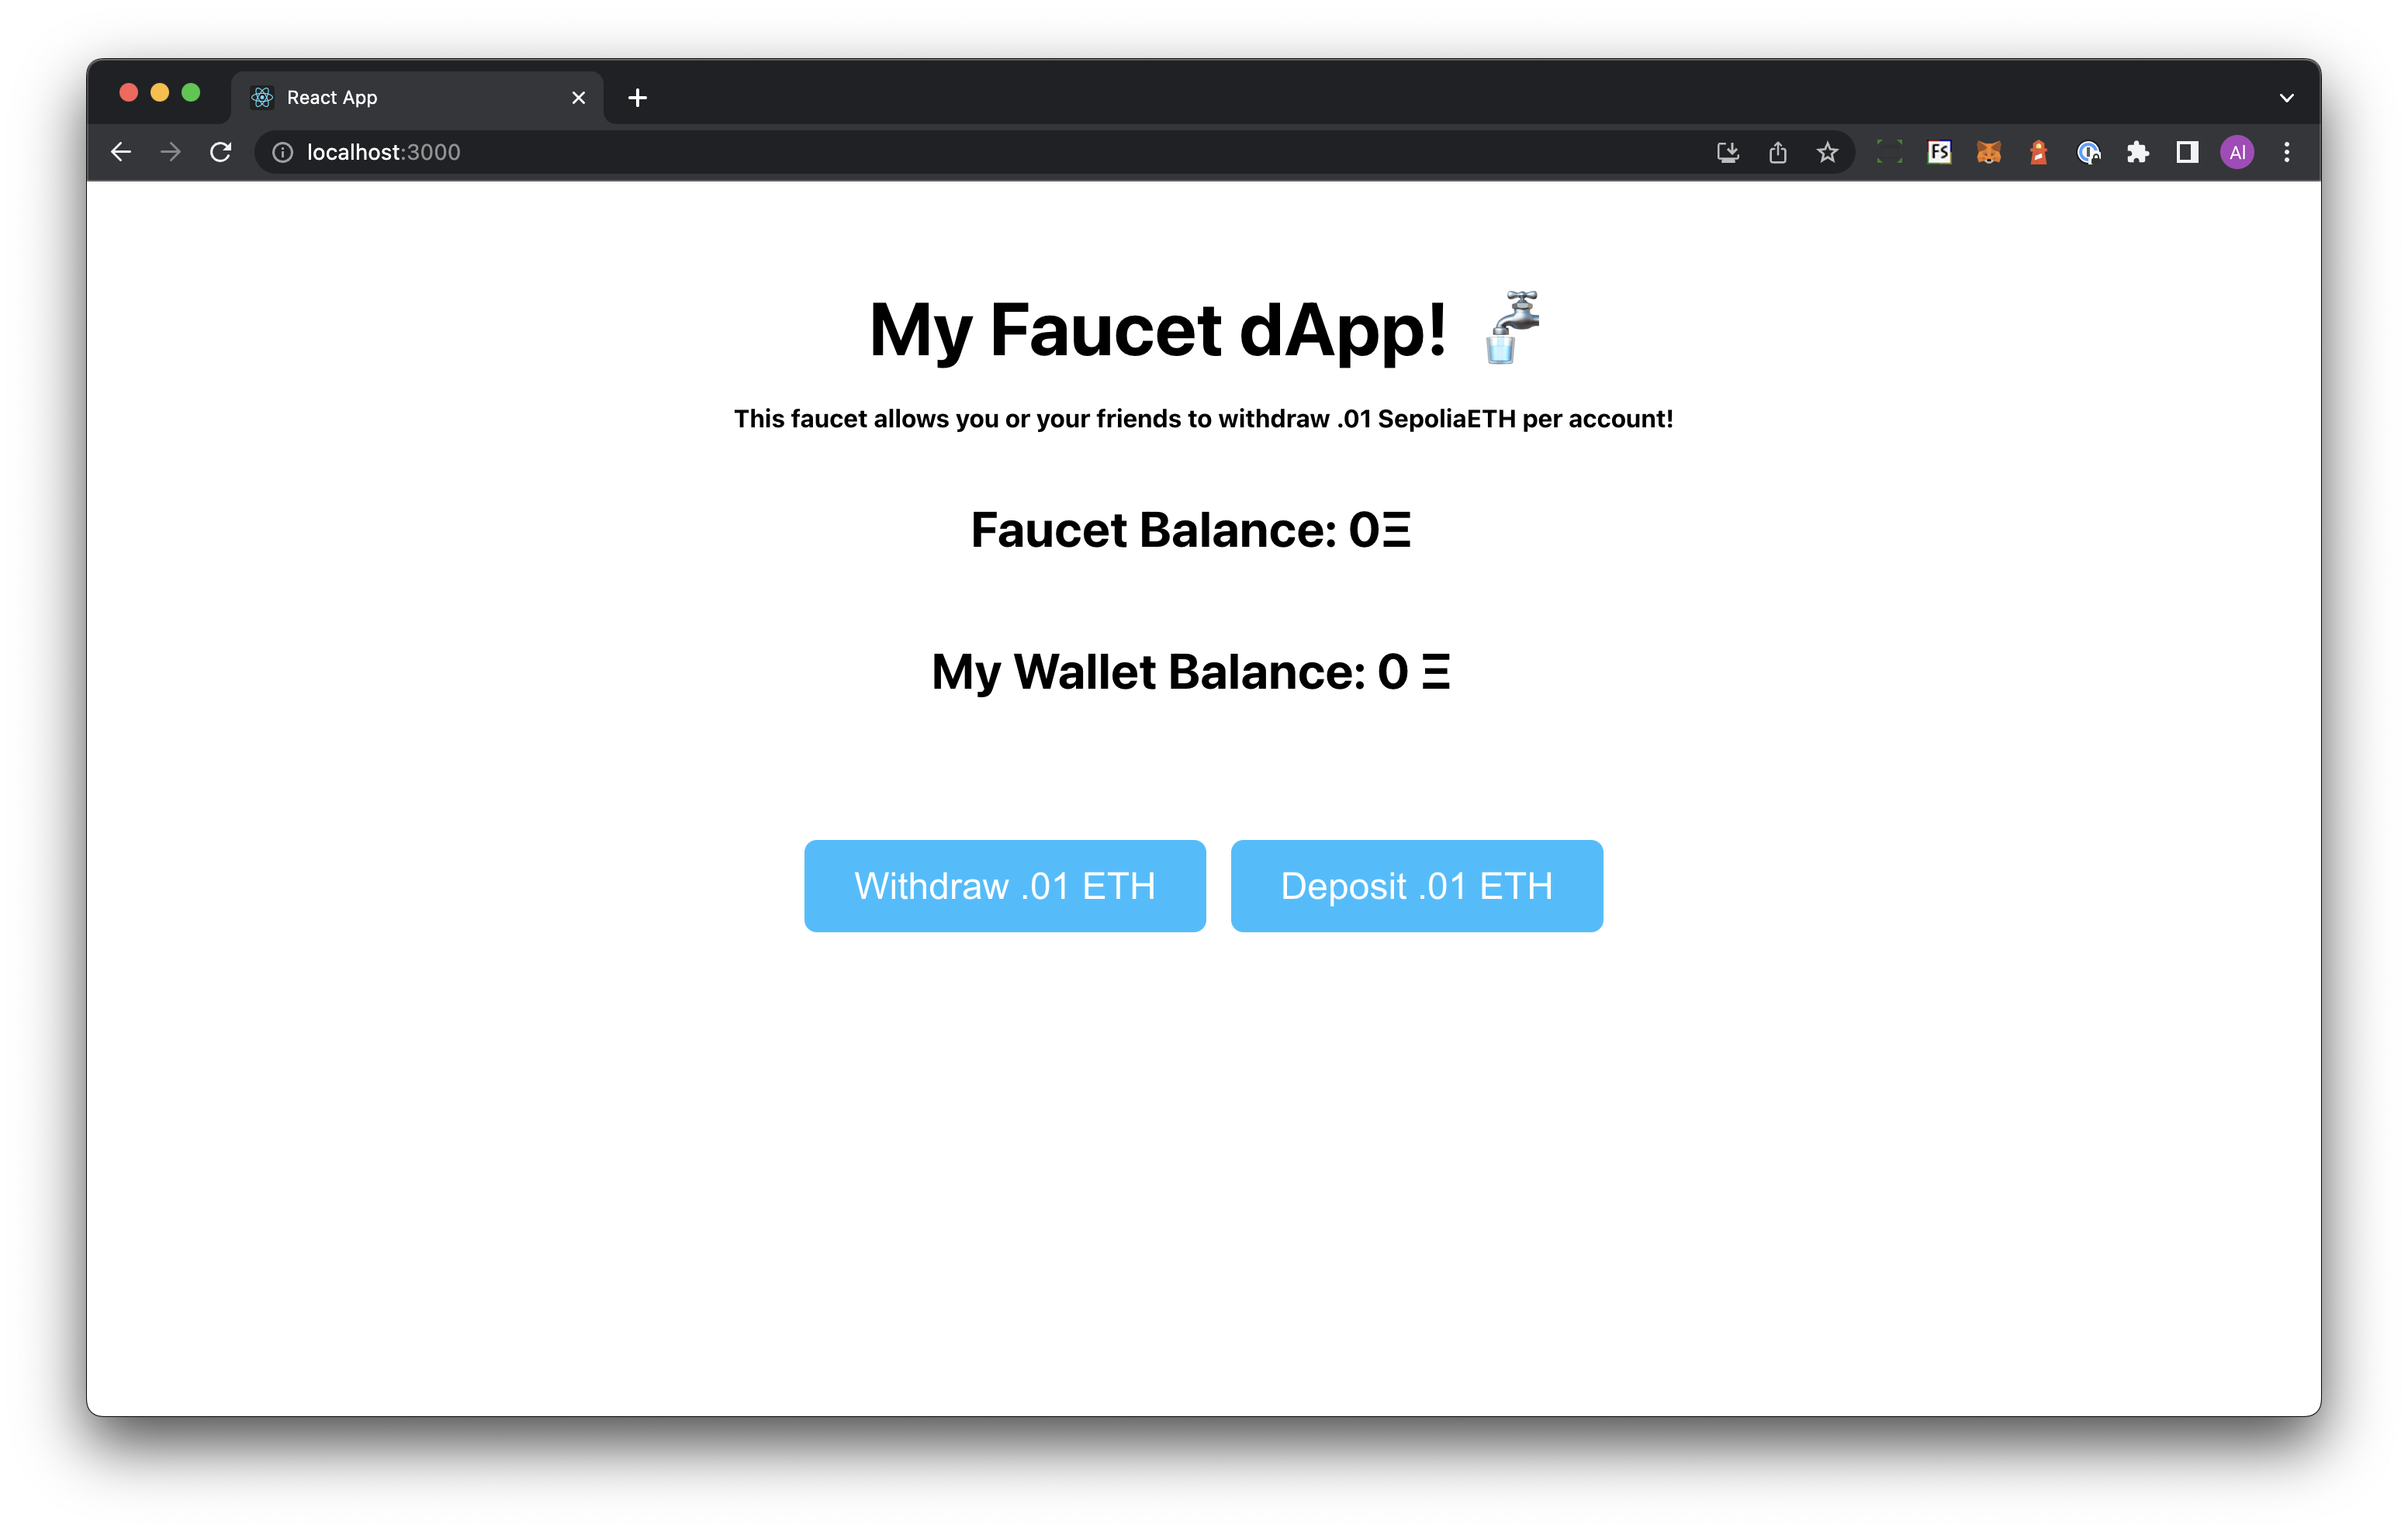
Your app on http://localhost:3000 should now look like this:

The front-end looks decent enough! But wait... the buttons don't work... Well, that's because they're not rigged to anything yet! In the next step, we'll use the MetaMask SDK to programmatically connect this application to the Sepolia test network (or any chain you prefer!) and read/write to a faucet smart contract located at: https://sepolia.etherscan.io/address/0x9bdcbc868519cf2907ece4e9602346c3fc9e6c8e.
Calling all you styling and UX gurus! 📞 How can you make this UI/UX experience better for the user? 👀
4. Use the MetaMask SDK to Connect to a Blockchain
Now that a working front-end is built, let's turn this application into a decentralized application by connecting it to a decentralized blockchain network, in our case to this faucet smart contract on the Sepolia network.
- In the terminal where your project is running, start a new tab and run
pnpm i @metamask/sdk
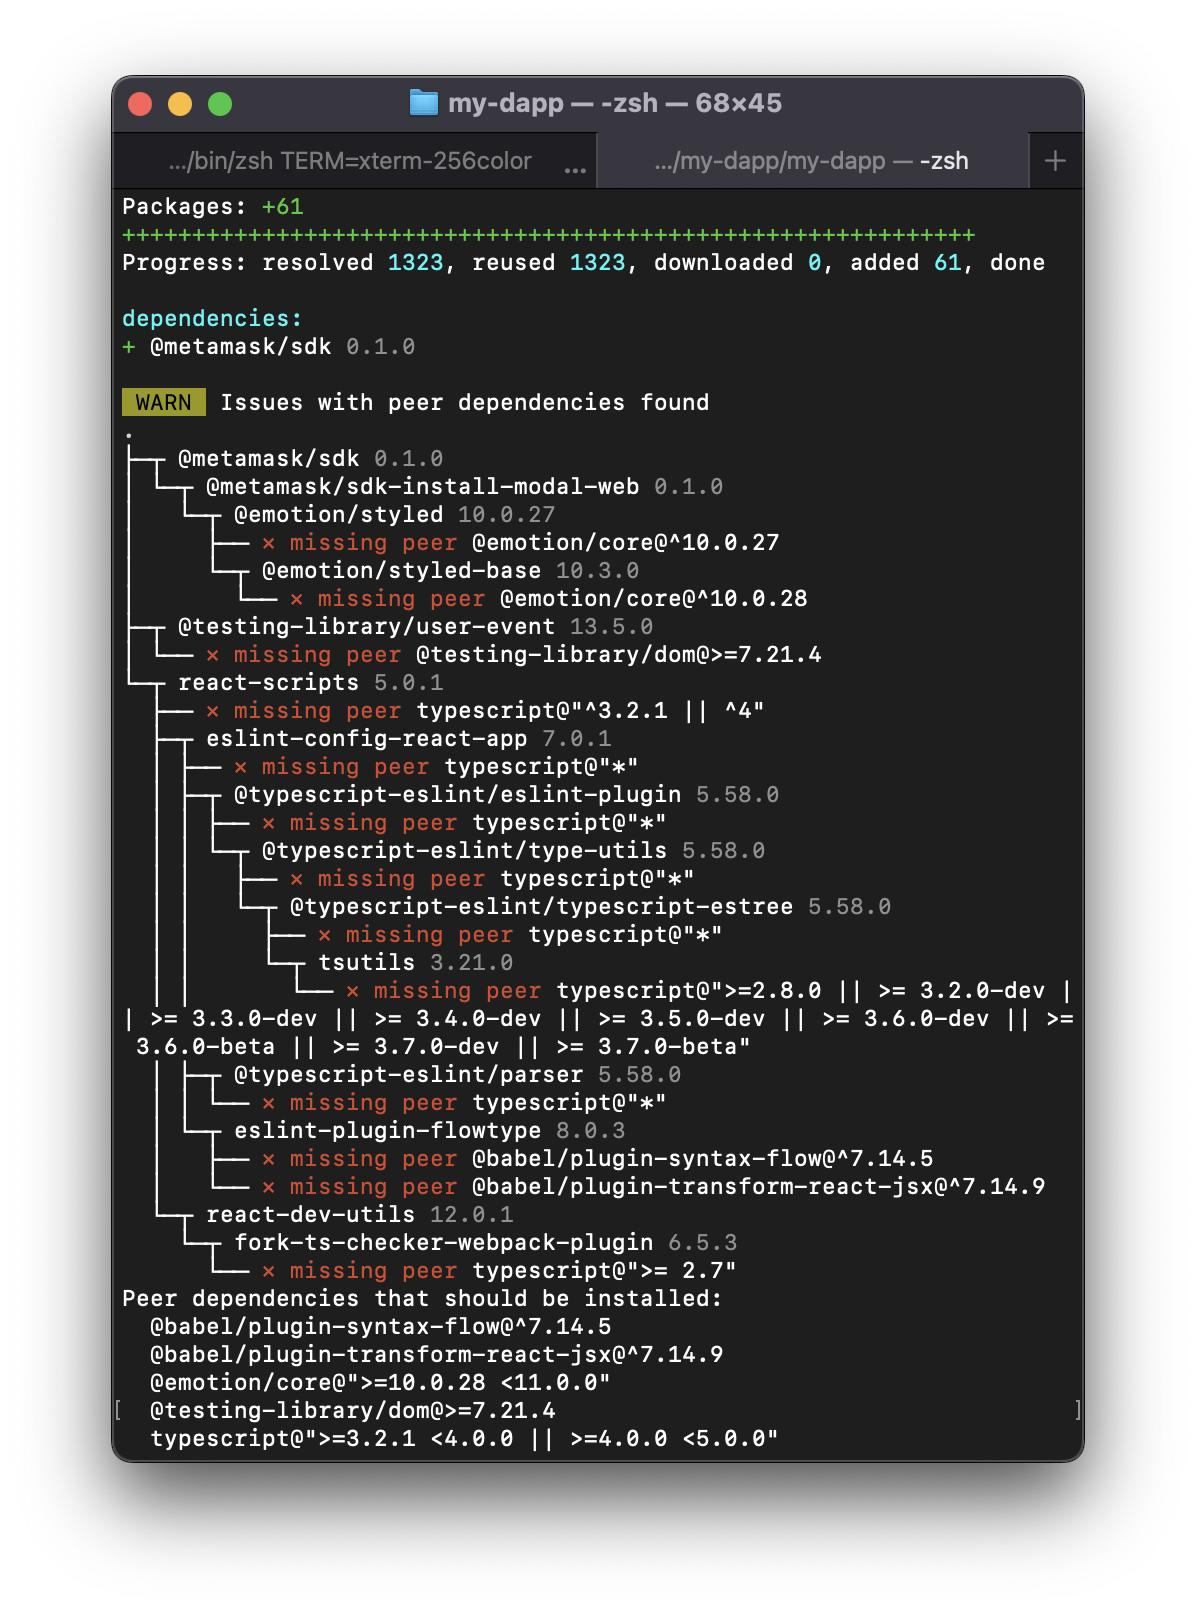
You should see the @metamask/sdk get installed as a project dependency! (You can verify this by checking the dependencies in your project's package.json file!) Your terminal might also show additional peer dependencies that need to be installed, like this:

You must install each needed dependency one-by-one! Just copy-paste each dependency name and pnpm install it, like this:
pnpm install "@babel/plugin-syntax-flow@^7.14.5"
If you get a
zsh: no matches found: @babel/plugin-syntax-flow@^7.14.5, remember to wrap the package names in string quotations, this means your shell is treating the package as a file instead of a package. Wrap the package name it is complaining about, including@versionnumbers, in string quotations for the shell to know it is a package and no longer show an error like that. 👀
Keep doing this until your terminal no longer lists additional peer dependencies to install. 🏗️
-
We'll also use ethers.js, run
pnpm i ethers -
Now, let's make some changes to our React code and add a buuuunch of functionality that, thanks to the MetaMask SDK, we can easily port into our application. In your
App.js, copy-paste the following:
import MetaMaskSDK from "@metamask/sdk";
import { ethers } from "ethers";
import { useEffect, useState } from "react";
import "./App.css";

// MetaMask SDK initialization
const MMSDK = new MetaMaskSDK();
const ethereum = MMSDK.getProvider(); // You can also access via window.ethereum

// This app will only work on Sepolia to protect users
const SEPOLIA_CHAIN_ID = "0xAA36A7";

// Faucet contract initialization
const provider = new ethers.providers.Web3Provider(ethereum, "any");
const FAUCET_CONTRACT_ADDRESS = "0x9BdCbC868519Cf2907ECE4E9602346c3fC9e6c8e";
const abi = [
	{
		"inputs": [],
		"name": "withdraw",
		"outputs": [],
		"stateMutability": "nonpayable",
		"type": "function"
	},
];
const faucetContract = new ethers.Contract(
  FAUCET_CONTRACT_ADDRESS,
  abi,
  provider.getSigner()
);

function App() {
  // useState hooks to keep track of changing figures
  const [walletBalance, setWalletBalance] = useState(0);
  const [faucetBalance, setFaucetBalance] = useState(0);
  const [buttonText, setButtonText] = useState("Connect");
  const [buttonDisabled, setButtonDisabled] = useState(false);
  const [onRightNetwork, setOnRightNetwork] = useState(false);
  // array populated by MetaMask onConnect
  const [accounts, setAccounts] = useState([]);
  const [isConnected, setIsConnected] = useState(
    accounts && accounts.length > 0
  );

  // MetaMask event listeners
  ethereum.on("chainChanged", handleNewNetwork);
  ethereum.on("accountsChanged", (newAccounts) => {
    handleNewAccounts(newAccounts);
    updateBalances();
  });

  // any time accounts changes, toggle state in the Connect button
  useEffect(() => {
    setIsConnected(accounts && accounts.length > 0);
  }, [accounts]);

  useEffect(() => {
    if (isConnected) {
      setButtonText("Connected");
      setButtonDisabled(true);
    } else {
      setButtonText("Connect");
      setButtonDisabled(false);
    }
  }, [isConnected]);

  // any time accounts changes, update the balances by checking blockchain again
  useEffect(() => {
    updateBalances();
  }, [accounts]);

  // helper function to protect users from using the wrong network
  // disables the withdraw/deposit buttons if not on Sepolia
  async function handleNewNetwork() {
    const chainId = await ethereum.request({
      method: "eth_chainId",
    });
    console.log(chainId);
    if (chainId != 0xaa36a7) {
      setOnRightNetwork(false);
    } else {
      setOnRightNetwork(true);
    }
  }

  // uses MM SDK to query latest Faucet and user wallet balance
  async function updateBalances() {
    if (accounts.length > 0) {
      const faucetBalance = await ethereum.request({
        method: "eth_getBalance",
        params: [FAUCET_CONTRACT_ADDRESS, "latest"],
      });
      const walletBalance = await ethereum.request({
        method: "eth_getBalance",
        params: [accounts[0], "latest"],
      });
      setFaucetBalance(Number(faucetBalance) / 10 ** 18);
      setWalletBalance(Number(walletBalance) / 10 ** 18);
    }
  }

  // handles user connecting to MetaMask
  // will add Sepolia network if not already a network in MM
  // will switch to Sepolia (bug, can't currently do this)
  async function onClickConnect() {
    try {
      const newAccounts = await ethereum.request({
        method: "eth_requestAccounts",
      });
      handleNewAccounts(newAccounts);
      try {
        await window.ethereum.request({
          method: "wallet_switchEthereumChain",
          params: [{ chainId: SEPOLIA_CHAIN_ID }], // Check networks.js for hexadecimal network ids
        });
      } catch (e) {
        if (e.code === 4902) {
          try {
            await window.ethereum.request({
              method: "wallet_addEthereumChain",
              params: [
                {
                  chainId: SEPOLIA_CHAIN_ID,
                  chainName: "Sepolia Test Network",
                  rpcUrls: [
                    "https://eth-sepolia.g.alchemy.com/v2/amBOEhqEklW5j3LzVerBSnqoV_Wtz-ws",
                  ],
                  nativeCurrency: {
                    name: "Sepolia ETH",
                    symbol: "SEPETH",
                    decimals: 18,
                  },
                  blockExplorerUrls: ["https://sepolia.etherscan.io/"],
                },
              ],
            });
          } catch (e) {
            console.log(e);
          }
        }
      }
      setIsConnected(true);
      handleNewNetwork();
      console.log(onRightNetwork);
    } catch (error) {
      console.error(error);
    }
  }

  // hook to change state
  function handleNewAccounts(newAccounts) {
    setAccounts(newAccounts);
  }

  // withdraws .01 ETH from the faucet
  async function withdrawEther() {
    console.log(ethereum);
    // const provider = await alchemy.

    const tx = await faucetContract.withdraw({
      from: accounts[0],
    });
    await tx.wait();
    updateBalances();
  }

  // deposits .01 ETH to the faucet
  async function depositEther() {
    const signer = await provider.getSigner();

    const tx_params = {
      from: accounts[0],
      to: FAUCET_CONTRACT_ADDRESS,
      value: "10000000000000000",
    };

    const tx = await signer.sendTransaction(tx_params);
    await tx.wait();
    updateBalances();
  }

  return (
    <div className="container">
      <div className="wallet-container">
        <div className="wallet wallet-background">
          <div className="balance-container">
            <h1 className="address-item">My Wallet</h1>
            <p className="balance-item">
              <b>Address:</b> {accounts[0]}
            </p>
            <p className="balance-item">
              <b>Balance:</b> {walletBalance} Ξ
            </p>
            <button
              className="button"
              onClick={onClickConnect}
              disabled={buttonDisabled}
            >
              {buttonText}
            </button>
          </div>
        </div>
      </div>
      <div className="faucet-container">
        <h1 className="title">My Faucet dApp! 🚰</h1>
        <p className="subtitle">
          This faucet allows you or your friends to withdraw .01 SepoliaETH per
          account!
        </p>
        <h2 className="balance-item">Faucet Balance: {faucetBalance}Ξ</h2>
        <div className="button-container">
          <button
            onClick={withdrawEther}
            className="button"
            disabled={!isConnected || !onRightNetwork}
          >
            Withdraw .01 ETH
          </button>
          <button
            onClick={depositEther}
            className="button"
            disabled={!isConnected || !onRightNetwork}
          >
            Deposit .01 ETH
          </button>
        </div>
      </div>
      <div className="footer">
        {isConnected
          ? "Connected to MetaMask ✅"
          : "Not connected to MetaMask ❌"}
      </div>
    </div>
  );
}

export default App;
Let's do a quick breakdown of the important code components above, starting with:
The MetaMask SDK initialization:
// MetaMask SDK initialization
const MMSDK = new MetaMaskSDK();
const ethereum = MMSDK.getProvider();
Easy... 2 lines of code! 💥
Creating a Contract Instance instance using ethers.js
// Faucet contract initialization
const provider = new ethers.providers.Web3Provider(ethereum, "any");
const FAUCET_CONTRACT_ADDRESS = "0x9BdCbC868519Cf2907ECE4E9602346c3fC9e6c8e";
const abi = `[
	{
		"inputs": [],
		"name": "withdraw",
		"outputs": [],
		"stateMutability": "nonpayable",
		"type": "function"
	},
]`;
const faucetContract = new ethers.Contract(
  FAUCET_CONTRACT_ADDRESS,
  abi,
  provider.getSigner()
);
This code snippet:
- initializes a
providerby plugging in theethereumobject (fetched using the MM SDK) into the ethersWeb3Provider - declares the
FAUCET_CONTRACT_ADDRESS(can be found here), theabiof theFaucet'swithdrawmethod (necessary for our website to be able to communicate with the smart contract) - using all of the above, a
faucetContractinstance is created - this will be used to interact directly with the smart contract
Calling the Faucet's withdraw function
withdraw function// withdraws .01 ETH from the faucet
async function withdrawEther() {
console.log(ethereum);
// const provider = await alchemy.
const tx = await faucetContract.withdraw({
from: accounts[0],
});
await tx.wait();
updateBalances();
}
Using the faucetContract instance, you can directly call the withdraw function.
Note: the
abiwe are using is a minimal version that does not contain the entire contract interface! 👀
Donating .01 ether to the Faucet
.01 ether to the Faucet// deposits .01 ETH to the faucet
async function depositEther() {
const signer = await provider.getSigner();
const tx_params = {
from: accounts[0],
to: FAUCET_CONTRACT_ADDRESS,
value: "10000000000000000",
};
const tx = await signer.sendTransaction(tx_params);
await tx.wait();
updateBalances();
}
Since the Faucet contract contains a receive function, we can send it some ether as if it was any regular account. ⬆️
5. Add Final Styling 🎨
Your application must look like a total mess right now! No worries, let's add some basic styling to make it look a little better!
- In your
App.cssfile, copy-paste the following code snippet:
.container {
  display: flex;
  justify-content: center;
  align-items: center;
  height: 100vh;
  font-family: sans-serif;
  background-color: #fafafa;
}

.wallet-container {
  background-color: #f5f5f5;
  border-radius: 10px;
  box-shadow: 0 0 10px rgba(0, 0, 0, 0.2);
  padding: 20px;
  margin-right: 20px;
  min-width: 300px;
}

.wallet {
  display: flex;
  flex-direction: column;
  align-items: center;
}

.wallet .account-address {
  font-size: 20px;
  margin: 0;
}

.wallet .balance-container {
  display: flex;
  flex-direction: column;
  margin-top: 10px;
  text-align: center;
}

.balance-item {
  font-size: 20px;
  margin-top: 10px;
}

.faucet-container {
  display: flex;
  flex-direction: column;
  justify-content: center;
  align-items: center;
}

.title {
  font-size: 32px;
  margin: 0;
  margin-bottom: 10px;
  text-align: center;
}

.subtitle {
  font-size: 20px;
  margin: 0;
  margin-bottom: 20px;
  text-align: center;
}

.balance-item {
  font-size: 20px;
  margin: 0;
  margin-bottom: 10px;
  text-align: center;
}

.button-container {
  display: flex;
  justify-content: center;
  align-items: center;
}

.button {
  background-color: #4285f4;
  border: none;
  border-radius: 5px;
  color: white;
  cursor: pointer;
  font-size: 20px;
  margin: 10px;
  padding: 10px;
  text-align: center;
  text-decoration: none;
  transition: all 0.2s ease-in-out;
}

.button:hover {
  background-color: #ff9933;
}

.button:active {
  background-color: #ff9933;
  transform: translateY(2px);
}

.button[disabled] {
  background-color: #87aff9;
  cursor: not-allowed;
}

.connect-button-container {
  display: flex;
  justify-content: center;
  align-items: center;
  margin-top: 20px;
}

.footer {
  position: absolute;
  bottom: 20px;
  left: 0;
  right: 0;
  text-align: center;
  font-size: 16px;
}
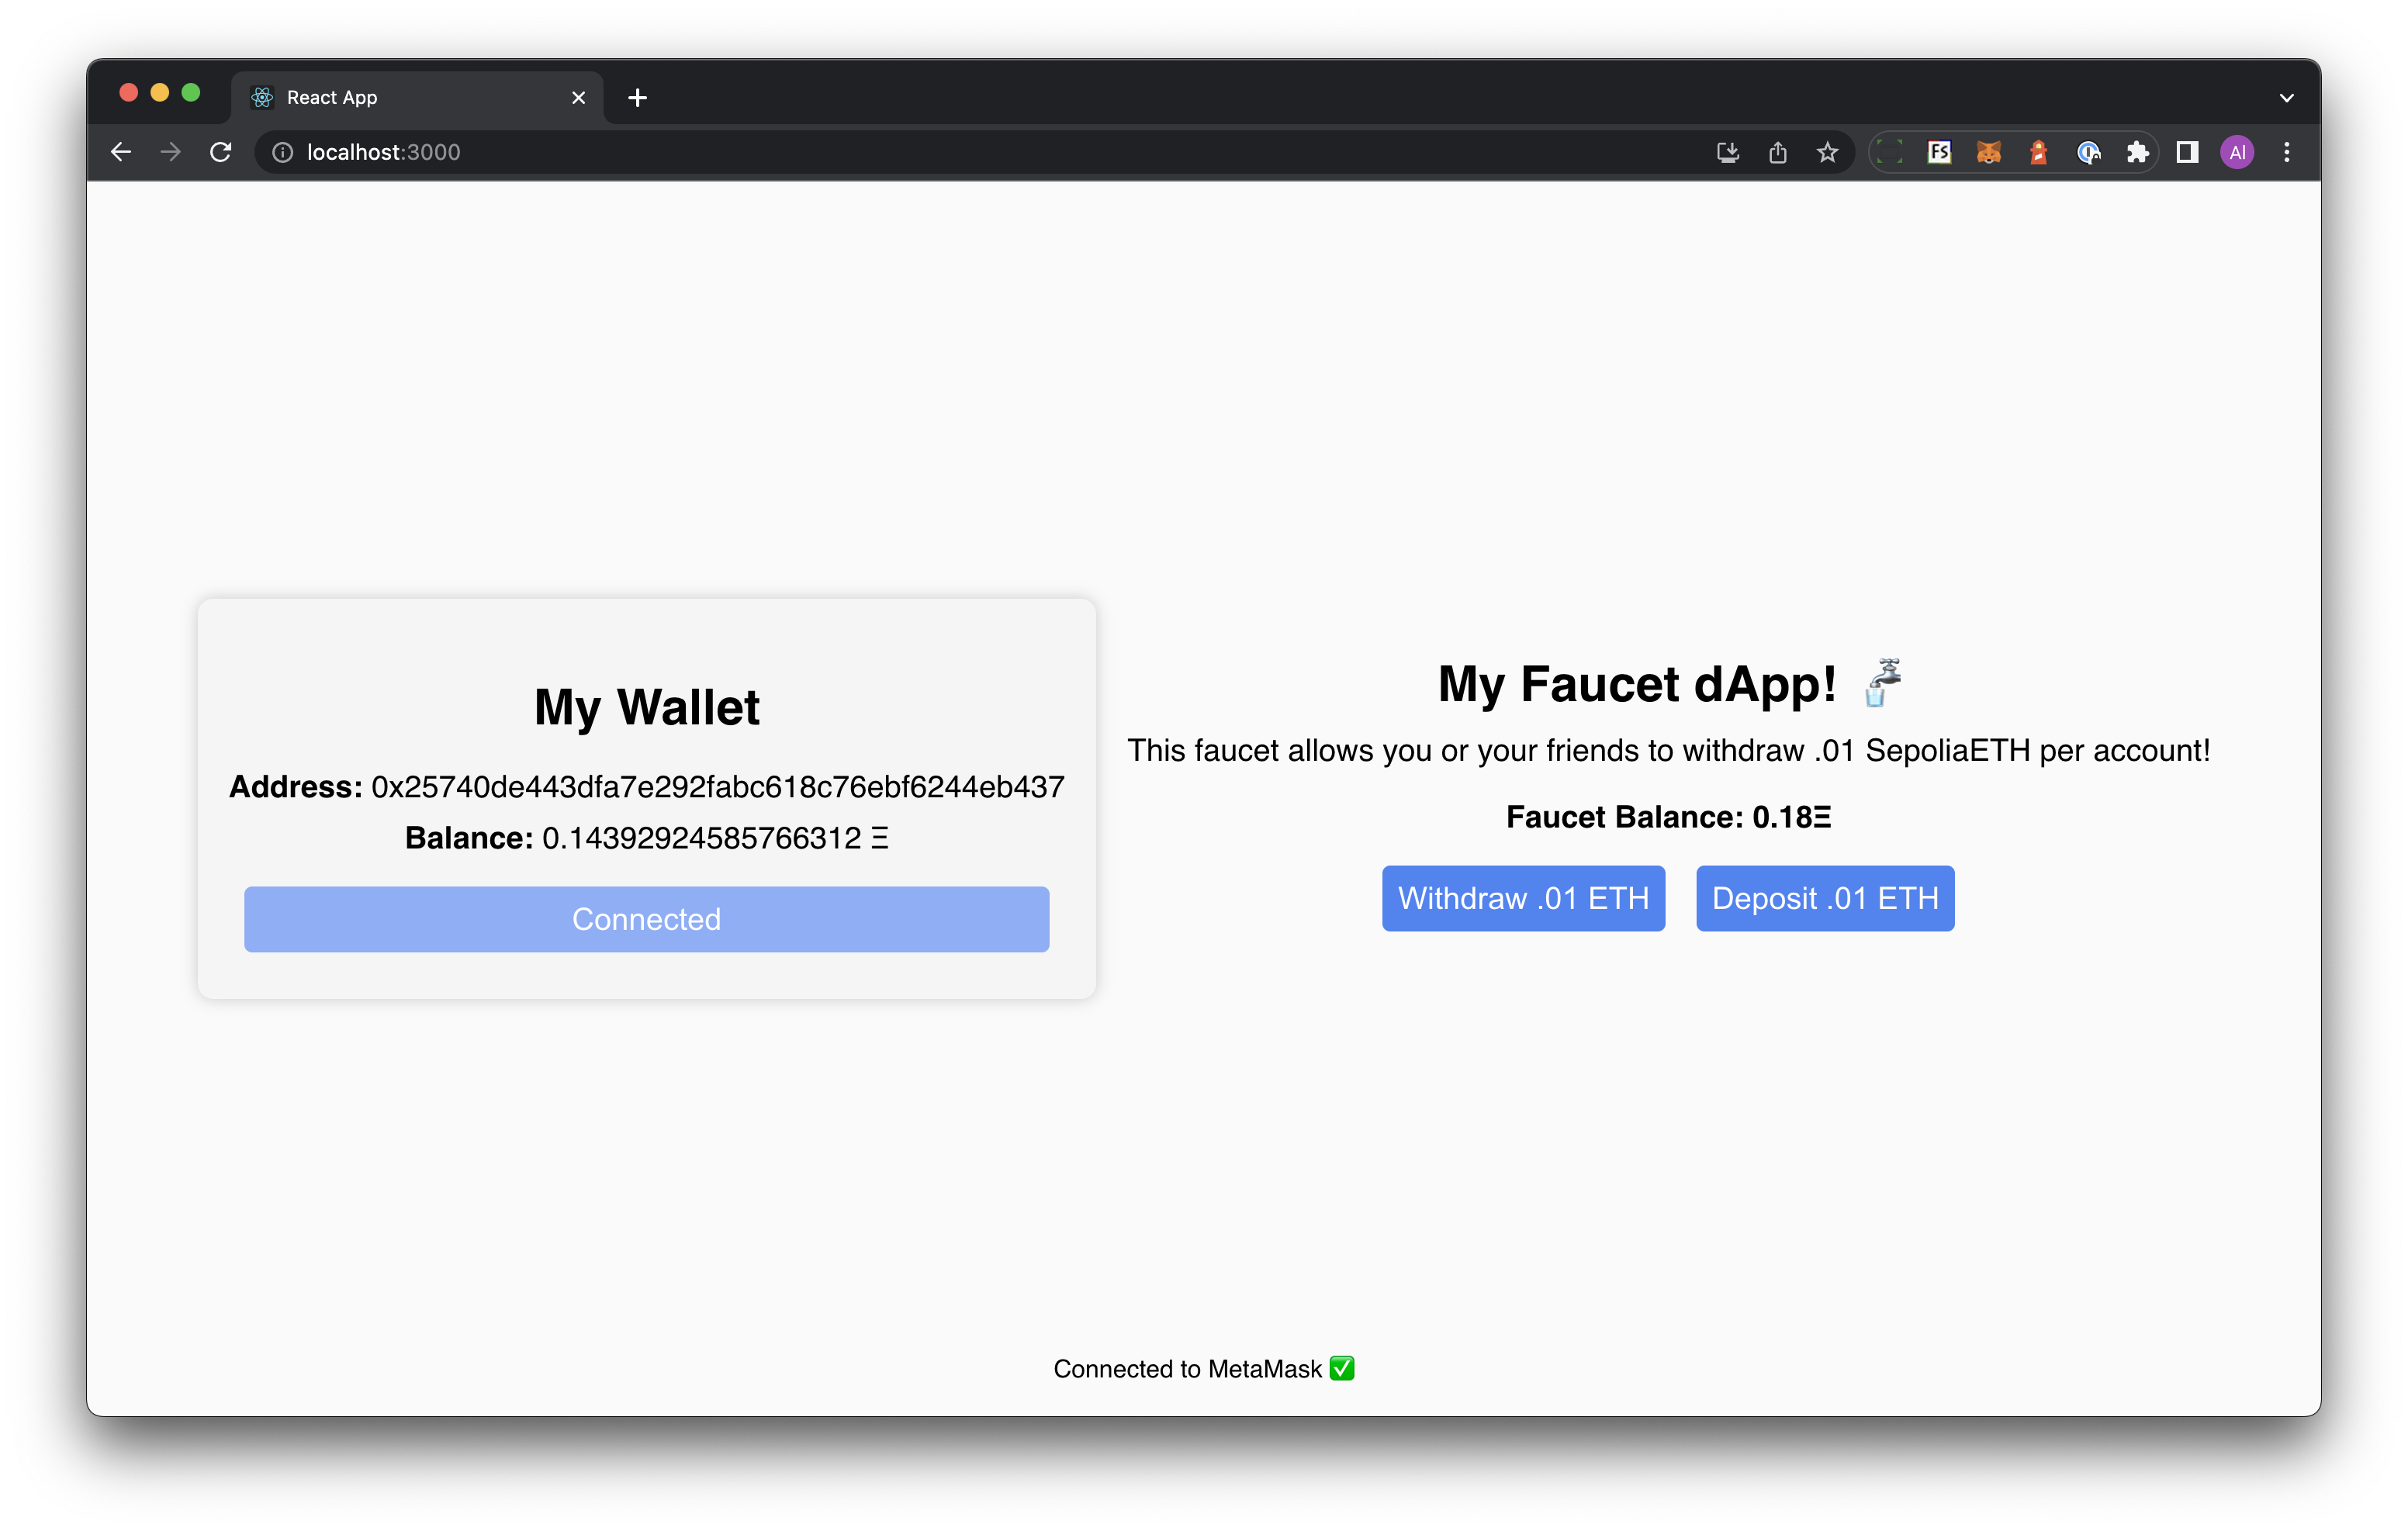
6. Final Application View

Woot woot!! You've just set up a full-stack decentralized application thanks to the help of the MetaMask SDK.
Feel free to withdraw or deposit to the faucet as much as you want, although please note an account can only ever withdraw once from the test faucet!
7. Final Challenges
If you want to continue improving your skills, here are some suggestions to make this dApp better:
- What other powers can the MetaMask SDK provide your application?
- Calling all front-end gurus! The styling needs some work!
- Can you completely replace the smart contract used in this application? It shouldn't be too difficult, everything is there as a template for you - just replace the important details such as
CONTRACT_ADDRESSandabi.
Congrats on building a full-stack dapp!! Feel free to use this as a template for more dapp-building! 🔥
Updated about 2 years ago
