2. How to Build "Buy Me a Coffee" DeFi dapp
Blockchain technology is amazing because it gives us the ability to program money using code and software. With a few lines of code, it's possible to build all kinds of applications and protocols that can create new opportunities for people around the world.
Buy Me A Coffee is a popular website that creators, educators, entertainers, and all kinds of people use to create a landing page where anyone can send some amount of money as a thank you for their services. However, in order to use it, you must have a bank account and a credit card. Not everyone has that!
A benefit of decentralized applications built on top of a blockchain is that anyone from around the world can access the app using just an Ethereum wallet, which anyone can set up for free in under 1 minute. Let's see how we can use that to our advantage!
In this tutorial, you're going to learn how to develop and deploy a decentralized "Buy Me a Coffee" smart contract that allows visitors to send you (fake) ETH as tips and leave nice messages, using Alchemy, Hardhat, Ethers.js, and Ethereum Goerli.
By the end of this tutorial, you will learn how to do the following:
- Use the Hardhat development environment to build, test, and deploy our smart contract.
- Connect your MetaMask wallet to the Goerli test network using an Alchemy RPC endpoint.
- Get free Goerli ETH from goerlifaucet.com.
- Use Ethers.js to interact with your deployed smart contract.
- Build a frontend website for your decentralized application with Replit.
Video tutorial version here:
Prerequisites
To prepare for the rest of this tutorial, you need to have:
npm(npx) version 8.5.5nodeversion 16.13.1- An Alchemy account (sign up here for free!)
The following is not required, but extremely useful:
- some familiarity with a command line
- some familiarity with JavaScript
Now let's begin building our smart contract!
Code the BuyMeACoffee.sol smart contract
Github reference: https://github.com/alchemyplatform/RTW3-Week2-BuyMeACoffee-Contracts
If you've used tools like OpenZeppelin Wizard and Remix before, then you're already primed to use Hardhat.
Hardhat is similar because it's a development environment and coding tool, but it's a little bit more customizable and runs from your own computer's command-line interface instead of a browser application.
We will be using Hardhat to:
- generate the project template
- test our smart contract code
- deploy to the Goerli test network
Let's go!
Open your terminal and create a new directory.
mkdir BuyMeACoffee-contracts
cd BuyMeACoffee-contracts
Inside this directory, we want to start a new npm project (default settings are fine):
npm init -y
This should create a package.json file for you that looks like this:
thatguyintech@albert BuyMeACoffee-contracts % npm init -y
Wrote to /Users/thatguyintech/Documents/co/videos/week2/BuyMeACoffee-contracts/package.json:

{
  "name": "buymeacoffee-contracts",
  "version": "1.0.0",
  "description": "",
  "main": "index.js",
  "scripts": {
    "test": "echo \"Error: no test specified\" && exit 1"
  },
  "keywords": [],
  "author": "",
  "license": "ISC"
}
Install hardhat:
npm install --save-dev hardhat
Now we create a sample project:
npx hardhat
You should then see a welcome message and options on what you can do. Select Create a JavaScript project:
888 888 888 888 888
888 888 888 888 888
888 888 888 888 888
8888888888 8888b. 888d888 .d88888 88888b. 8888b. 888888
888 888 "88b 888P" d88" 888 888 "88b "88b 888
888 888 .d888888 888 888 888 888 888 .d888888 888
888 888 888 888 888 Y88b 888 888 888 888 888 Y88b.
888 888 "Y888888 888 "Y88888 888 888 "Y888888 "Y888
👷 Welcome to Hardhat v2.12.2 👷
? What do you want to do? …
❯ Create a JavaScript project
Create a TypeScript project
Create an empty hardhat.config.js
Quit
Agree to all the defaults (project root, adding a .gitignore, and installing all sample project dependencies):
✔ What do you want to do? · Create a JavaScript project
✔ Hardhat project root: · /Users/user/docs/new
✔ Do you want to install this sample project's dependencies with npm (@nomiclabs/hardhat-waffle ethereum-waffle chai @nomiclabs/hardhat-ethers ethers)? (Y/n) · y
Hardhat will then generate a hardhat.config.js file for us along with a couple of folders with sample code we can work with, including contracts, scripts, and test.
To check if everything works properly, run:
npx hardhat test
We now have our hardhat development environment successfully configured.
Your project directory should now look something like this (I'm using tree to visualize):
thatguyintech@albert BuyMeACoffee-contracts % tree -C -L 1
.
├── README.md
├── contracts
├── hardhat.config.js
├── node_modules
├── package-lock.json
├── package.json
├── scripts
└── test
The important folders and files are:
contracts- folder where your smart contracts live- in this project we'll only create one, to organize our
BuyMeACoffeelogic
- in this project we'll only create one, to organize our
scripts- folder where your hardhat javascript scripts live- we will write
deploylogic - example
buy-coffeescript - and a
withdrawscript to cash out our tips
- we will write
hardhat.config.js- configuration file with settings for solidity version and deployment
Now use any code editor to open up the project folder! I like to use VSCode.
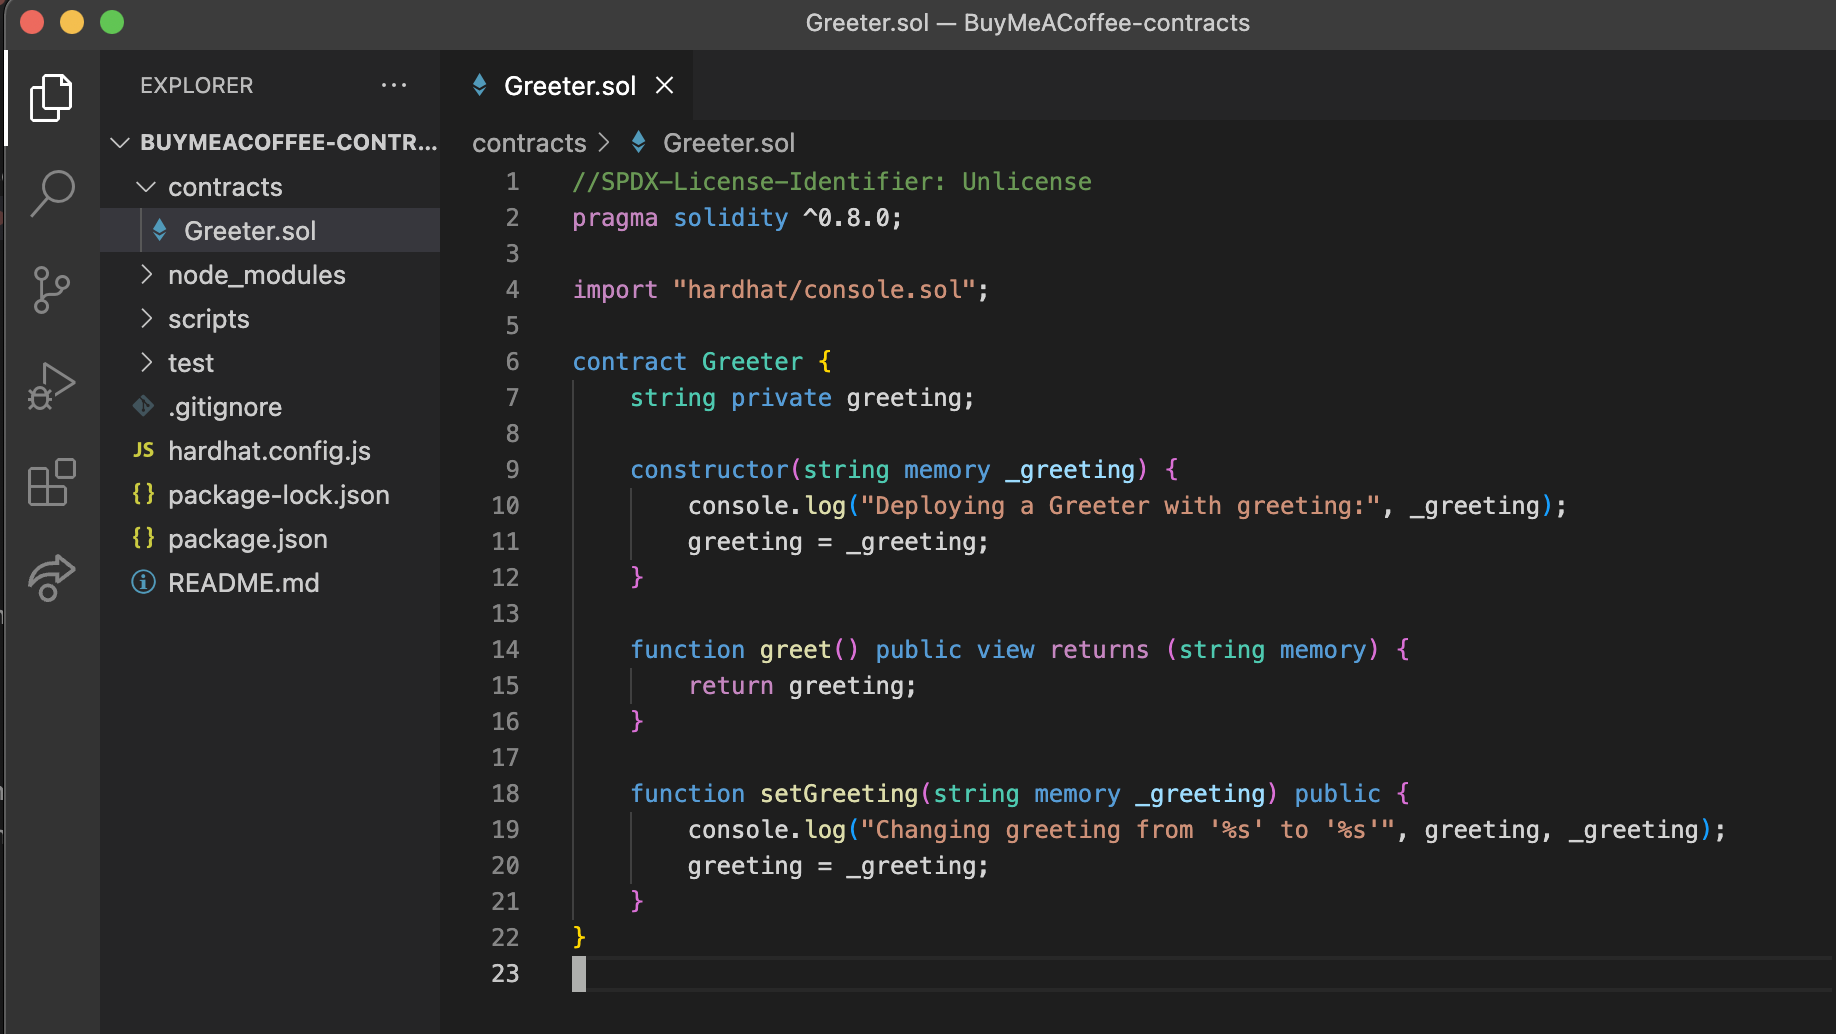
You'll notice that there are a number of files already auto-generated via the Hardhat sample project tool. We will be replacing all of them, starting with the Greeter.sol contract.
- Rename the contract file to
BuyMeACoffee.sol - Replace the contract code with the following:
//SPDX-License-Identifier: Unlicense

// contracts/BuyMeACoffee.sol
pragma solidity ^0.8.0;

// Switch this to your own contract address once deployed, for bookkeeping!
// Example Contract Address on Goerli: 0xDBa03676a2fBb6711CB652beF5B7416A53c1421D

contract BuyMeACoffee {
    // Event to emit when a Memo is created.
    event NewMemo(
        address indexed from,
        uint256 timestamp,
        string name,
        string message
    );

    // Memo struct.
    struct Memo {
        address from;
        uint256 timestamp;
        string name;
        string message;
    }

    // Address of contract deployer. Marked payable so that
    // we can withdraw to this address later.
    address payable owner;

    // List of all memos received from coffee purchases.
    Memo[] memos;

    constructor() {
        // Store the address of the deployer as a payable address.
        // When we withdraw funds, we'll withdraw here.
        owner = payable(msg.sender);
    }

    /**
     * @dev fetches all stored memos
     */
    function getMemos() public view returns (Memo[] memory) {
        return memos;
    }

    /**
     * @dev buy a coffee for owner (sends an ETH tip and leaves a memo)
     * @param _name name of the coffee purchaser
     * @param _message a nice message from the purchaser
     */
    function buyCoffee(string memory _name, string memory _message) public payable {
        // Must accept more than 0 ETH for a coffee.
        require(msg.value > 0, "can't buy coffee for free!");

        // Add the memo to storage!
        memos.push(Memo(
            msg.sender,
            block.timestamp,
            _name,
            _message
        ));

        // Emit a NewMemo event with details about the memo.
        emit NewMemo(
            msg.sender,
            block.timestamp,
            _name,
            _message
        );
    }

    /**
     * @dev send the entire balance stored in this contract to the owner
     */
    function withdrawTips() public {
        require(owner.send(address(this).balance));
    }
}
Take some time to read through the contract comments and see if you can gather what's going on!
I'll list the highlights here:
- When we deploy the contract, the
constructorsaves the address of the wallet that was responsible for deploying inside anownervariable as apayableaddress. This is useful for later when we want to withdraw any tips collected by the contract. - The
buyCoffeefunction is the most important function on the contract. It accepts two strings, a_name, and a_message, and it also accepts ether due to thepayablemodifier. It uses the_nameand_messageinputs to create aMemostruct that is stored on the blockchain.- When visitors call the
buyCoffeefunction, they must submit some ether due to therequire(msg.value > 0)statement. The ether is then held on the contractbalanceuntil it is withdrawn.
- When visitors call the
- The
memosarray holds all of theMemostructs generated from coffee purchases. NewMemolog events are emitted every time a coffee is purchased. This allows us to listen for new coffee purchases from our front-end website.withdrawTipsis a function that anyone can call, but will only ever send money to the original deployer of the contract.address(this).balancefetches the ether stored on the contractowner.send(...)is the syntax for creating a send transaction with ether- the
require(...)statement that wraps everything is there to ensure that if there are any issues, the transaction is reverted and nothing is lost - that's how we get
require(owner.send(address(this).balance))
Armed with this smart contract code, we can now write a script to test our logic!
Create a buy-coffee.js script to test your contract
Under the scripts folder, there should be a sample script already populated sample-script.js. Let's rename that file to buy-coffee.js and paste in the following code:
const hre = require("hardhat");

// Returns the Ether balance of a given address.
async function getBalance(address) {
  const balanceBigInt = await hre.ethers.provider.getBalance(address);
  return hre.ethers.utils.formatEther(balanceBigInt);
}

// Logs the Ether balances for a list of addresses.
async function printBalances(addresses) {
  let idx = 0;
  for (const address of addresses) {
    console.log(`Address ${idx} balance: `, await getBalance(address));
    idx ++;
  }
}

// Logs the memos stored on-chain from coffee purchases.
async function printMemos(memos) {
  for (const memo of memos) {
    const timestamp = memo.timestamp;
    const tipper = memo.name;
    const tipperAddress = memo.from;
    const message = memo.message;
    console.log(`At ${timestamp}, ${tipper} (${tipperAddress}) said: "${message}"`);
  }
}

async function main() {
  // Get the example accounts we'll be working with.
  const [owner, tipper, tipper2, tipper3] = await hre.ethers.getSigners();

  // We get the contract to deploy.
  const BuyMeACoffee = await hre.ethers.getContractFactory("BuyMeACoffee");
  const buyMeACoffee = await BuyMeACoffee.deploy();

  // Deploy the contract.
  await buyMeACoffee.deployed();
  console.log("BuyMeACoffee deployed to:", buyMeACoffee.address);

  // Check balances before the coffee purchase.
  const addresses = [owner.address, tipper.address, buyMeACoffee.address];
  console.log("== start ==");
  await printBalances(addresses);

  // Buy the owner a few coffees.
  const tip = {value: hre.ethers.utils.parseEther("1")};
  await buyMeACoffee.connect(tipper).buyCoffee("Carolina", "You're the best!", tip);
  await buyMeACoffee.connect(tipper2).buyCoffee("Vitto", "Amazing teacher", tip);
  await buyMeACoffee.connect(tipper3).buyCoffee("Kay", "I love my Proof of Knowledge", tip);

  // Check balances after the coffee purchase.
  console.log("== bought coffee ==");
  await printBalances(addresses);

  // Withdraw.
  await buyMeACoffee.connect(owner).withdrawTips();

  // Check balances after withdrawal.
  console.log("== withdrawTips ==");
  await printBalances(addresses);

  // Check out the memos.
  console.log("== memos ==");
  const memos = await buyMeACoffee.getMemos();
  printMemos(memos);
}

// We recommend this pattern to be able to use async/await everywhere
// and properly handle errors.
main()
  .then(() => process.exit(0))
  .catch((error) => {
    console.error(error);
    process.exit(1);
  });
At this point, your project directory should look something like this:
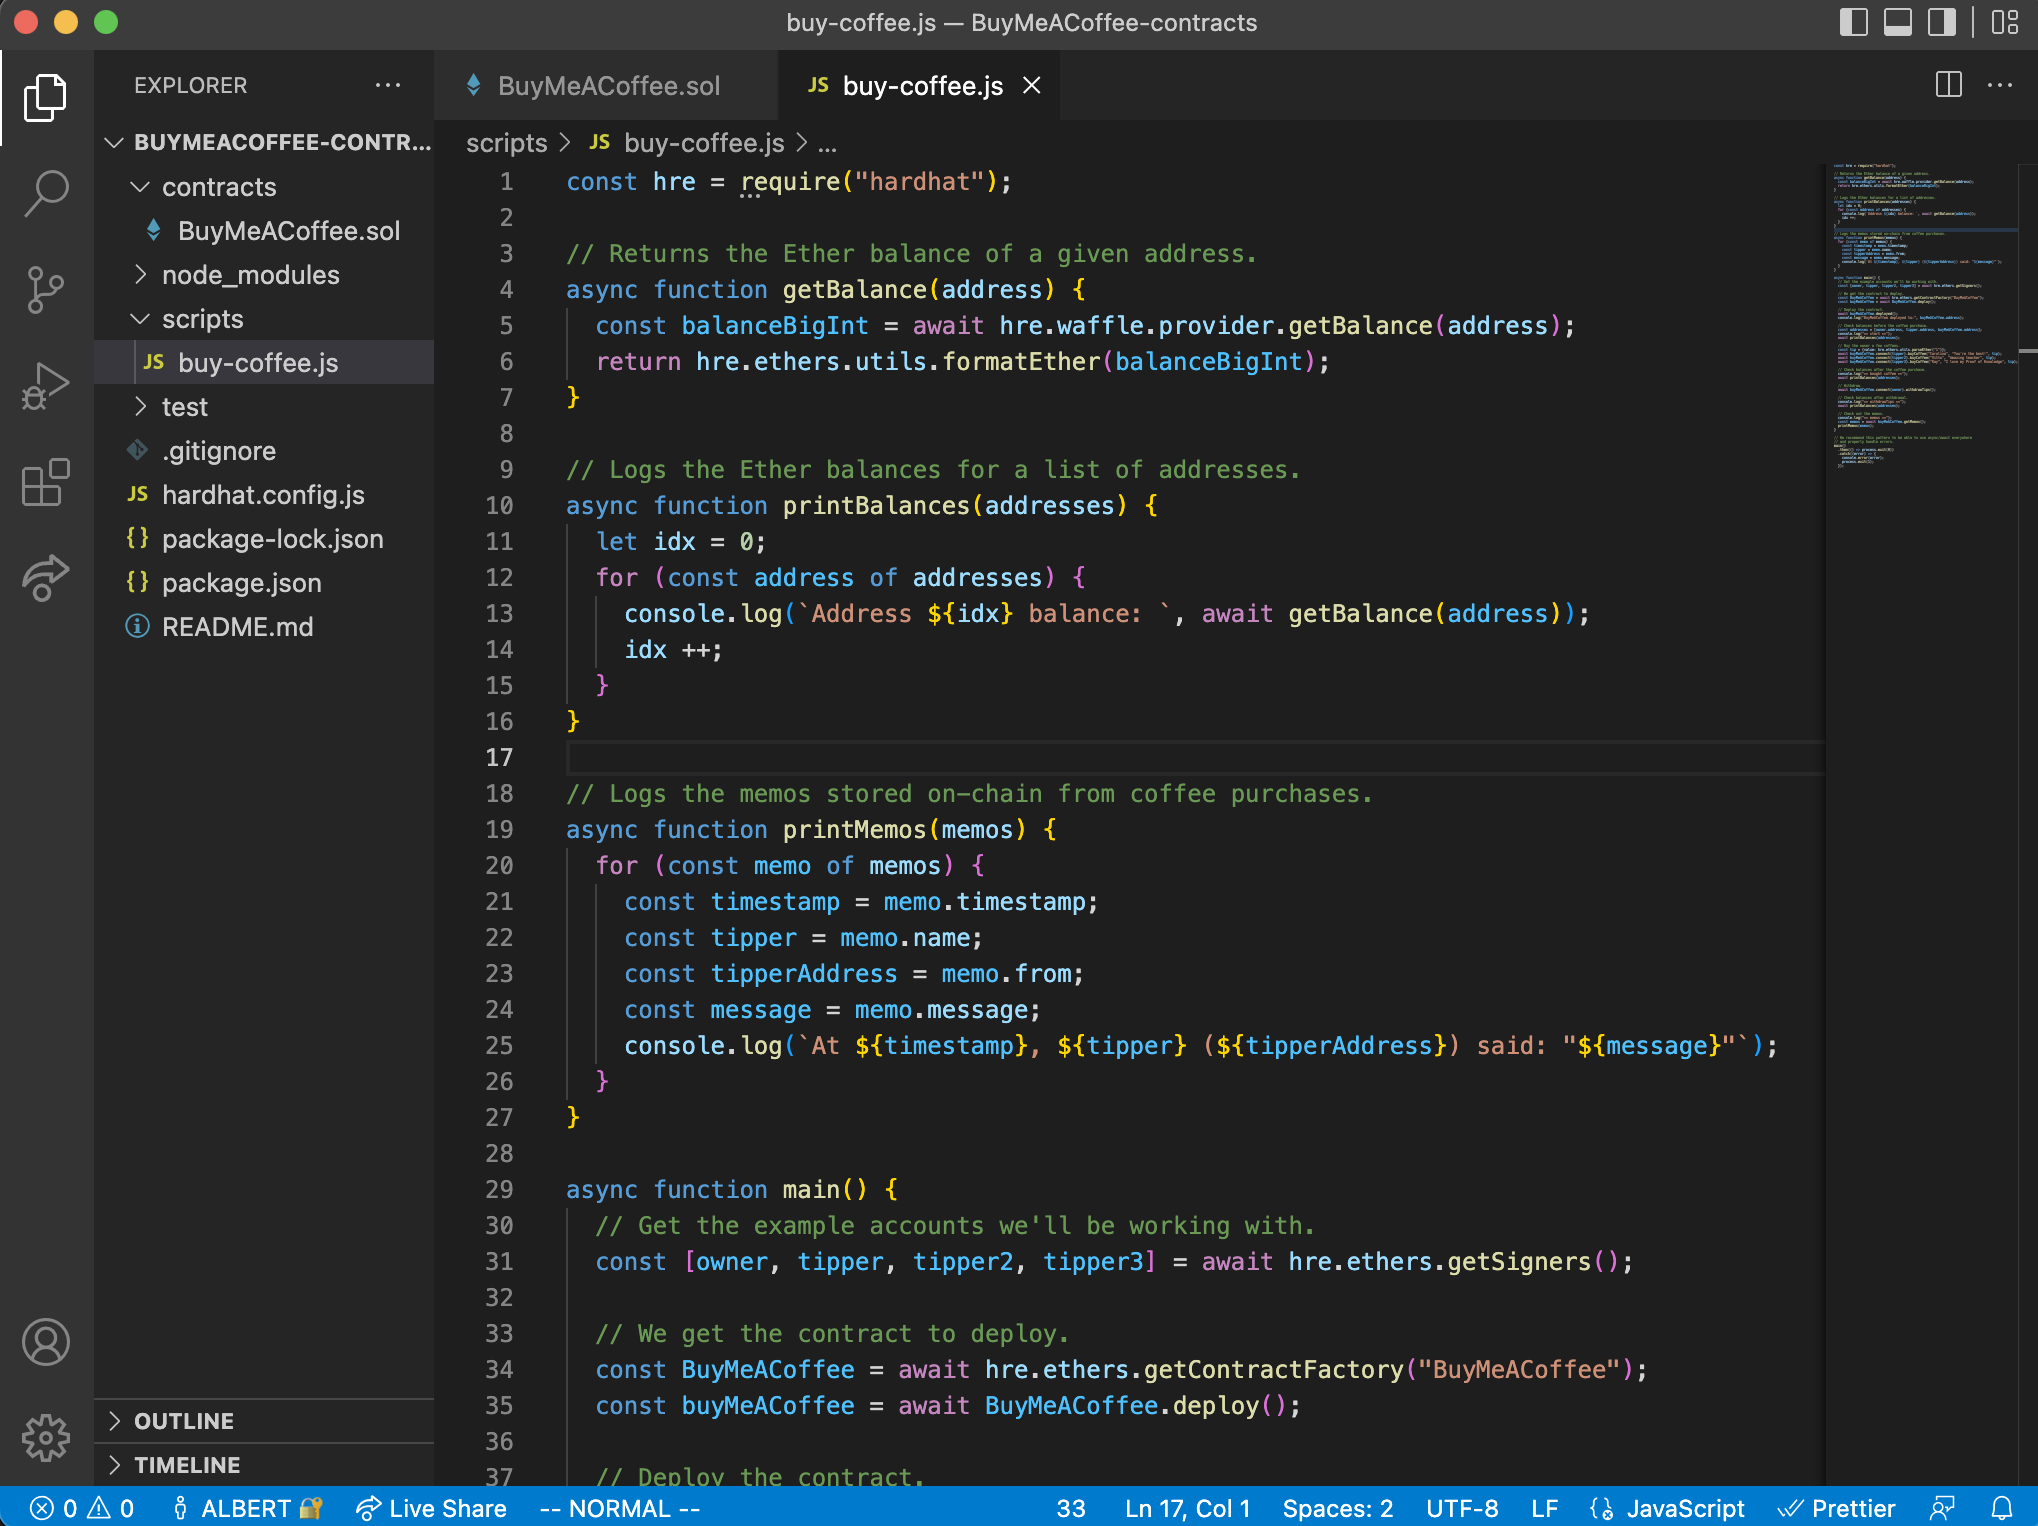
renamed scripts/sample-script.js to scripts/buy-coffee.js and pasted in the example code
Feel free to take a few moments to read through the script code. Some utility functions are defined at the top for convenience, like getting wallet balances and printing them out.
The main logic of the script is inside the main() function. The commented code shows the flow of the script:
- Get the example accounts we'll be working with.
- We get the contract to deploy.
- Deploy the contract.
- Check balances before the coffee purchase.
- Buy the owner a few coffees.
- Check balances after the coffee purchase.
- Withdraw.
- Check balances after withdrawal.
- Check out the memos.
This script tests out all the functions we implemented in our smart contract! That's awesome.
You may also notice that we are making interesting calls like:
hre.waffle.provider.getBalancehre.ethers.getContractFactoryhre.ethers.utils.parseEther- etc.
These lines of code are where we take advantage of the Hardhat (hre) development environment along with the Ethers and Waffle SDK plug-ins to access functionality that allows us to read blockchain wallet account balances, deploy contracts, and format Ether cryptocurrency values.
We won't go too in-depth about that code in this tutorial, but you can learn more about them by looking up the Hardhat and Ethers.js documentation.
Enough talking. Now for the fun, let's run the script:
npx hardhat run scripts/buy-coffee.js
You should see the output in your terminal like this:
thatguyintech@albert BuyMeACoffee-contracts % npx hardhat run scripts/buy-coffee.js
Compiled 1 Solidity file successfully
BuyMeACoffee deployed to: 0x5FbDB2315678afecb367f032d93F642f64180aa3
== start ==
Address 0 balance:  9999.99877086625
Address 1 balance:  10000.0
Address 2 balance:  0.0
== bought coffee ==
Address 0 balance:  9999.99877086625
Address 1 balance:  9998.999752902808629985
Address 2 balance:  3.0
== withdrawTips ==
Address 0 balance:  10002.998724967892122376
Address 1 balance:  9998.999752902808629985
Address 2 balance:  0.0
== memos ==
At 1652033688, Carolina (0x70997970C51812dc3A010C7d01b50e0d17dc79C8) said: "You're the best!"
At 1652033689, Vitto (0x3C44CdDdB6a900fa2b585dd299e03d12FA4293BC) said: "Amazing teacher"
At 1652033690, Kay (0x90F79bf6EB2c4f870365E785982E1f101E93b906) said: "I love my Proof of Knowledge"
At the start of the script (right after the contract deploy), note that the 0 address has 9999.99877086625 ETH. This is because it started with 10k ETH as one of the pre-populated hardhat addresses, but it had to spend a tiny amount to deploy to the local blockchain.
In the second step,== bought coffee ==, Address 1 purchases one coffee. Two other wallets that are not shown ALSO purchase coffees. In total, 3 coffees were purchased for a total tip amount of 3.0 ETH. You can see that Address 2 (which represents the contract address), is holding on to 3.0 ETH.
After the withdrawTips() function is called in == withdrawTips ==, the contract goes back down to 0 ETH, and the original deployer, aka Address 0, has now earned some money and is sitting on 10002.998724967892122376 ETH.
Are we having fun yet?!?! Can you imagine the tips you're about to earn?? I can.
Now let's implement an isolated deploy script to keep the real deployment simple and also get ready to deploy to the Goerli test network!
Deploy your BuyMeACoffe.sol smart contract to the Ethereum Goerli testnet using Alchemy and MetaMask
Let's create a new file scripts/deploy.js that will be super simple, just for deploying our contract to any network we choose later (we'll choose Goerli later if you haven't noticed).
The deploy.js file should look like this:
// scripts/deploy.js

const hre = require("hardhat");

async function main() {
  // We get the contract to deploy.
  const BuyMeACoffee = await hre.ethers.getContractFactory("BuyMeACoffee");
  const buyMeACoffee = await BuyMeACoffee.deploy();

  await buyMeACoffee.deployed();

  console.log("BuyMeACoffee deployed to:", buyMeACoffee.address);
}

// We recommend this pattern to be able to use async/await everywhere
// and properly handle errors.
main()
  .then(() => process.exit(0))
  .catch((error) => {
    console.error(error);
    process.exit(1);
  });
To review the project structure, we now have one smart contract and two hardhat scripts:
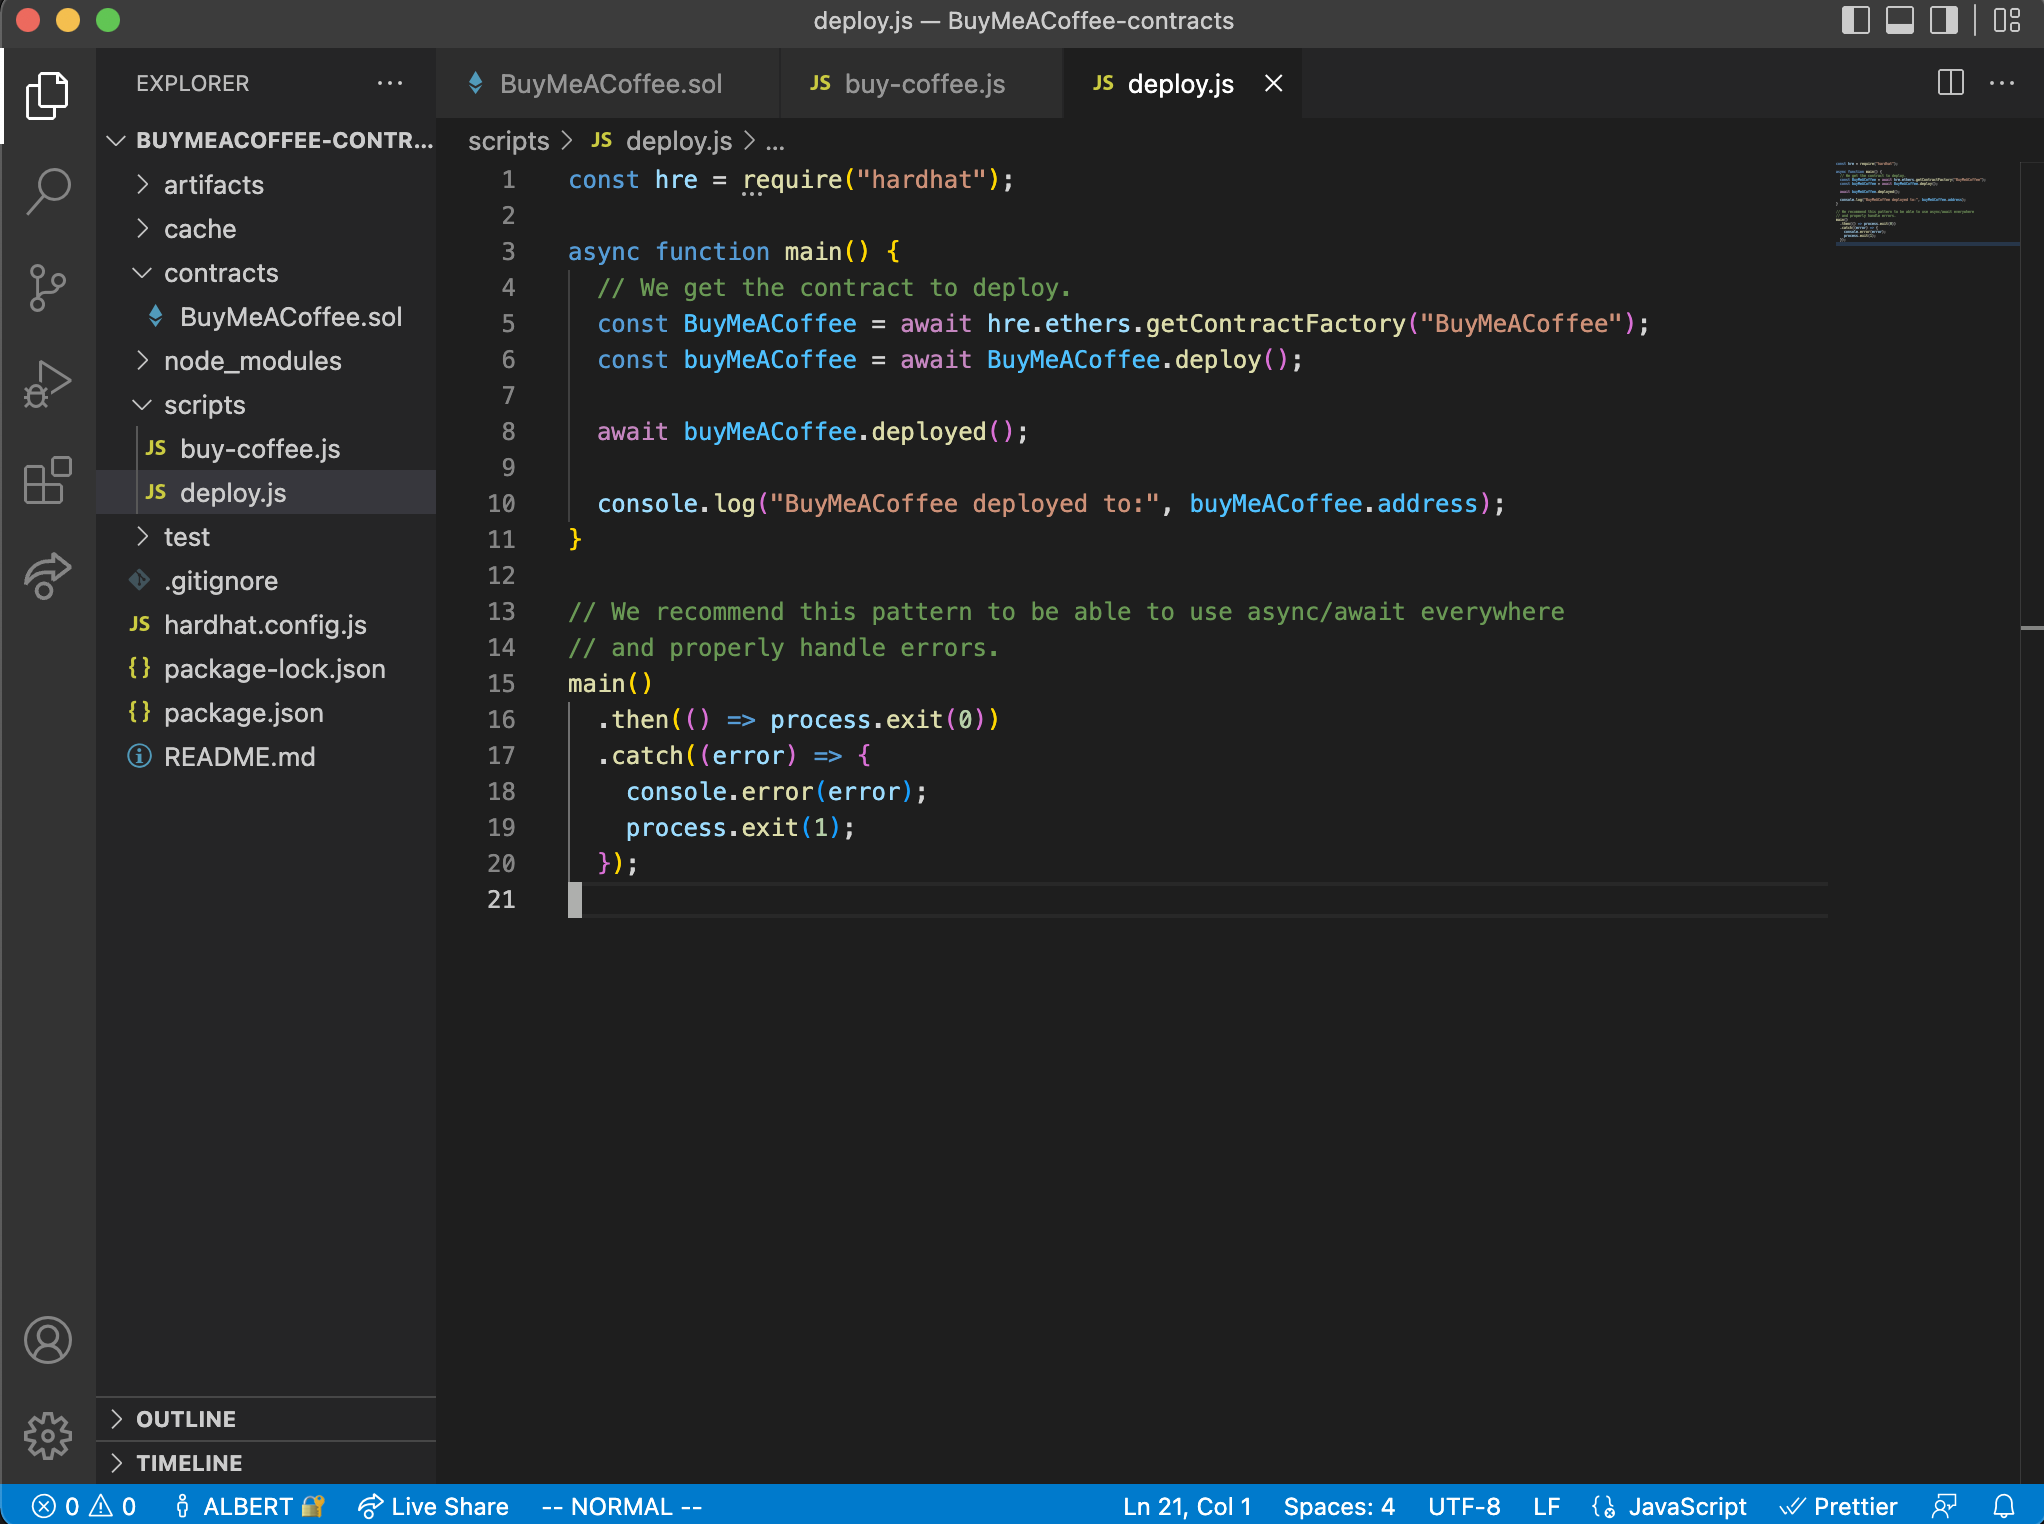
Now with this deploy.js script coded and saved, if you run the following command:
npx hardhat run scripts/deploy.js
You'll see one single line printed out:
BuyMeACoffee deployed to: 0x5FbDB2315678afecb367f032d93F642f64180aa3
What's interesting is that if you run it over and over again, you'll see the same exact deploy address every time:
thatguyintech@albert BuyMeACoffee-contracts % npx hardhat run scripts/deploy.js
BuyMeACoffee deployed to: 0x5FbDB2315678afecb367f032d93F642f64180aa3
thatguyintech@albert BuyMeACoffee-contracts % npx hardhat run scripts/deploy.js
BuyMeACoffee deployed to: 0x5FbDB2315678afecb367f032d93F642f64180aa3
thatguyintech@albert BuyMeACoffee-contracts % npx hardhat run scripts/deploy.js
BuyMeACoffee deployed to: 0x5FbDB2315678afecb367f032d93F642f64180aa3
Why is that? That's because when you run the script, the default `network Hardhat tool uses a local development network right on your computer. It's fast and deterministic and great for some quick sanity checking.
However, to actually deploy to a test network running over the internet with nodes worldwide, we need to change our Hardhat config file to give ourselves the option.
This is where the hardhat.config.json file comes in.
A quick word of caution before we dive in:
CONFIGURATIONS ARE HARD! KEEP YOUR SECRETS SAFE!
There are all kinds of little details that can go wrong, and things change all the time. The most dangerous thing is the secret values, for example, your MetaMask private key and your Alchemy URL.
If something isn't working for you, check the Ethereum StackExchange, Alchemy Discord, or Google your errors.
And don't. ever. share. your. secrets! Your keys, your coins!
When you open your hardhat.config.js file, you will see some sample deploy code. Delete that and paste this version in:
// hardhat.config.js

require("@nomiclabs/hardhat-ethers");
require("@nomiclabs/hardhat-waffle");
require("dotenv").config()

// You need to export an object to set up your config
// Go to https://hardhat.org/config/ to learn more

const GOERLI_URL = process.env.GOERLI_URL;
const PRIVATE_KEY = process.env.PRIVATE_KEY;

/**
 * @type import('hardhat/config').HardhatUserConfig
 */
module.exports = {
  solidity: "0.8.4",
  networks: {
    goerli: {
      url: GOERLI_URL,
      accounts: [PRIVATE_KEY]
    }
  }
};
A couple of things going on here:
- By importing
hardhat-ethers,hardhat-waffle, anddotenvat the top of the configuration file, our entire Hardhat project will have access to those dependencies. - I know we haven't introduced
dotenvyet, that's an important tool we'll talk about that in a bit. process.env.GOERLI_URLandprocess.env.PRIVATE_KEYare how we can access environment variables to use in our config file while not exposing the secret values.- Inside the
modules.exports, we are using solidity compiler version0.8.4. Different compiler versions support different features and syntax sets, so it's important to match this version with thepragmadeclaration at the top of ourBuyMeACoffee.solsmart contract.- If you go back to that file you can cross-check the statement
pragma solidity ^0.8.0;. In this case, even though the numbers don't match exactly, that's okay because the karat^symbol means that any version that's greater than or equal to0.8.0will work.
- If you go back to that file you can cross-check the statement
- Also in the
modules.exports, we define anetworkssetting that contains one test network configuration forgoerli.
Now, before we can do our deployment, we need to make sure we get one last tool installed: thedotenvmodule. As its name implies,dotenvhelps us connect a.envfile to the rest of our project. Let's set it up.
Install dotenv:
npm install dotenv
Create a .env file:
touch .env
Populate the .env file with the variables that we need:
GOERLI_URL=https://eth-goerli.alchemyapi.io/v2/<your api key>
GOERLI_API_KEY=<your api key>
PRIVATE_KEY=<your metamask api key>
You'll notice I haven't spilled any of my own secrets. Yup. Safety first. It's totally fine for you to put in that file though, as long as you also have a .gitignore that ensures you don't accidentally push the file to version control. Make sure that .env is listed in your .gitignore
node_modules
.env
coverage
coverage.json
typechain

#Hardhat files
cache
artifacts
Also, in order to get what you need for environment variables, you can use the following resources:
GOERLI_URL- sign up for an account on Alchemy, create an Ethereum -> Goerli app, and use the HTTP URLGOERLI_API_KEY- from your same Alchemy Ethereum Goerli app, you can get the last portion of the URL, and that will be your API KEYPRIVATE_KEY- Follow these instructions from MetaMask to export your private key.
Now, with dotenv installed and your .env file populated, we are ALMOST ready to deploy to the Goerli testnet!
The last thing we need to do is ensure you have some Goerli ETH. This fake ether allows you to practice doing things on the Goerli test network, which is a practice zone for building Ethereum applications. That way you don't have to spend real money on Ethereum mainnet.
Go to Georli faucet and sign in with your Alchemy account to get some free test ether.
Now we can deploy!
Run the deploy script, this time adding a special flag to use the Goerli network:
npx hardhat run scripts/deploy.js --network goerli
If you run into any errors here, for example Error HH8, then I highly recommend searching Google and Stack Overflow or Ethereum Stackexchange for solutions. It's common to run into those issues when something in your hardhat.config.js, .env, or your dotenv module isn't set up correctly.
If all goes well, you should be able to see your contract address logged to the console after a few seconds:
BuyMeACoffee deployed to: 0xDBa03676a2fBb6711CB652beF5B7416A53c1421D
🎉 Congrats! 🎉
You now have a contract deployed to the Goerli testnet. You can view it on the Goerli etherscan blockchain explorer by pasting in your address here: https://goerli.etherscan.io/
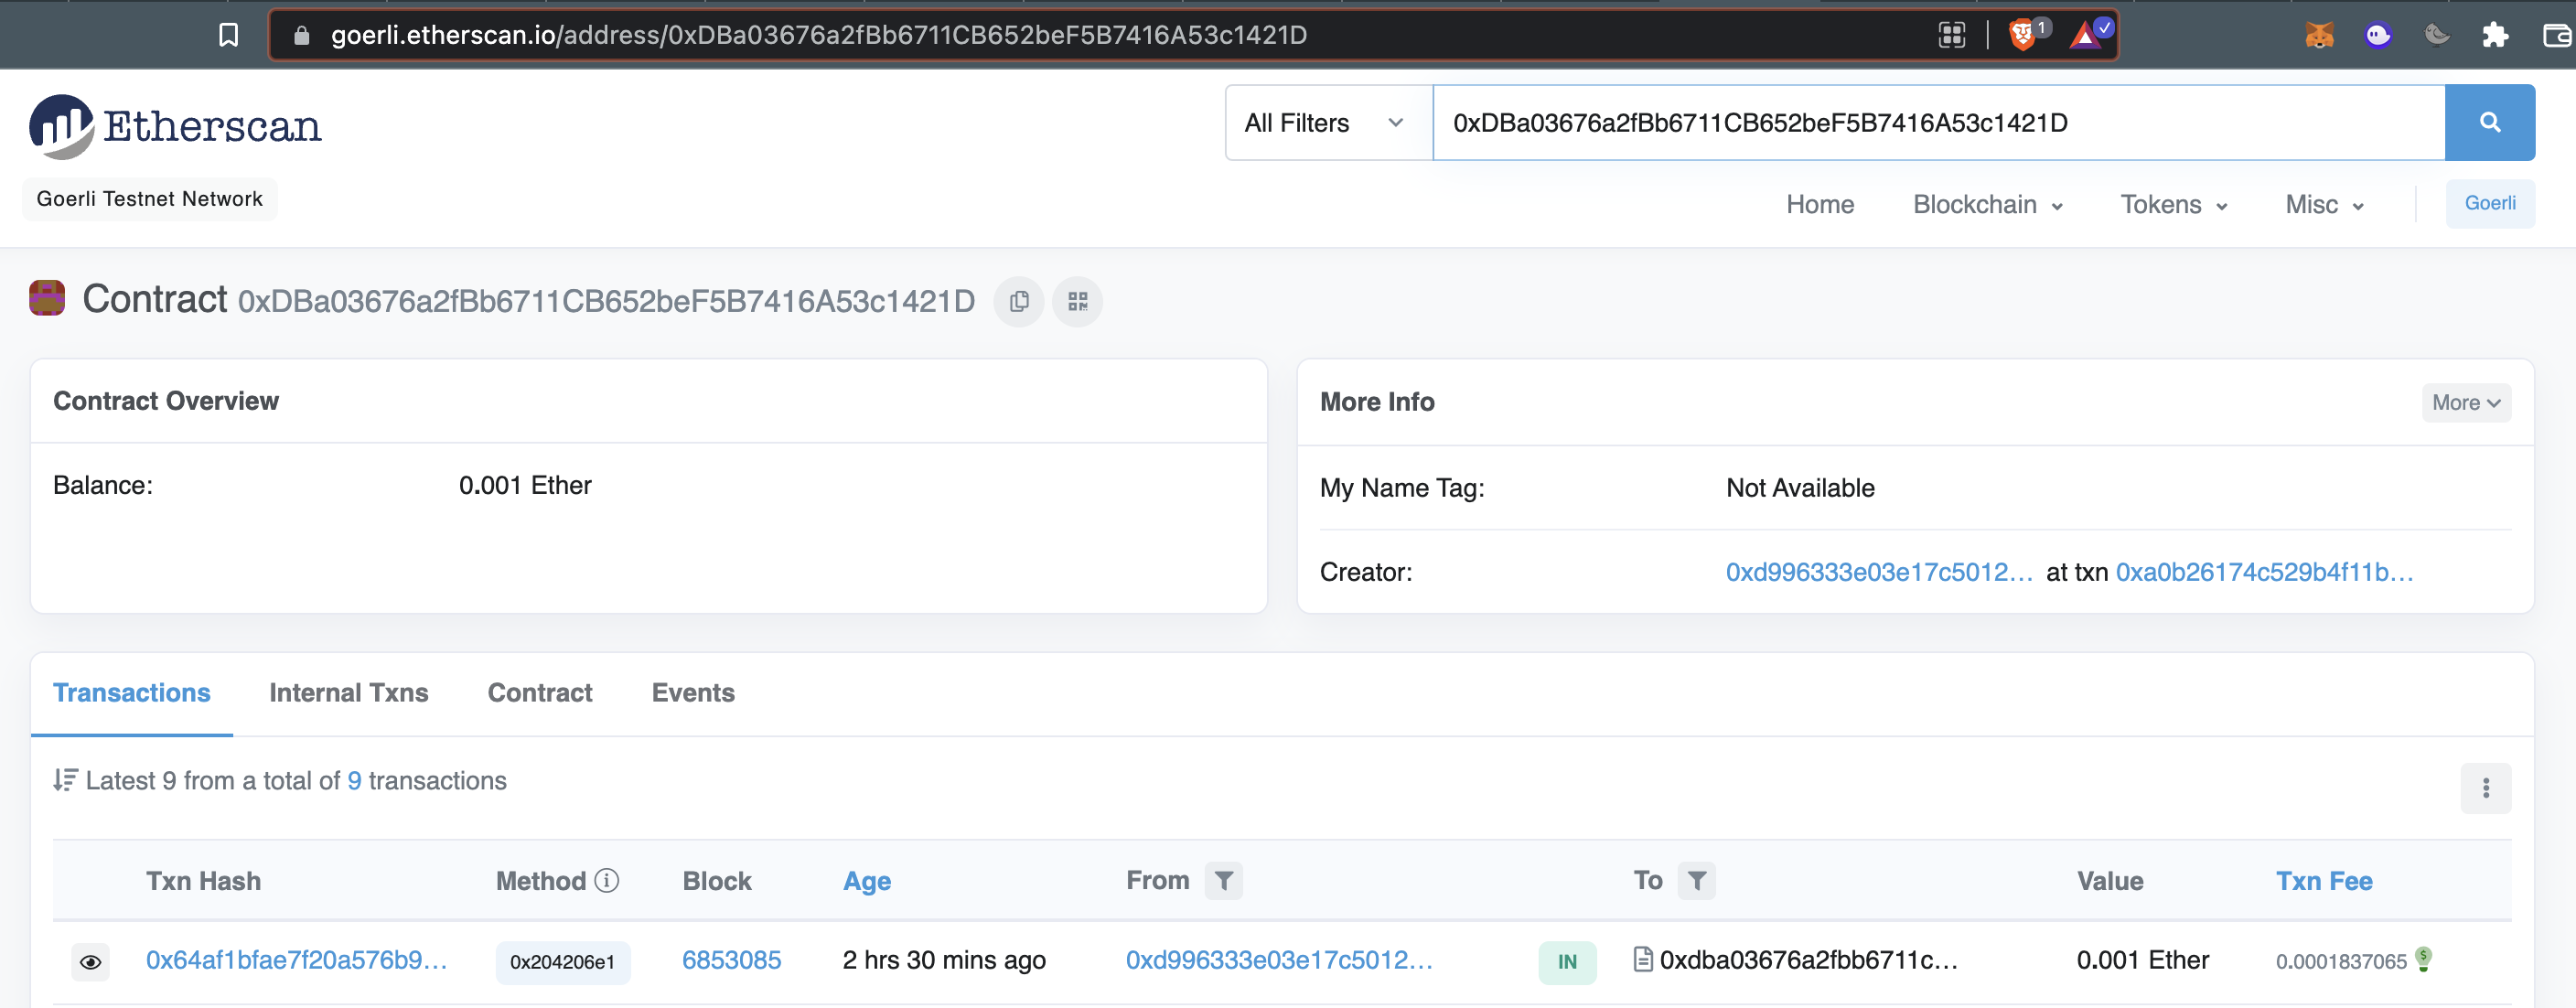
Before we move on to the frontend website (dapp) portion of the tutorial, let's prepare one more script that we'll want to use later, the withdraw.js script.
Implement a withdraw script
withdraw scriptLater on when we publish our website, we'll need a way to collect all the awesome tips that our friends and fans are leaving us. We can write another hardhat script to do just that!
Create a file at scripts/withdraw.js
// scripts/withdraw.js

const hre = require("hardhat");
const abi = require("../artifacts/contracts/BuyMeACoffee.sol/BuyMeACoffee.json");

async function getBalance(provider, address) {
  const balanceBigInt = await provider.getBalance(address);
  return hre.ethers.utils.formatEther(balanceBigInt);
}

async function main() {
  // Get the contract that has been deployed to Goerli.
  const contractAddress="0xDBa03676a2fBb6711CB652beF5B7416A53c1421D";
  const contractABI = abi.abi;

  // Get the node connection and wallet connection.
  const provider = new hre.ethers.providers.JsonRpcProvider("goerli", process.env.GOERLI_API_KEY);

  // Ensure that signer is the SAME address as the original contract deployer,
  // or else this script will fail with an error.
  const signer = new hre.ethers.Wallet(process.env.PRIVATE_KEY, provider);

  // Instantiate connected contract.
  const buyMeACoffee = new hre.ethers.Contract(contractAddress, contractABI, signer);

  // Check starting balances.
  console.log("current balance of owner: ", await getBalance(provider, signer.address), "ETH");
  const contractBalance = await getBalance(provider, buyMeACoffee.address);
  console.log("current balance of contract: ", await getBalance(provider, buyMeACoffee.address), "ETH");

  // Withdraw funds if there are funds to withdraw.
  if (contractBalance !== "0.0") {
    console.log("withdrawing funds..")
    const withdrawTxn = await buyMeACoffee.withdrawTips();
    await withdrawTxn.wait();
  } else {
    console.log("no funds to withdraw!");
  }

  // Check ending balance.
  console.log("current balance of owner: ", await getBalance(provider, signer.address), "ETH");
}

// We recommend this pattern to be able to use async/await everywhere
// and properly handle errors.
main()
  .then(() => process.exit(0))
  .catch((error) => {
    console.error(error);
    process.exit(1);
  });
Your project structure should look like this:
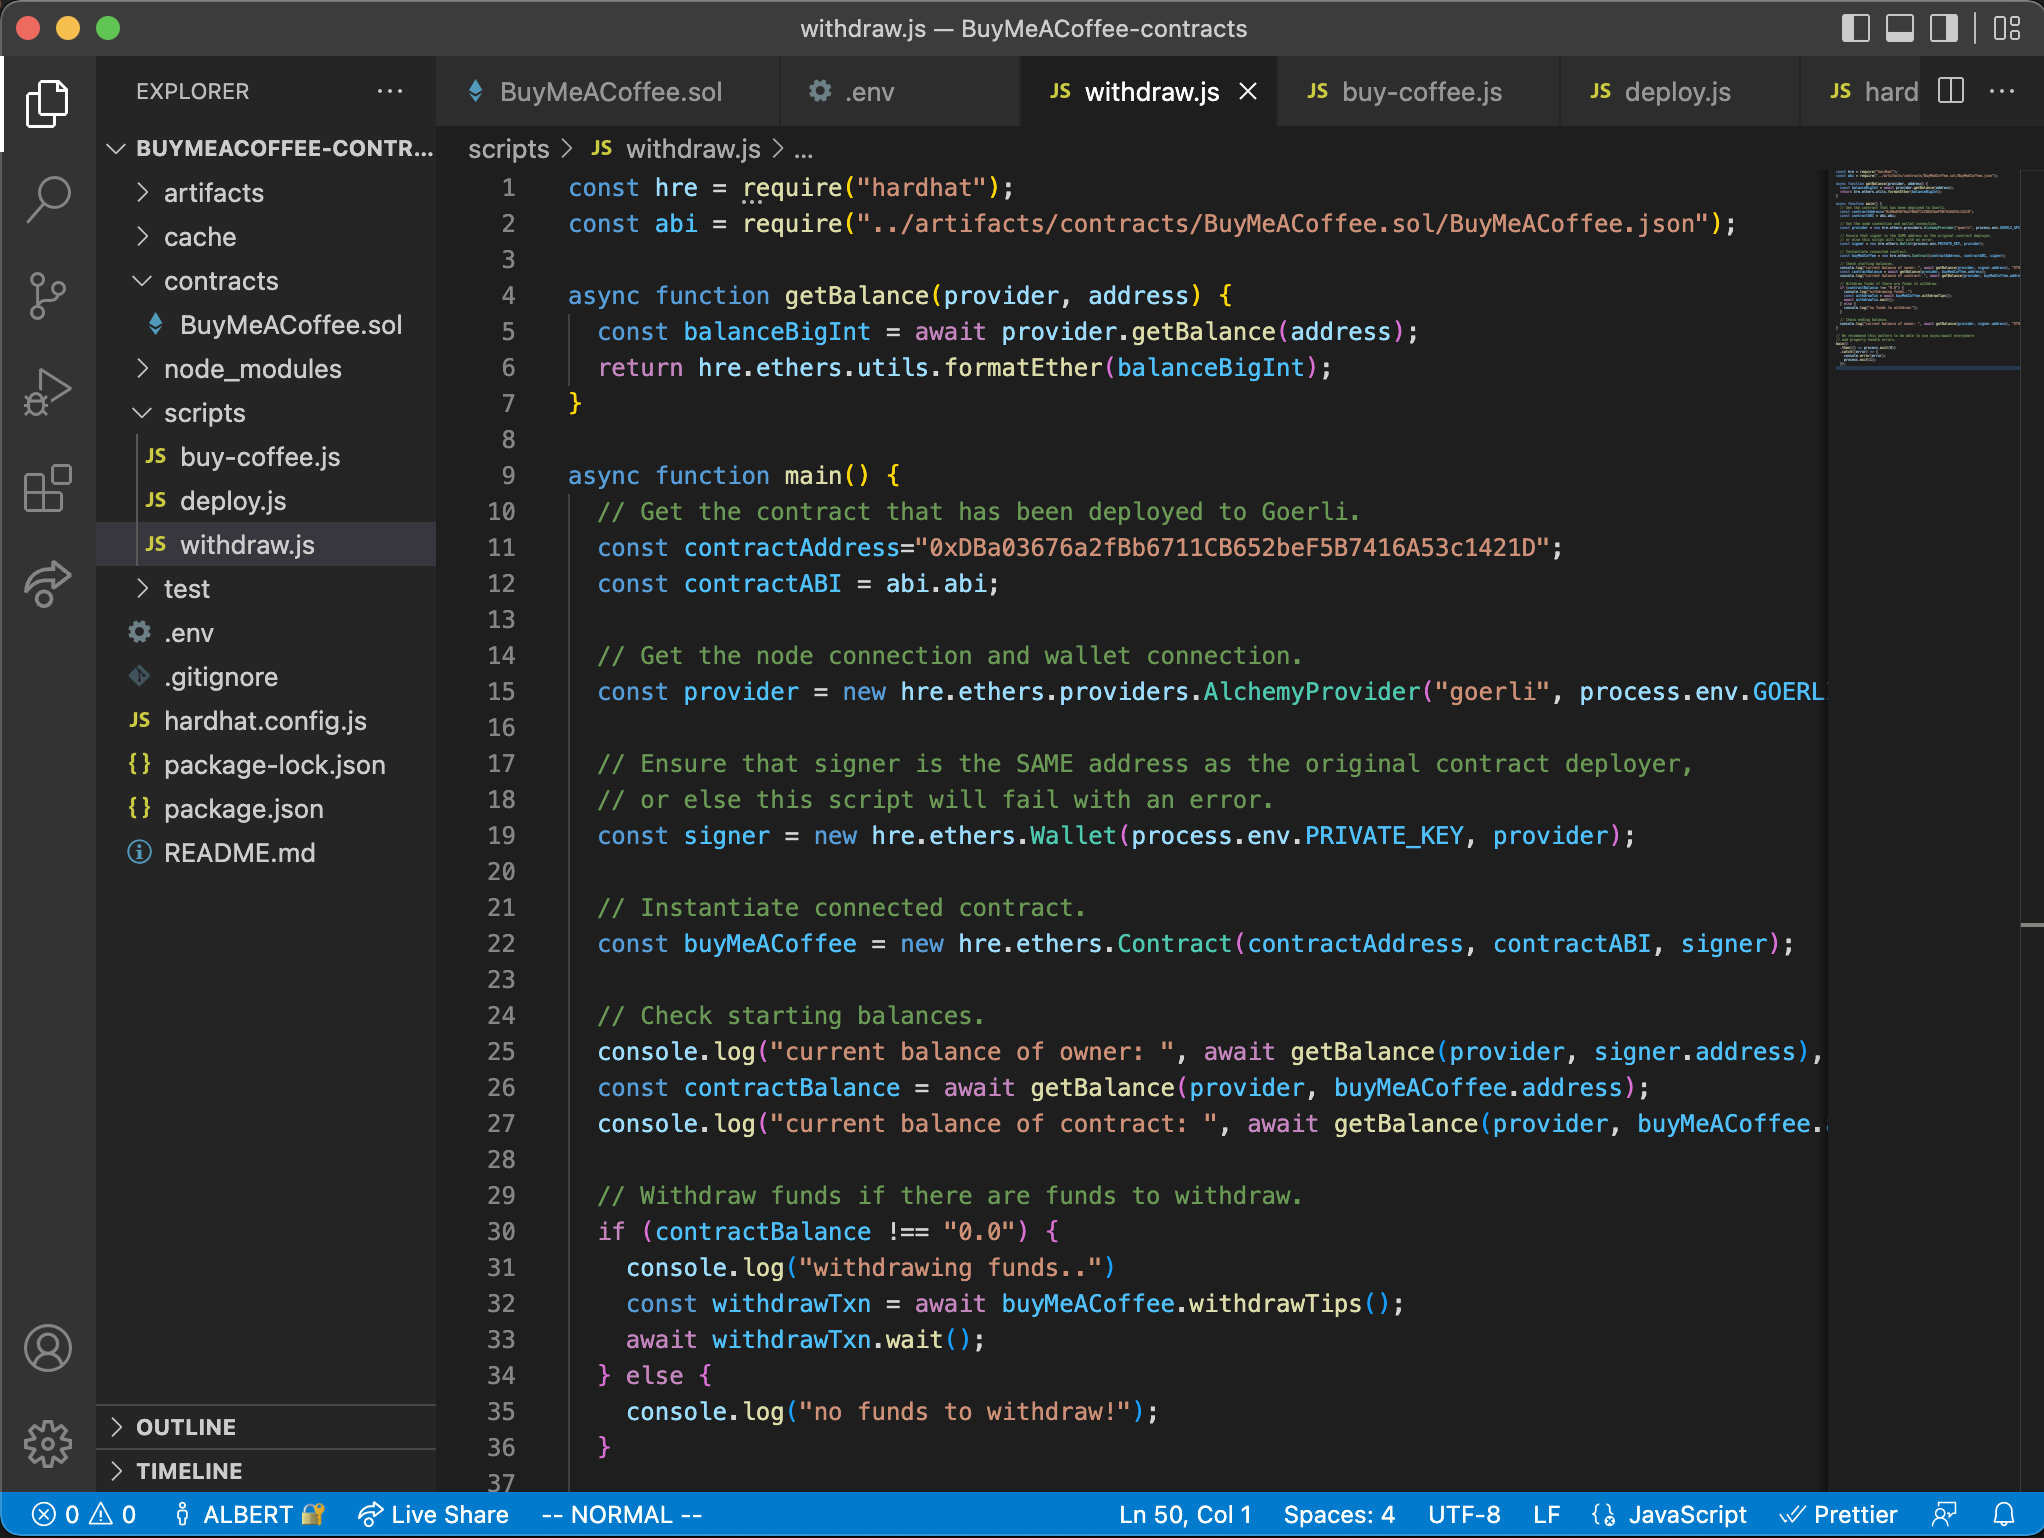
Now we have 1 Contract and 3 Hardhat scripts.
The most important part of this script is when we call the withdrawTips() function to pull money out from our contract balance and send it over to the owner's wallet:
// Withdraw funds if there are funds to withdraw.
  if (contractBalance !== "0.0") {
    console.log("withdrawing funds..")
    const withdrawTxn = await buyMeACoffee.withdrawTips();
    await withdrawTxn.wait();
  }
If there are no funds in the contract, we avoid attempting to withdraw so we don't unnecessarily spend gas fees.
When you run the script, you'll see output like this:
thatguyintech@albert BuyMeACoffee-contracts % npx hardhat run scripts/withdraw.js
current balance of owner:  0.039608085986833815 ETH
current balance of contract:  0.001 ETH
withdrawing funds..
current balance of owner:  0.040562731986622163 ETH
Note that we didn't add the --network goerli flag this time, and that's because our script hard-codes the network configuration directly inside the logic:
const provider = new hre.ethers.providers.JsonRpcProvider(
  `https://eth.georli.g.alchemy.com/v2/${GOERLI_API_KEY}`
);
Note
Remember, you need to create an environment variable called GEORLI_API_KEY in your
.envfile for this to work.
Great, now we have a way to rescue the contract's tips!
Let's move onto the dapp part of this project so that we can share our tipping page with all our friends :)
Build the frontend Buy Me A Coffee website dapp with Replit and Ethers.js
For this website portion, in order to keep things simple and clean, we are going to use an amazing tool for spinning up demo projects quickly, called Replit IDE.
Visit my example project here, and fork it to create your own copy to modify: https://replit.com/@thatguyintech/BuyMeACoffee-Solidity-DeFi-Tipping-app
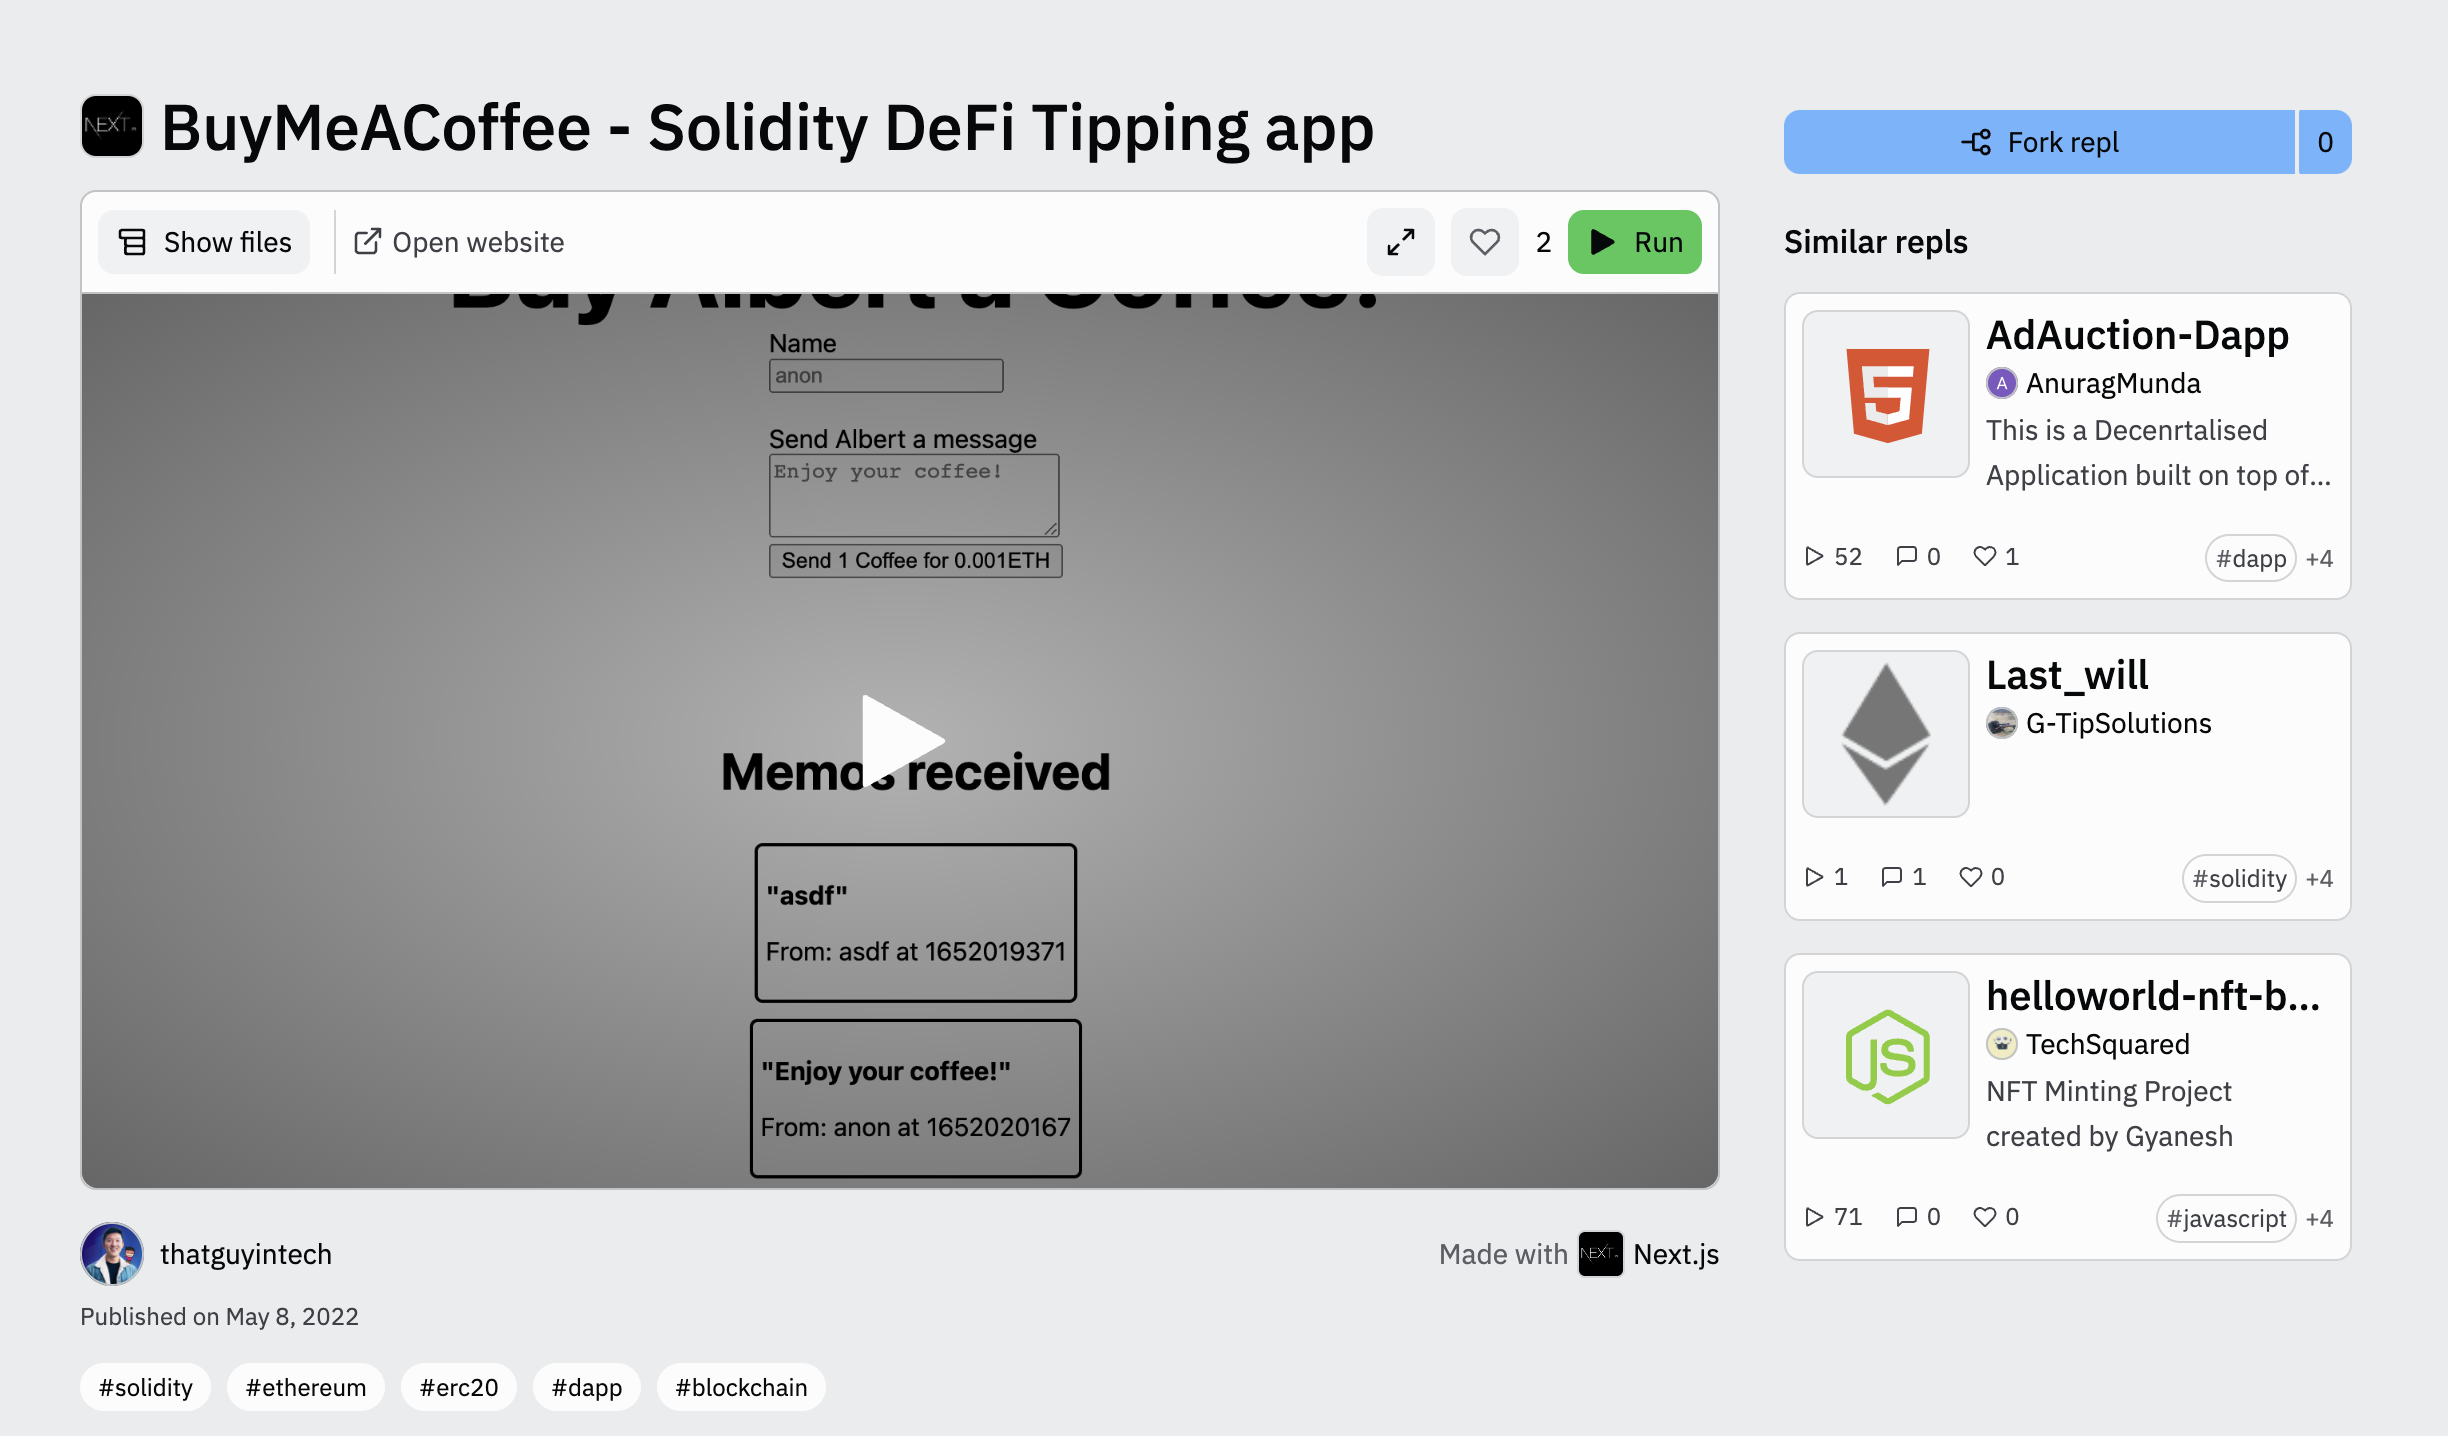
Click "Fork repl" in the top right to make your own copy and follow along!
You can also view the full website code here: https://github.com/alchemyplatform/RTW3-Week2-BuyMeACoffee-Website
After forking the repl, you should be taken to an IDE page where you can:
- See the code of a
Next.jsweb application - Get access to a console, a terminal shell, and a preview of the README.md file
- View a hot-reloading version of your dapp
It should look like this:
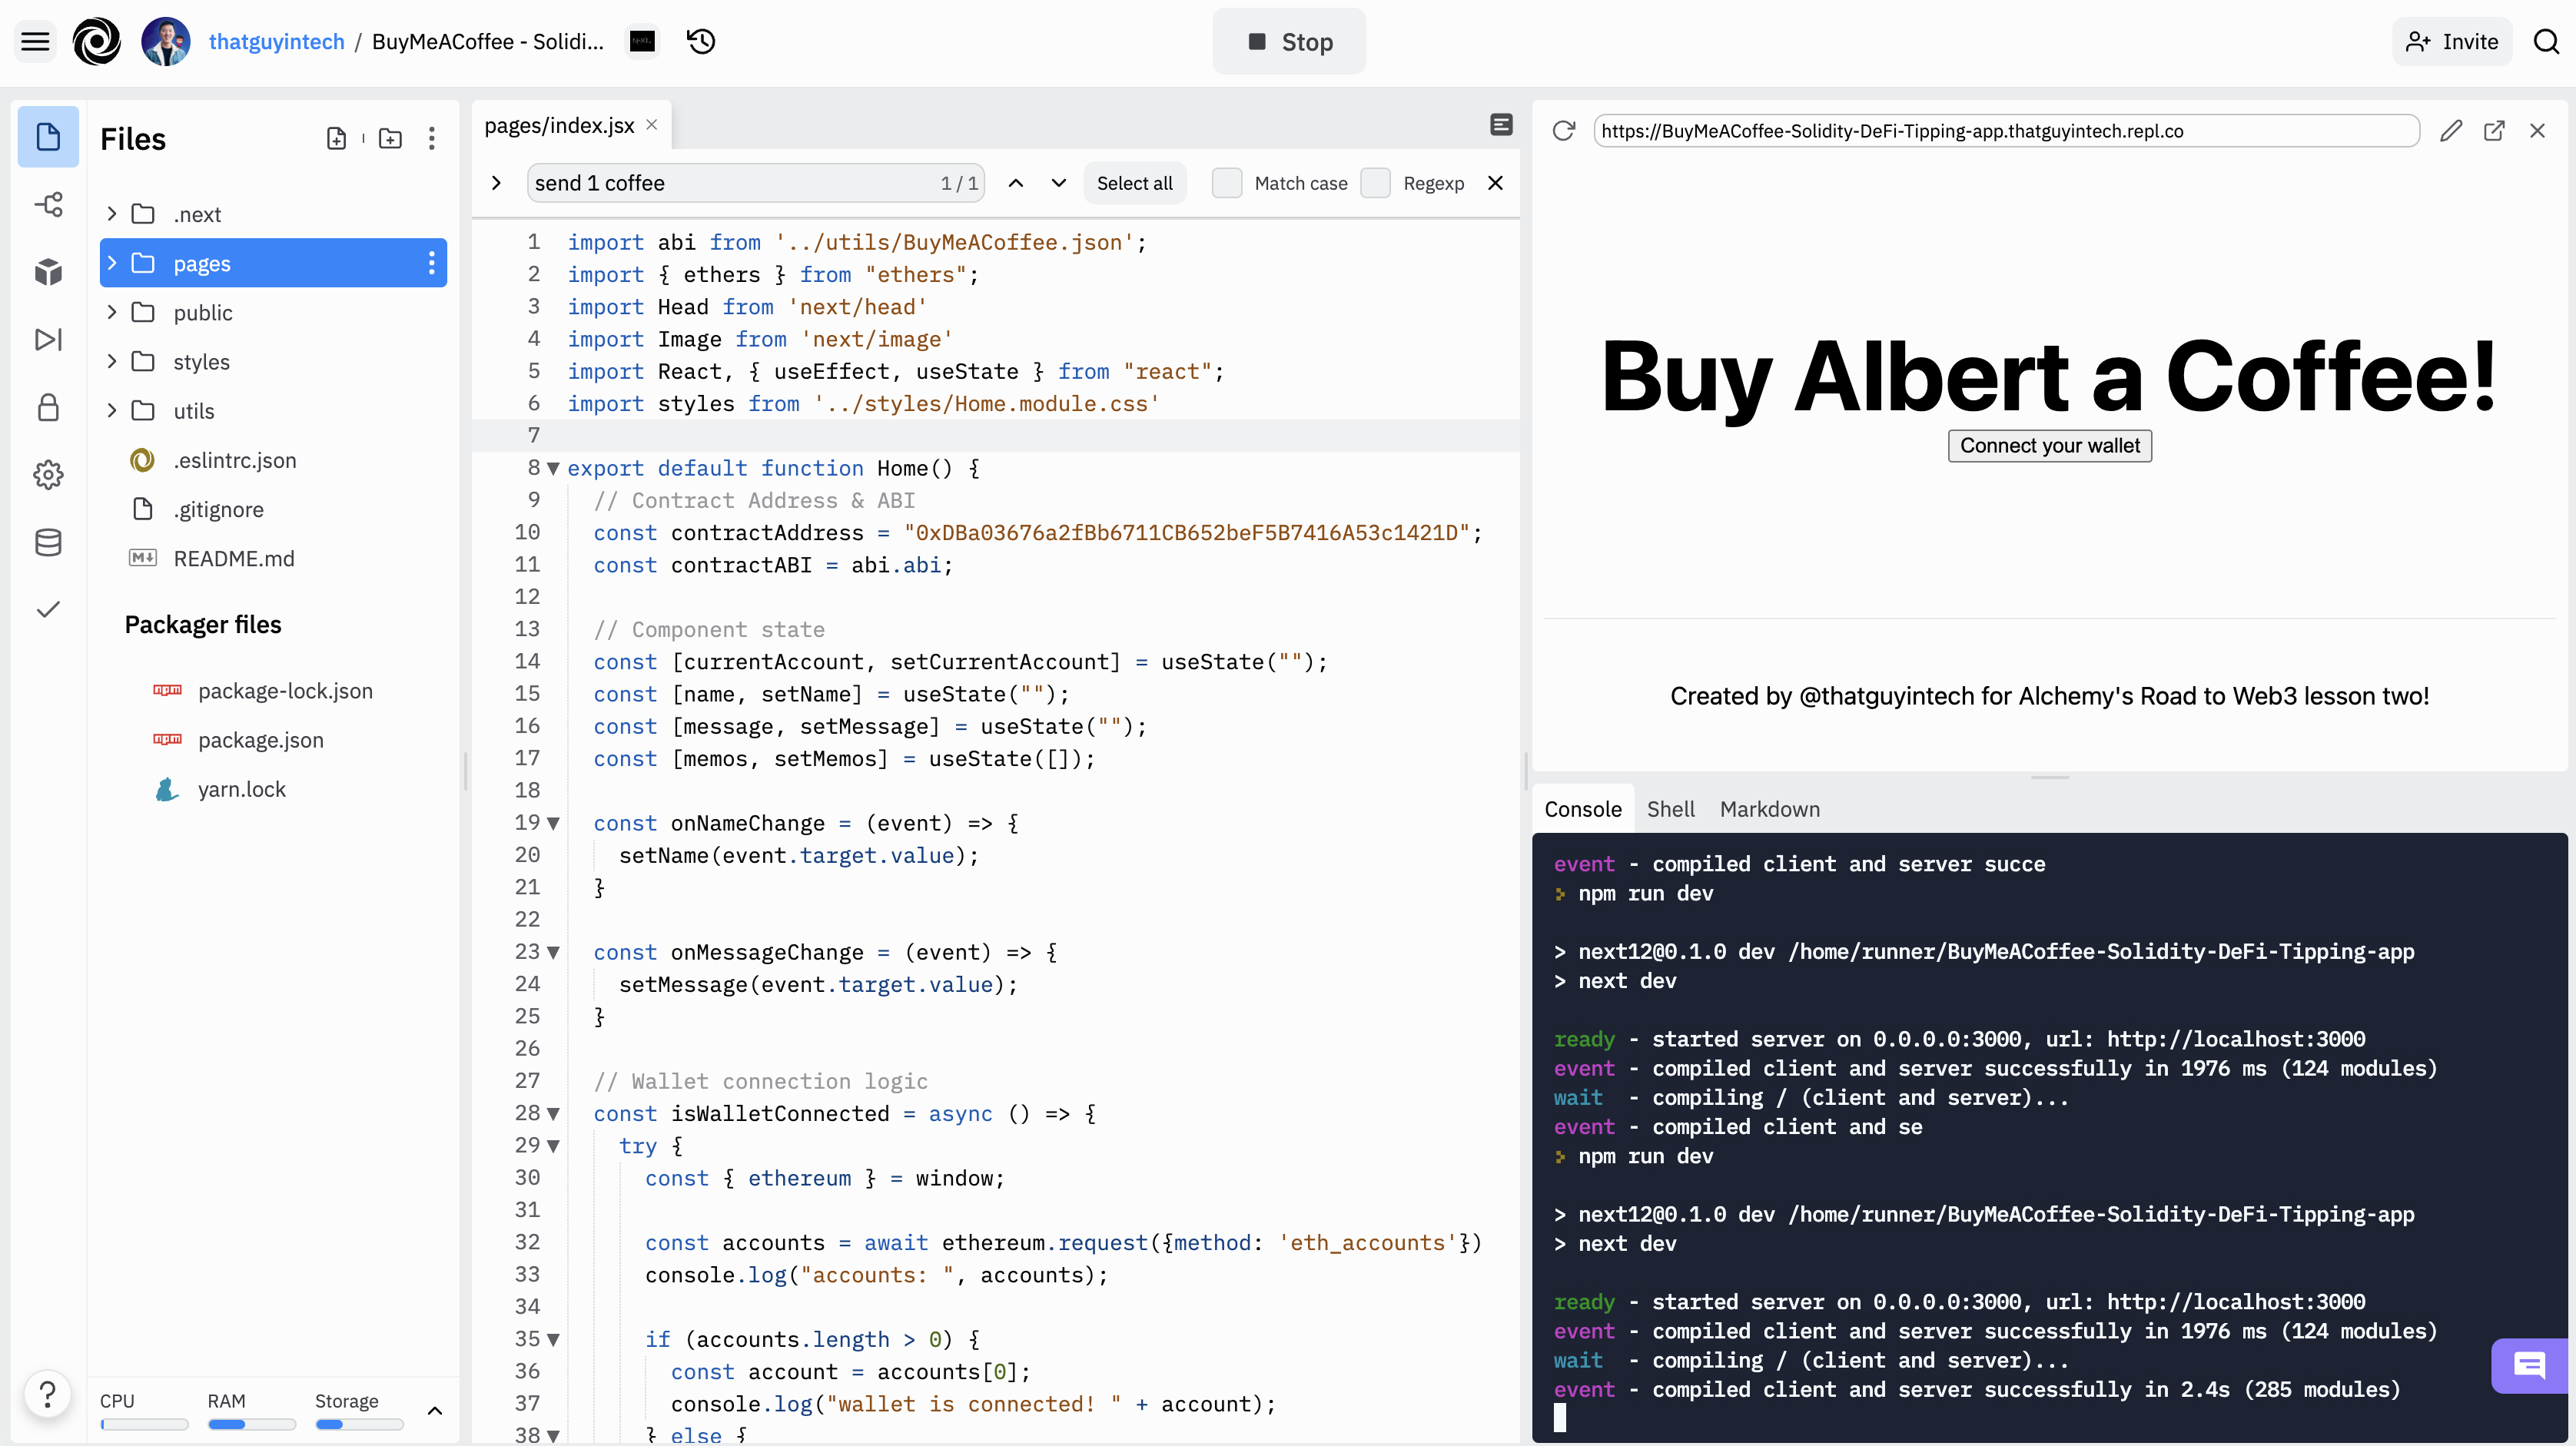
This part of the tutorial will be quick and fun -- we're going to update a couple of variables so that it's connected to the smart contract we deployed in the earlier parts of the project and so that it shows your own name on the website!
Let's get everything hooked up and working first, and then I'll explain to you what's going on in each part.
Here are the changes we need to make:
- Update the
contractAddressinpages/index.js - Update the name strings to be your own name in
pages/index.js - Ensure that the contract ABI matches your contract in
utils/BuyMeACoffee.json
Update contractAddress in pages/index.js
contractAddress in pages/index.jsYou can see that the contractAddress variable is already populated with an address. This is an example contract that I deployed, which you're welcome to use, but if you do... all the tips sent to your website will go to my address :)
You can fix this by pasting in your address from when we deployed the BuyMeACoffee.sol smart contract earlier.
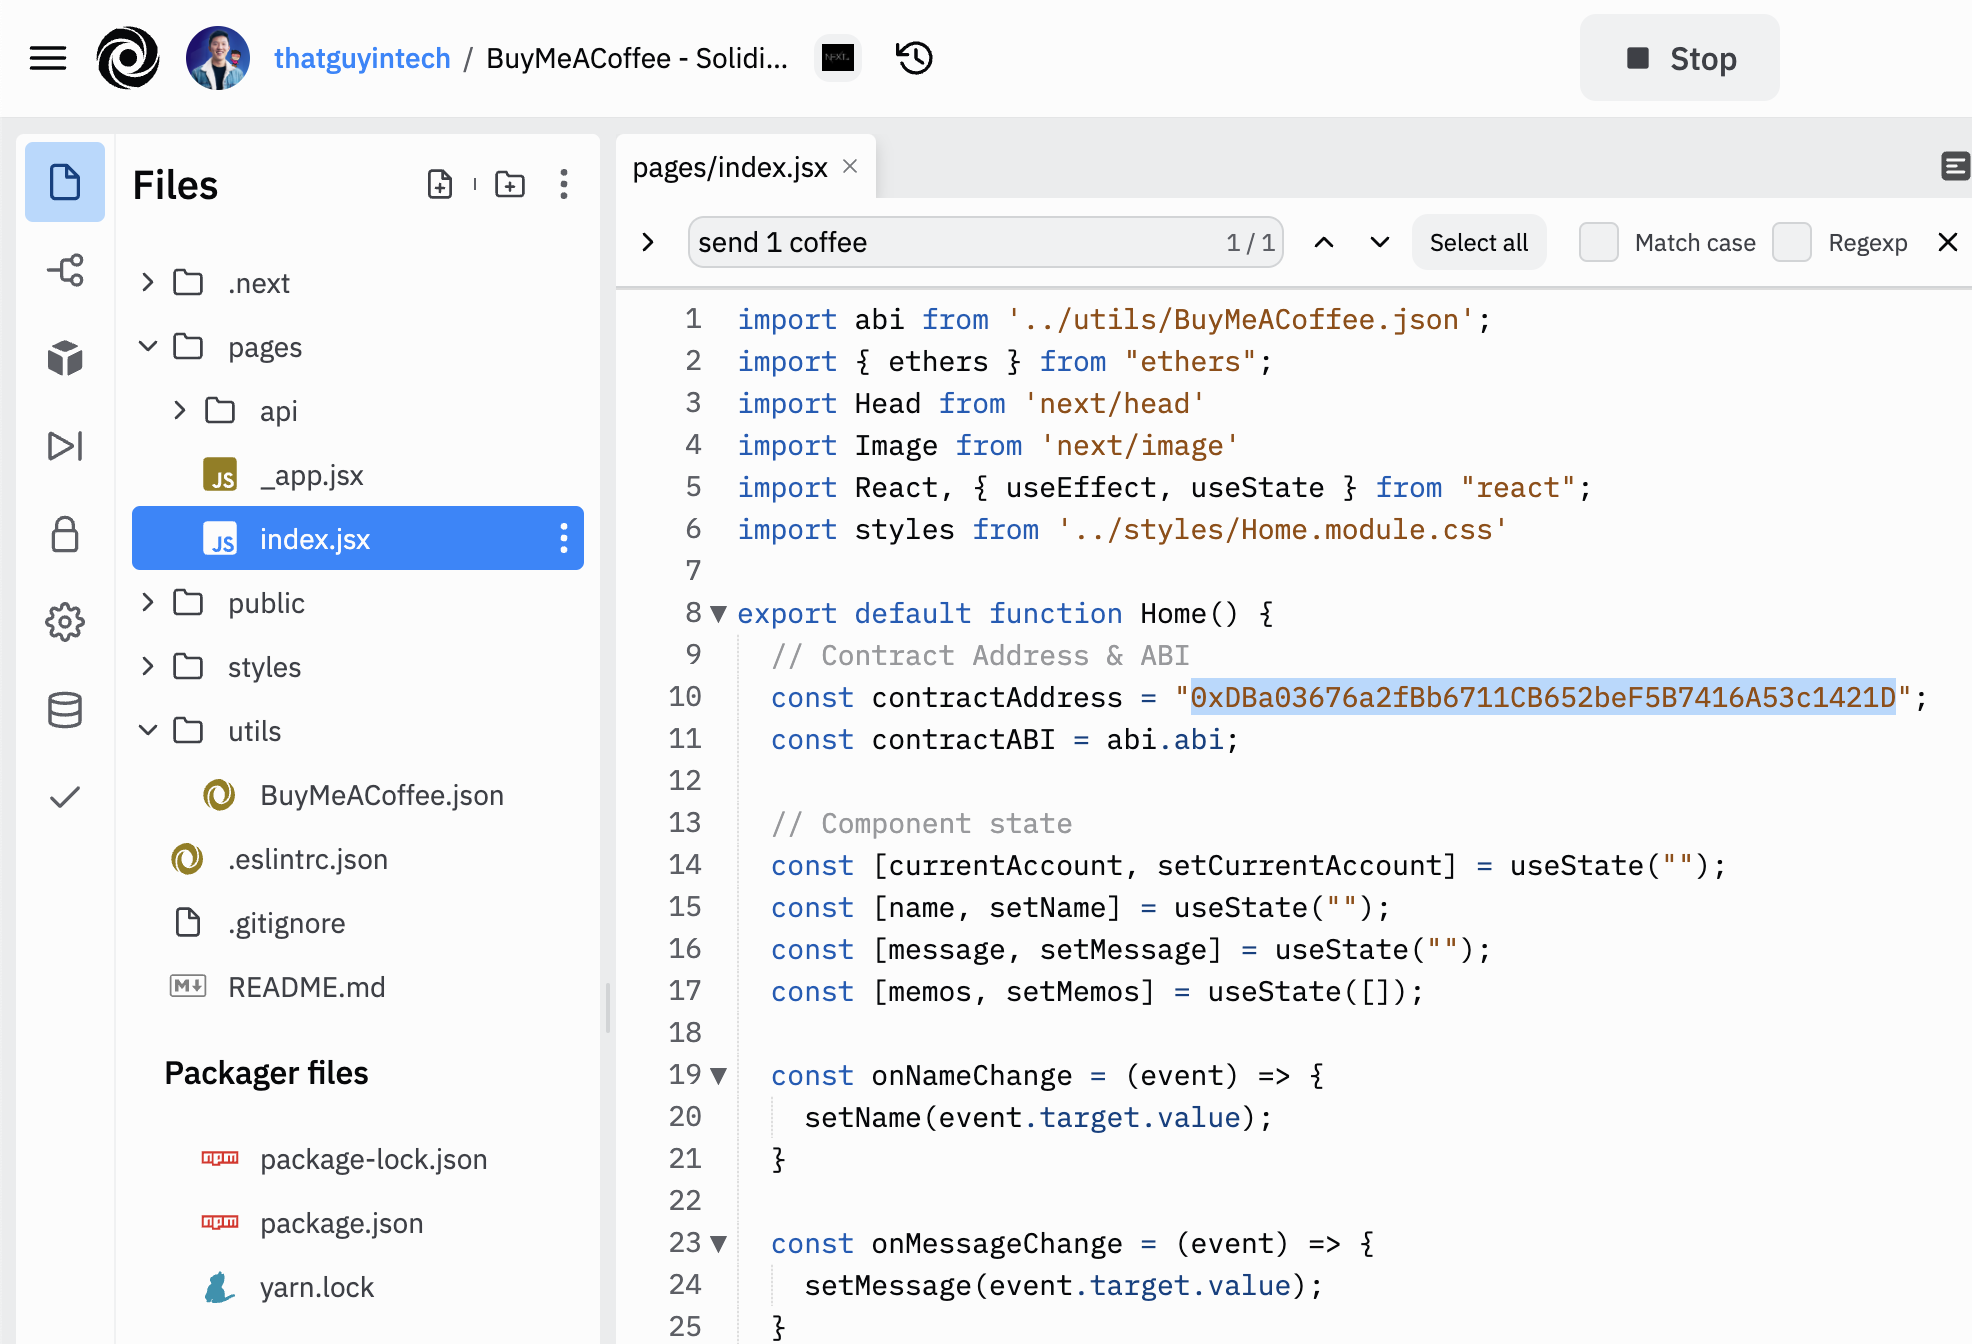
Change the contractAddress to point to your BuyMeACoffee.sol contract deployed on Goerli
Update name strings to be your own name in pages/index.js
Right now, the site has my name all over it. Find all the places that use Albert and replace it with your name/anon profile / ENS domain, or whatever it is you'd like for people to call you.
You can do a cmd + F or ctrl + F to look for all instances of Albert to replace.
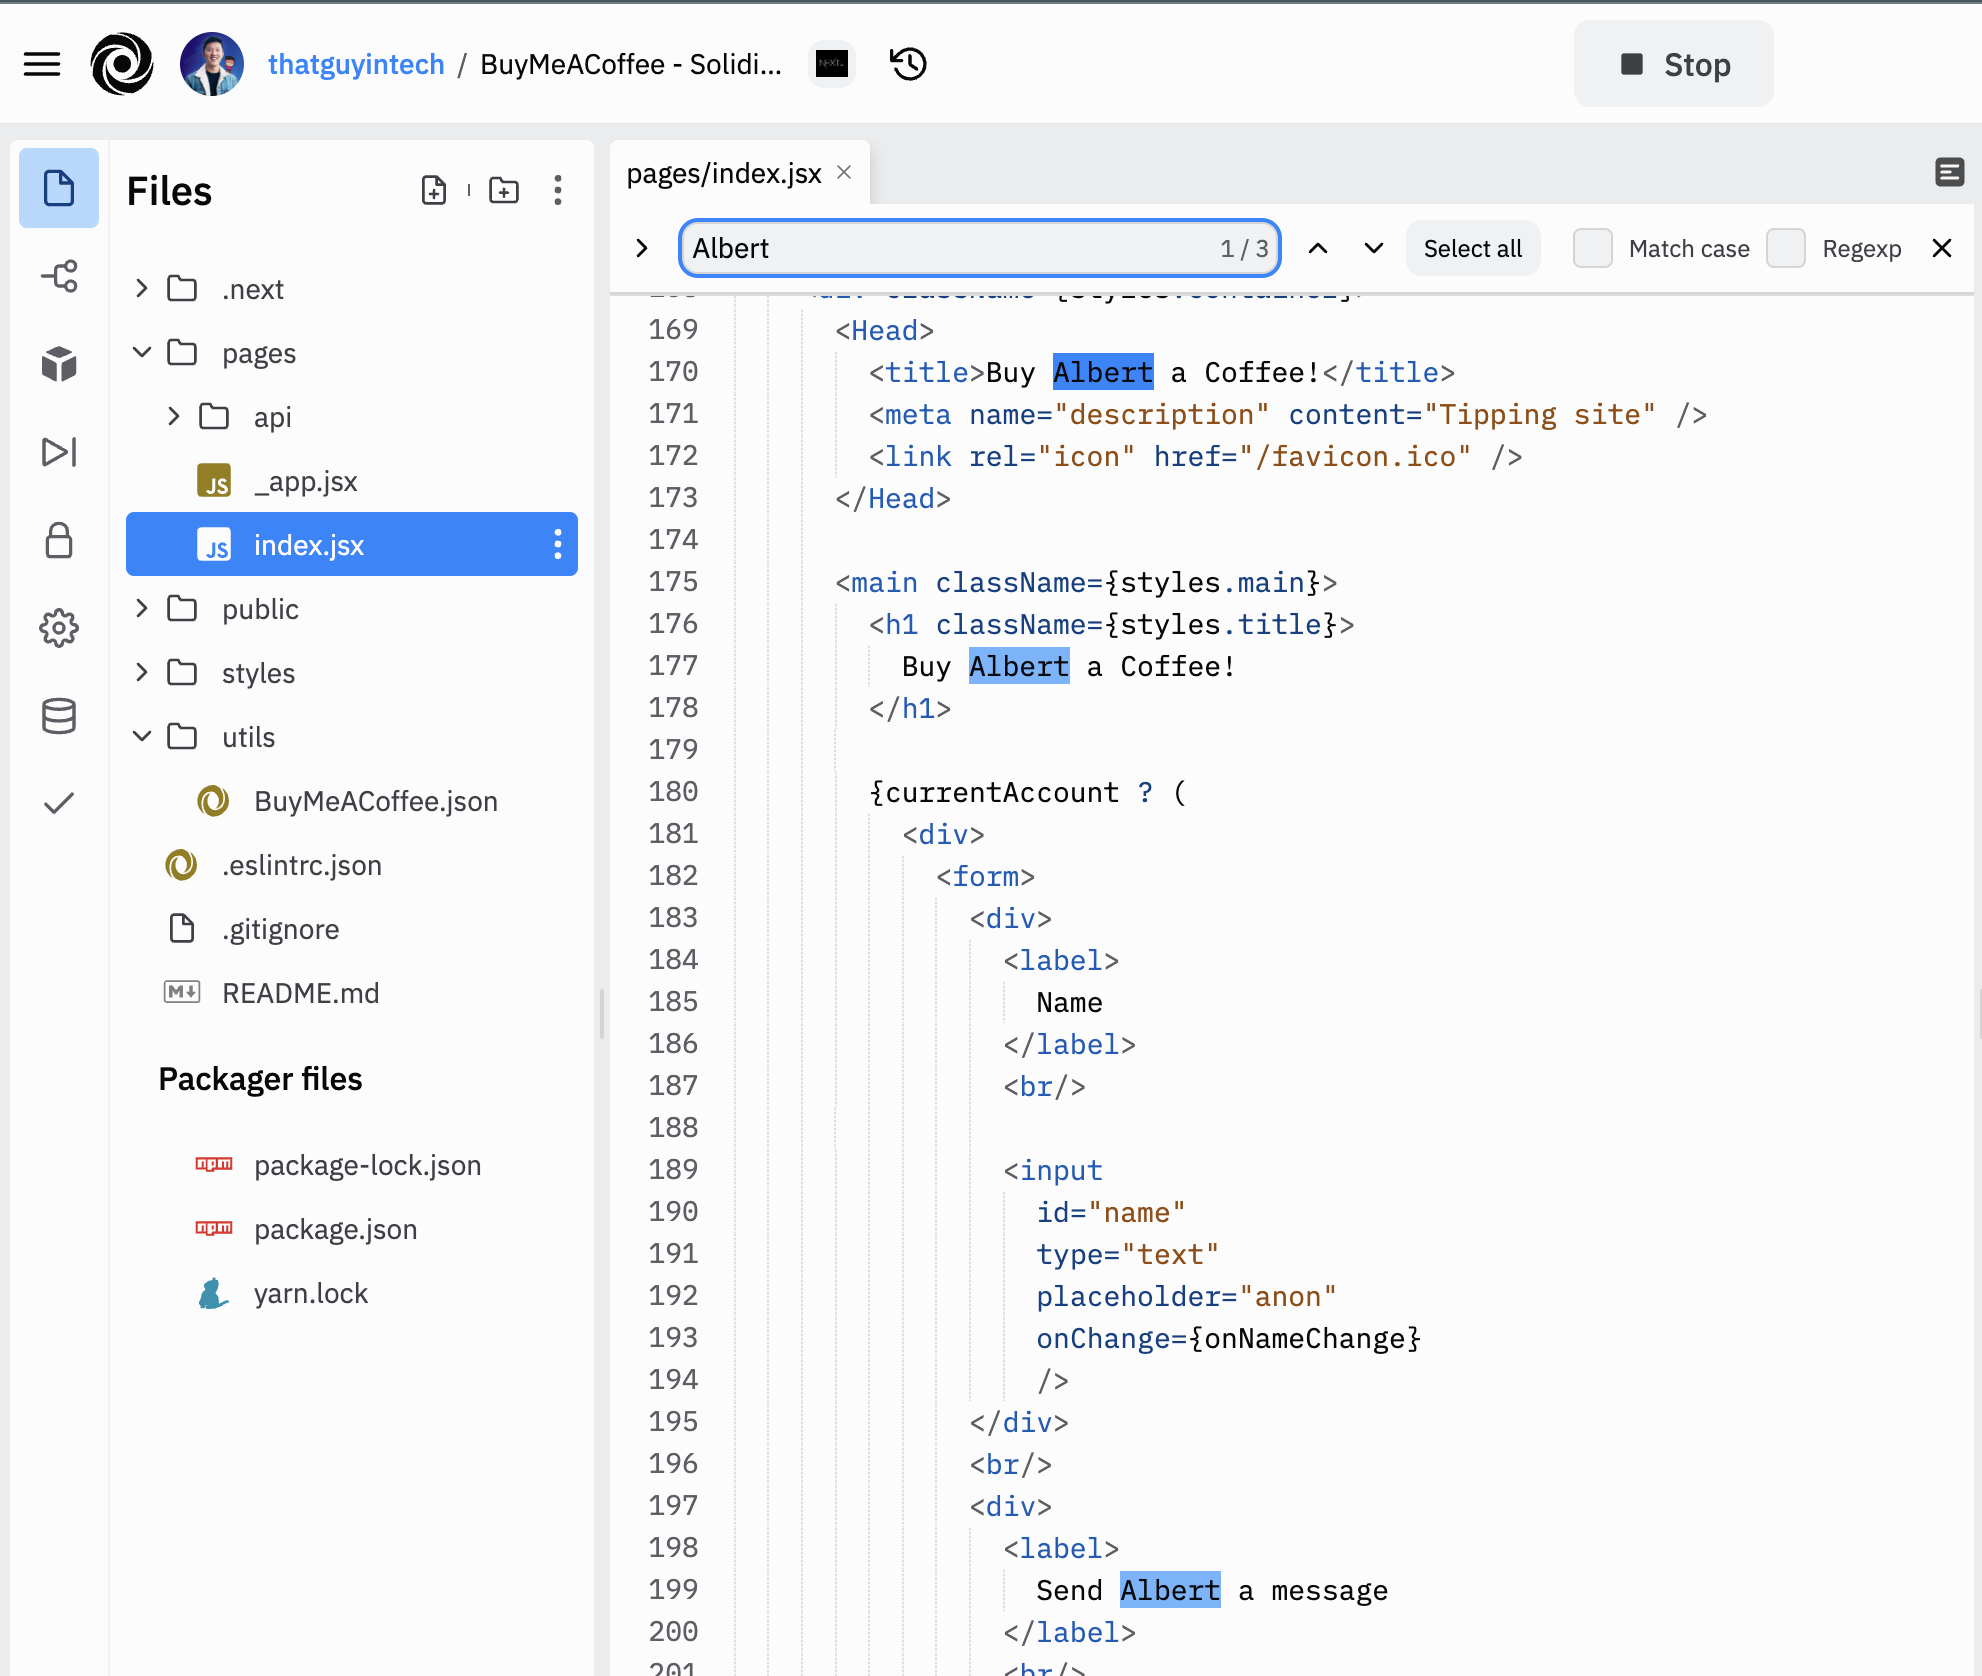
Change the name text to your own name! I apologize for not putting these in a single variable.
Ensure that the contract ABI matches in utils/BuyMeACoffee.json
This is also a key thing to check, especially when you make changes to your smart contract later on (after this tutorial).
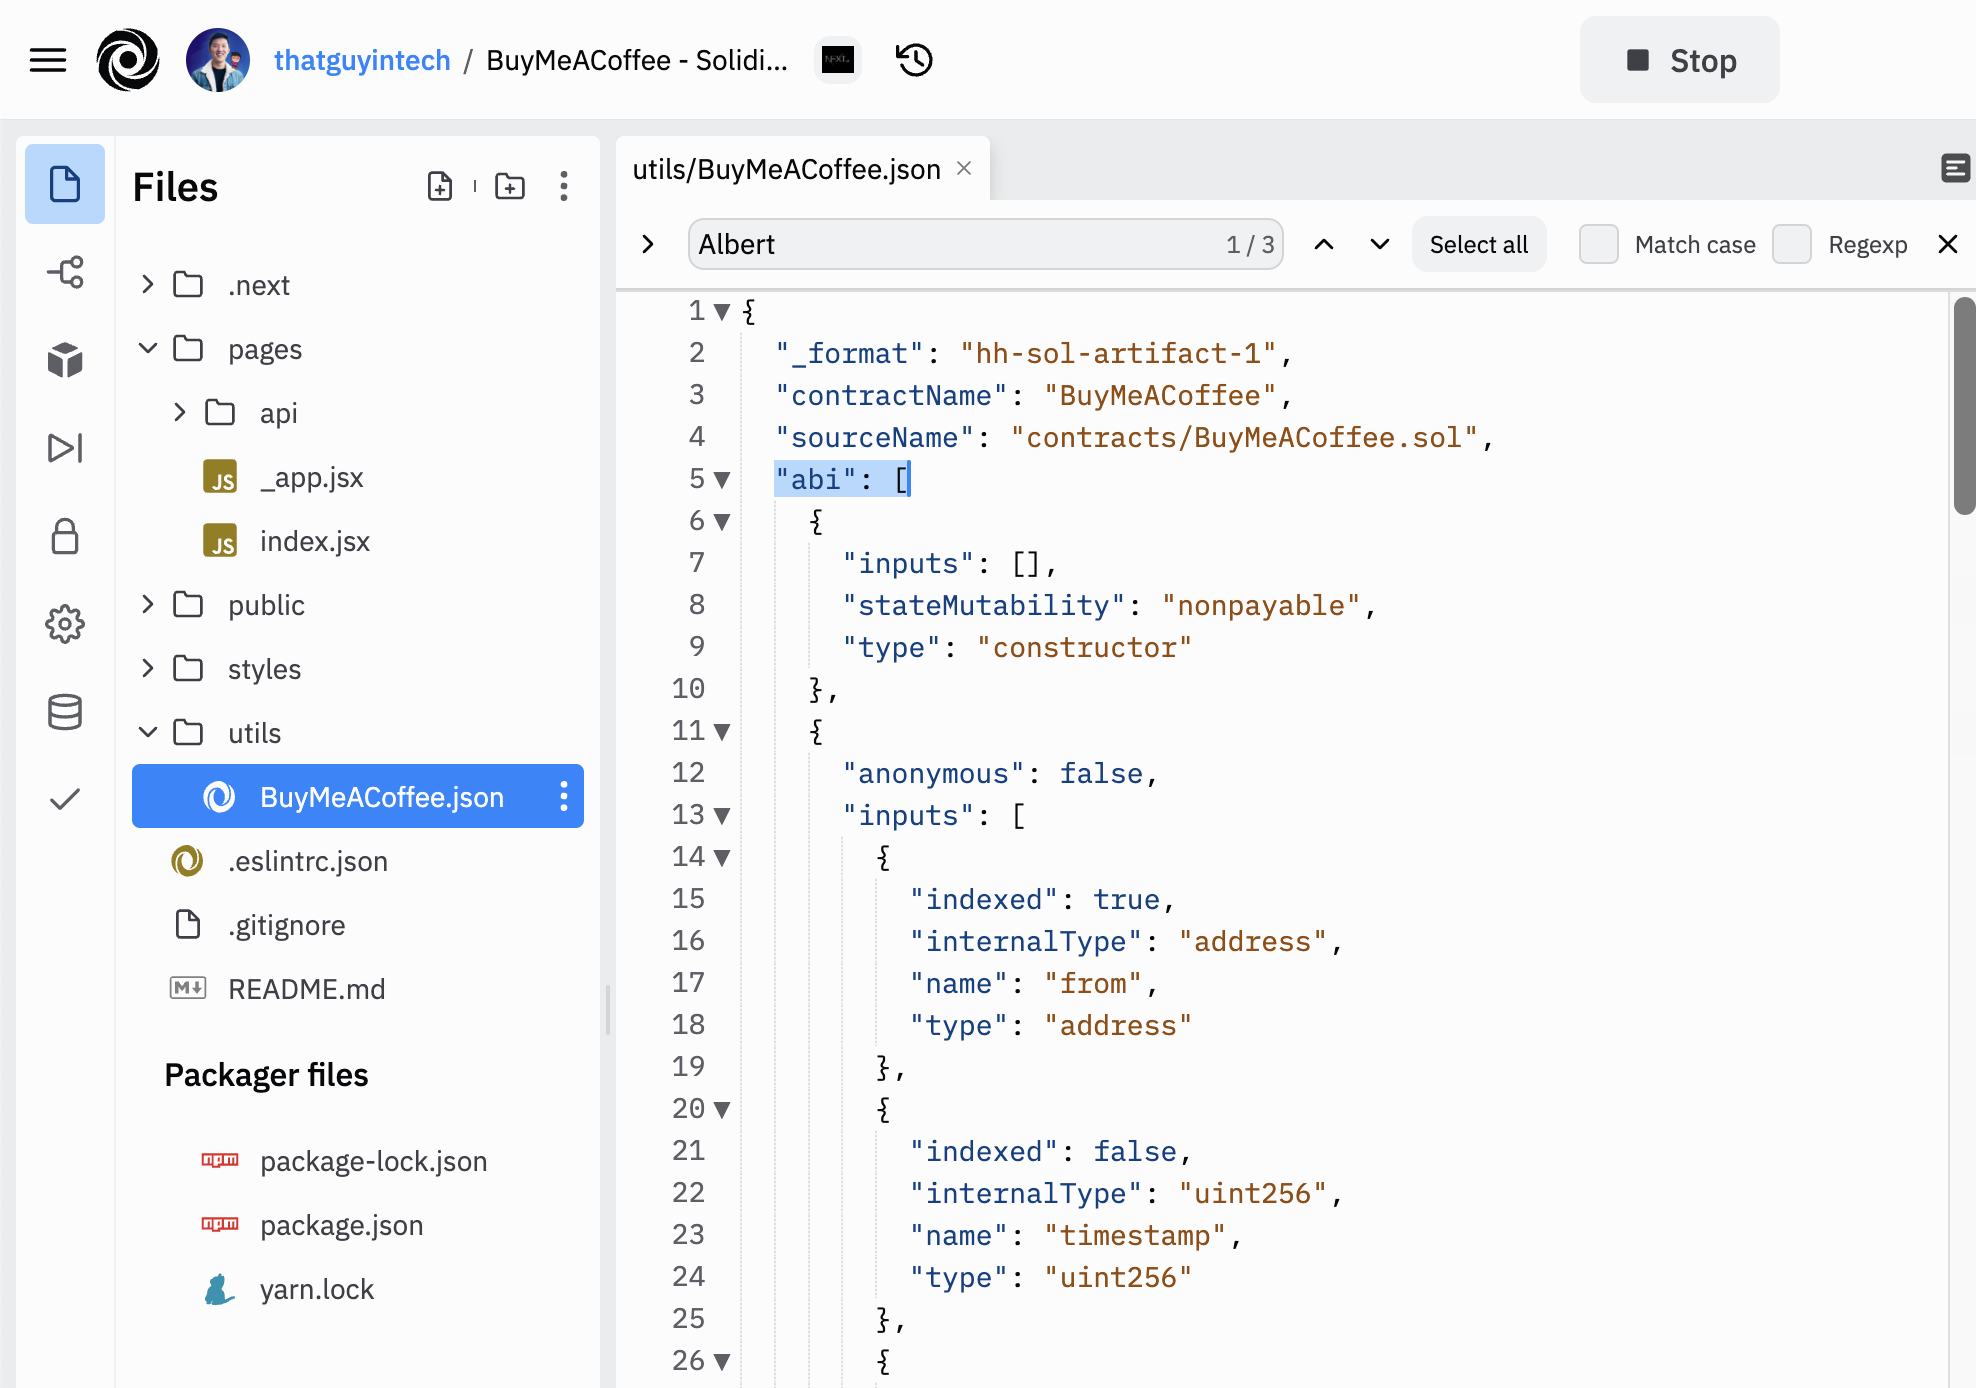
The ABI is the application binary interface, which is a fancy way of telling our frontend code what functions are available to call on the smart contract. The ABI is generated inside a json file when the smart contract is compiled. You can find it back in the smart contract folder at the path artifacts/contracts/BuyMeACoffee.sol/BuyMeACoffee.json
Your ABI will also change whenever you change your smart contract code and redeploy. Copy that over and paste it into the Replit file: utils/BuyMeACoffee.json
Now, if the app isn't already running, you can go to the shell and use npm run dev to start a local server to test out your changes. The website should load in a few seconds:
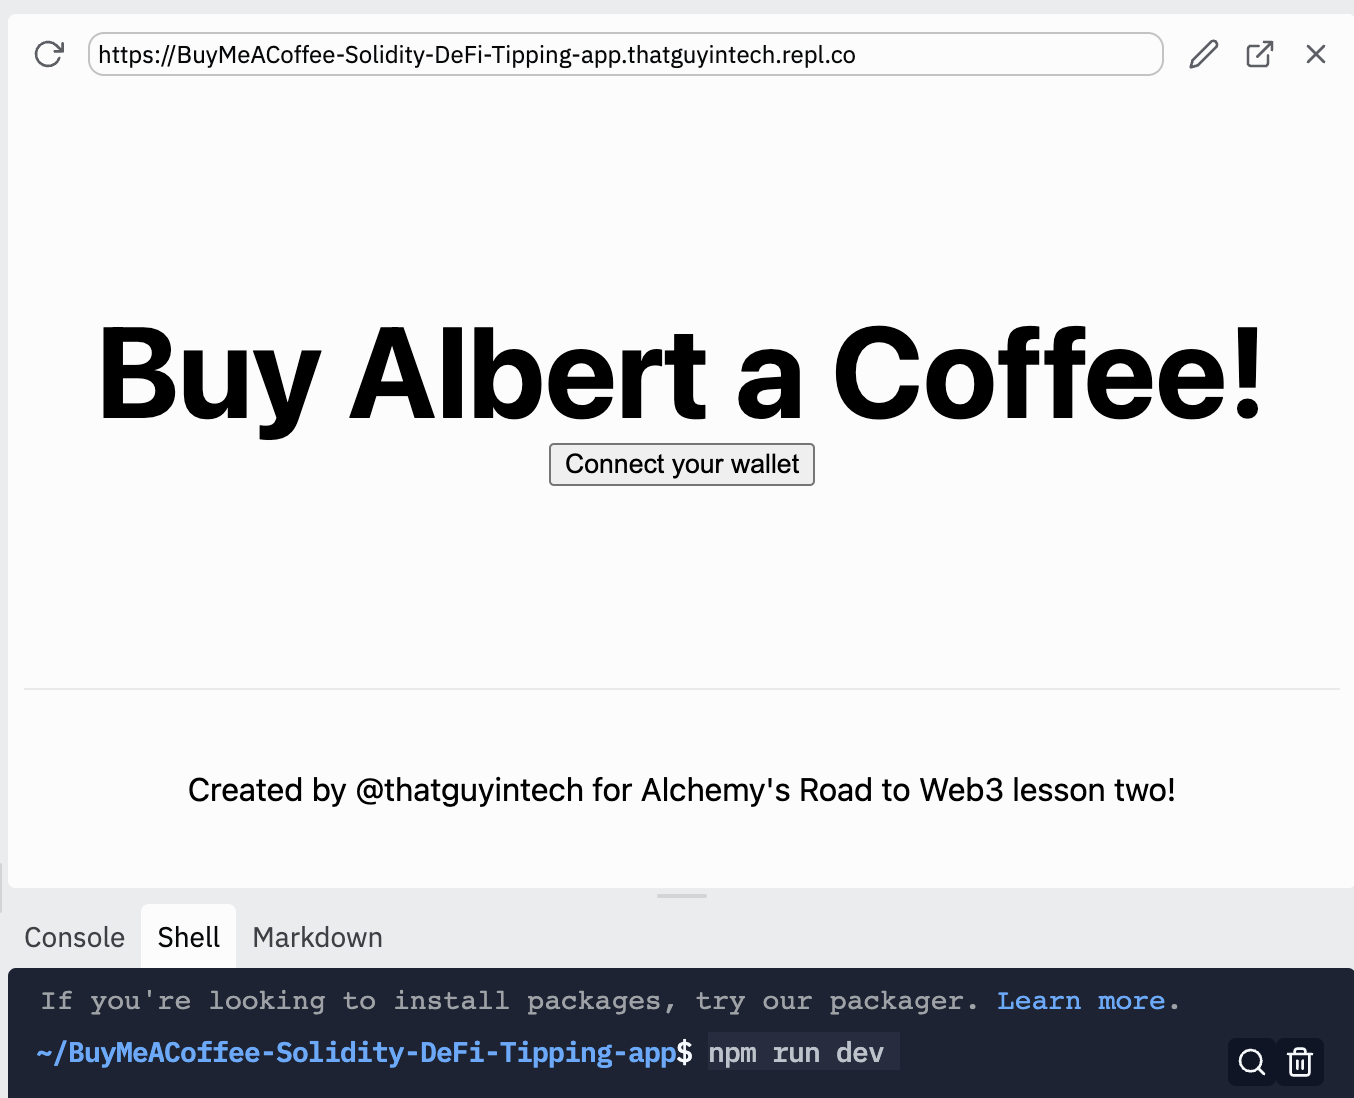
The awesome thing about Replit is that once you have the website up, you can go back to your profile, find the Replit project link, and send it to friends to visit your tipping page.
Now, let's take a tour through the website and the code. You can already see from the above screenshot that when you first visit the dapp, it will check if you have MetaMask installed and whether your wallet is connected to the site. The first time you visit, you will not be connected, so a button will appear asking you to Connect your wallet.
After you click Connect your wallet, a MetaMask window will pop up asking if you want to confirm the connection by signing a message. This message signing does not require any gas fees or costs.
Once the signature is complete, the website will acknowledge your connection and you will be able to see the coffee form and any of the previous memos left behind by other visitors.
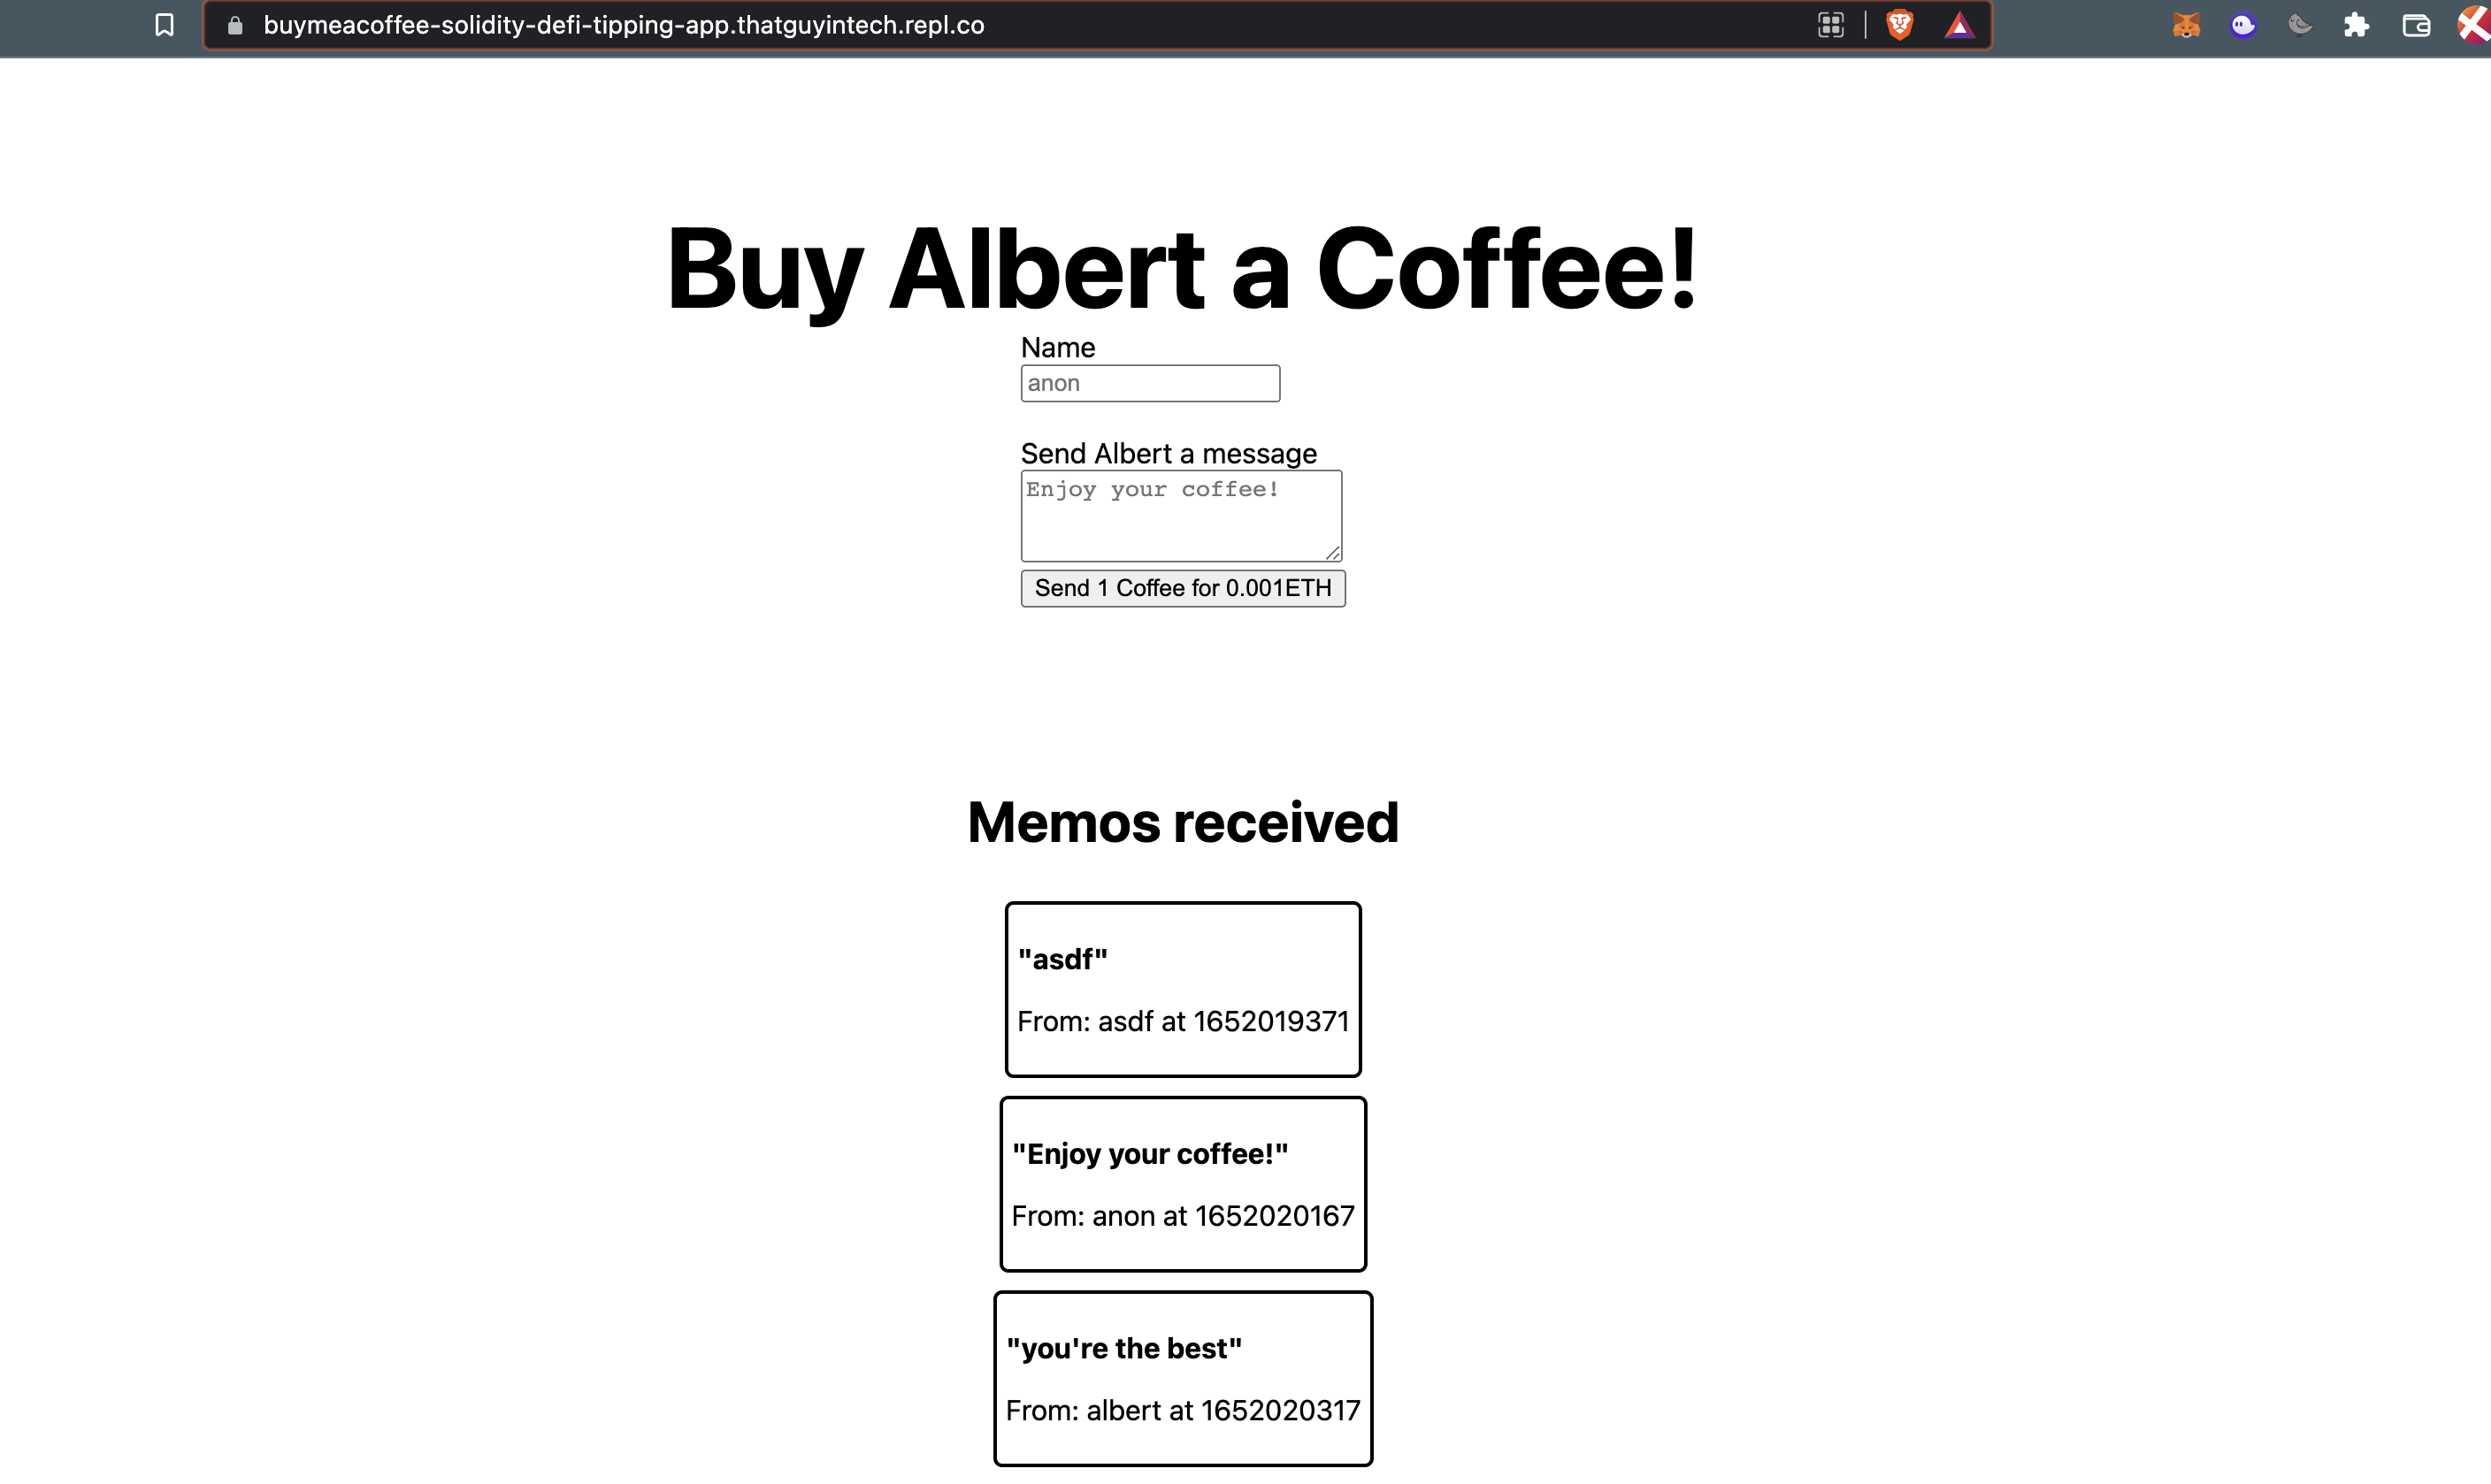
BOOM! That's it! That's the whole project. Take a second to pat yourself on the back and reflect on the journey you've been on ☺️
To recap:
- We used Hardhat and Ethers.js to code, test, and deploy a custom solidity smart contract.
- We deployed the smart contract to the Goerli test network using Alchemy and MetaMask.
- We implemented a withdrawal script to allow us to accept the fruits of our labor.
- We connected a frontend website built with Next.js, React, and Replit to the smart contract by using Ethers.js to load the contract ABI.
That's a LOT!
Challenges
Okay, now time for the best part. I'm going to leave you with some challenges to try on your own, to see if you fully understand what you've learned here! (For some guidance, watch the YouTube video here).
- Allow your smart contract to update the withdrawal address.
- Allow your smart contract to
buyLargeCoffeefor 0.003 ETH, and create a button on the frontend website that shows a "Buy Large Coffee for 0.003ETH" button.
Once you're done with your challenge, tweet about it by tagging @AlchemyLearn on Twitter and using the hashtag #roadtoweb3!
See you on the other side ❤️
Updated over 1 year ago
