Submitting your Smart Contract to Etherscan
Step-by-step guide on submitting your smart contract's ABI to Etherscan so anyone can look at the contract's methods and variables and understand how to interact with it.
You should have completed Part 1: Creating and Deploying a Smart Contract, and Part 2: Interacting with Your Smart Contract prior to starting this section below.
Part 3: Publish your Smart Contract to Etherscan
You did all the hard work of bringing your smart contract to life - now it's time to share it with the world!
By verifying your smart contract on Etherscan, anyone can view your source code and interact with your smart contract. Let's get started!
Step 1: Generate an API Key on your Etherscan account
An Etherscan API Key is necessary to verify that you're the owner of the smart contract that you're trying to publish
Register on Etherscan
If you don't have an Etherscan account, first sign up using this link.
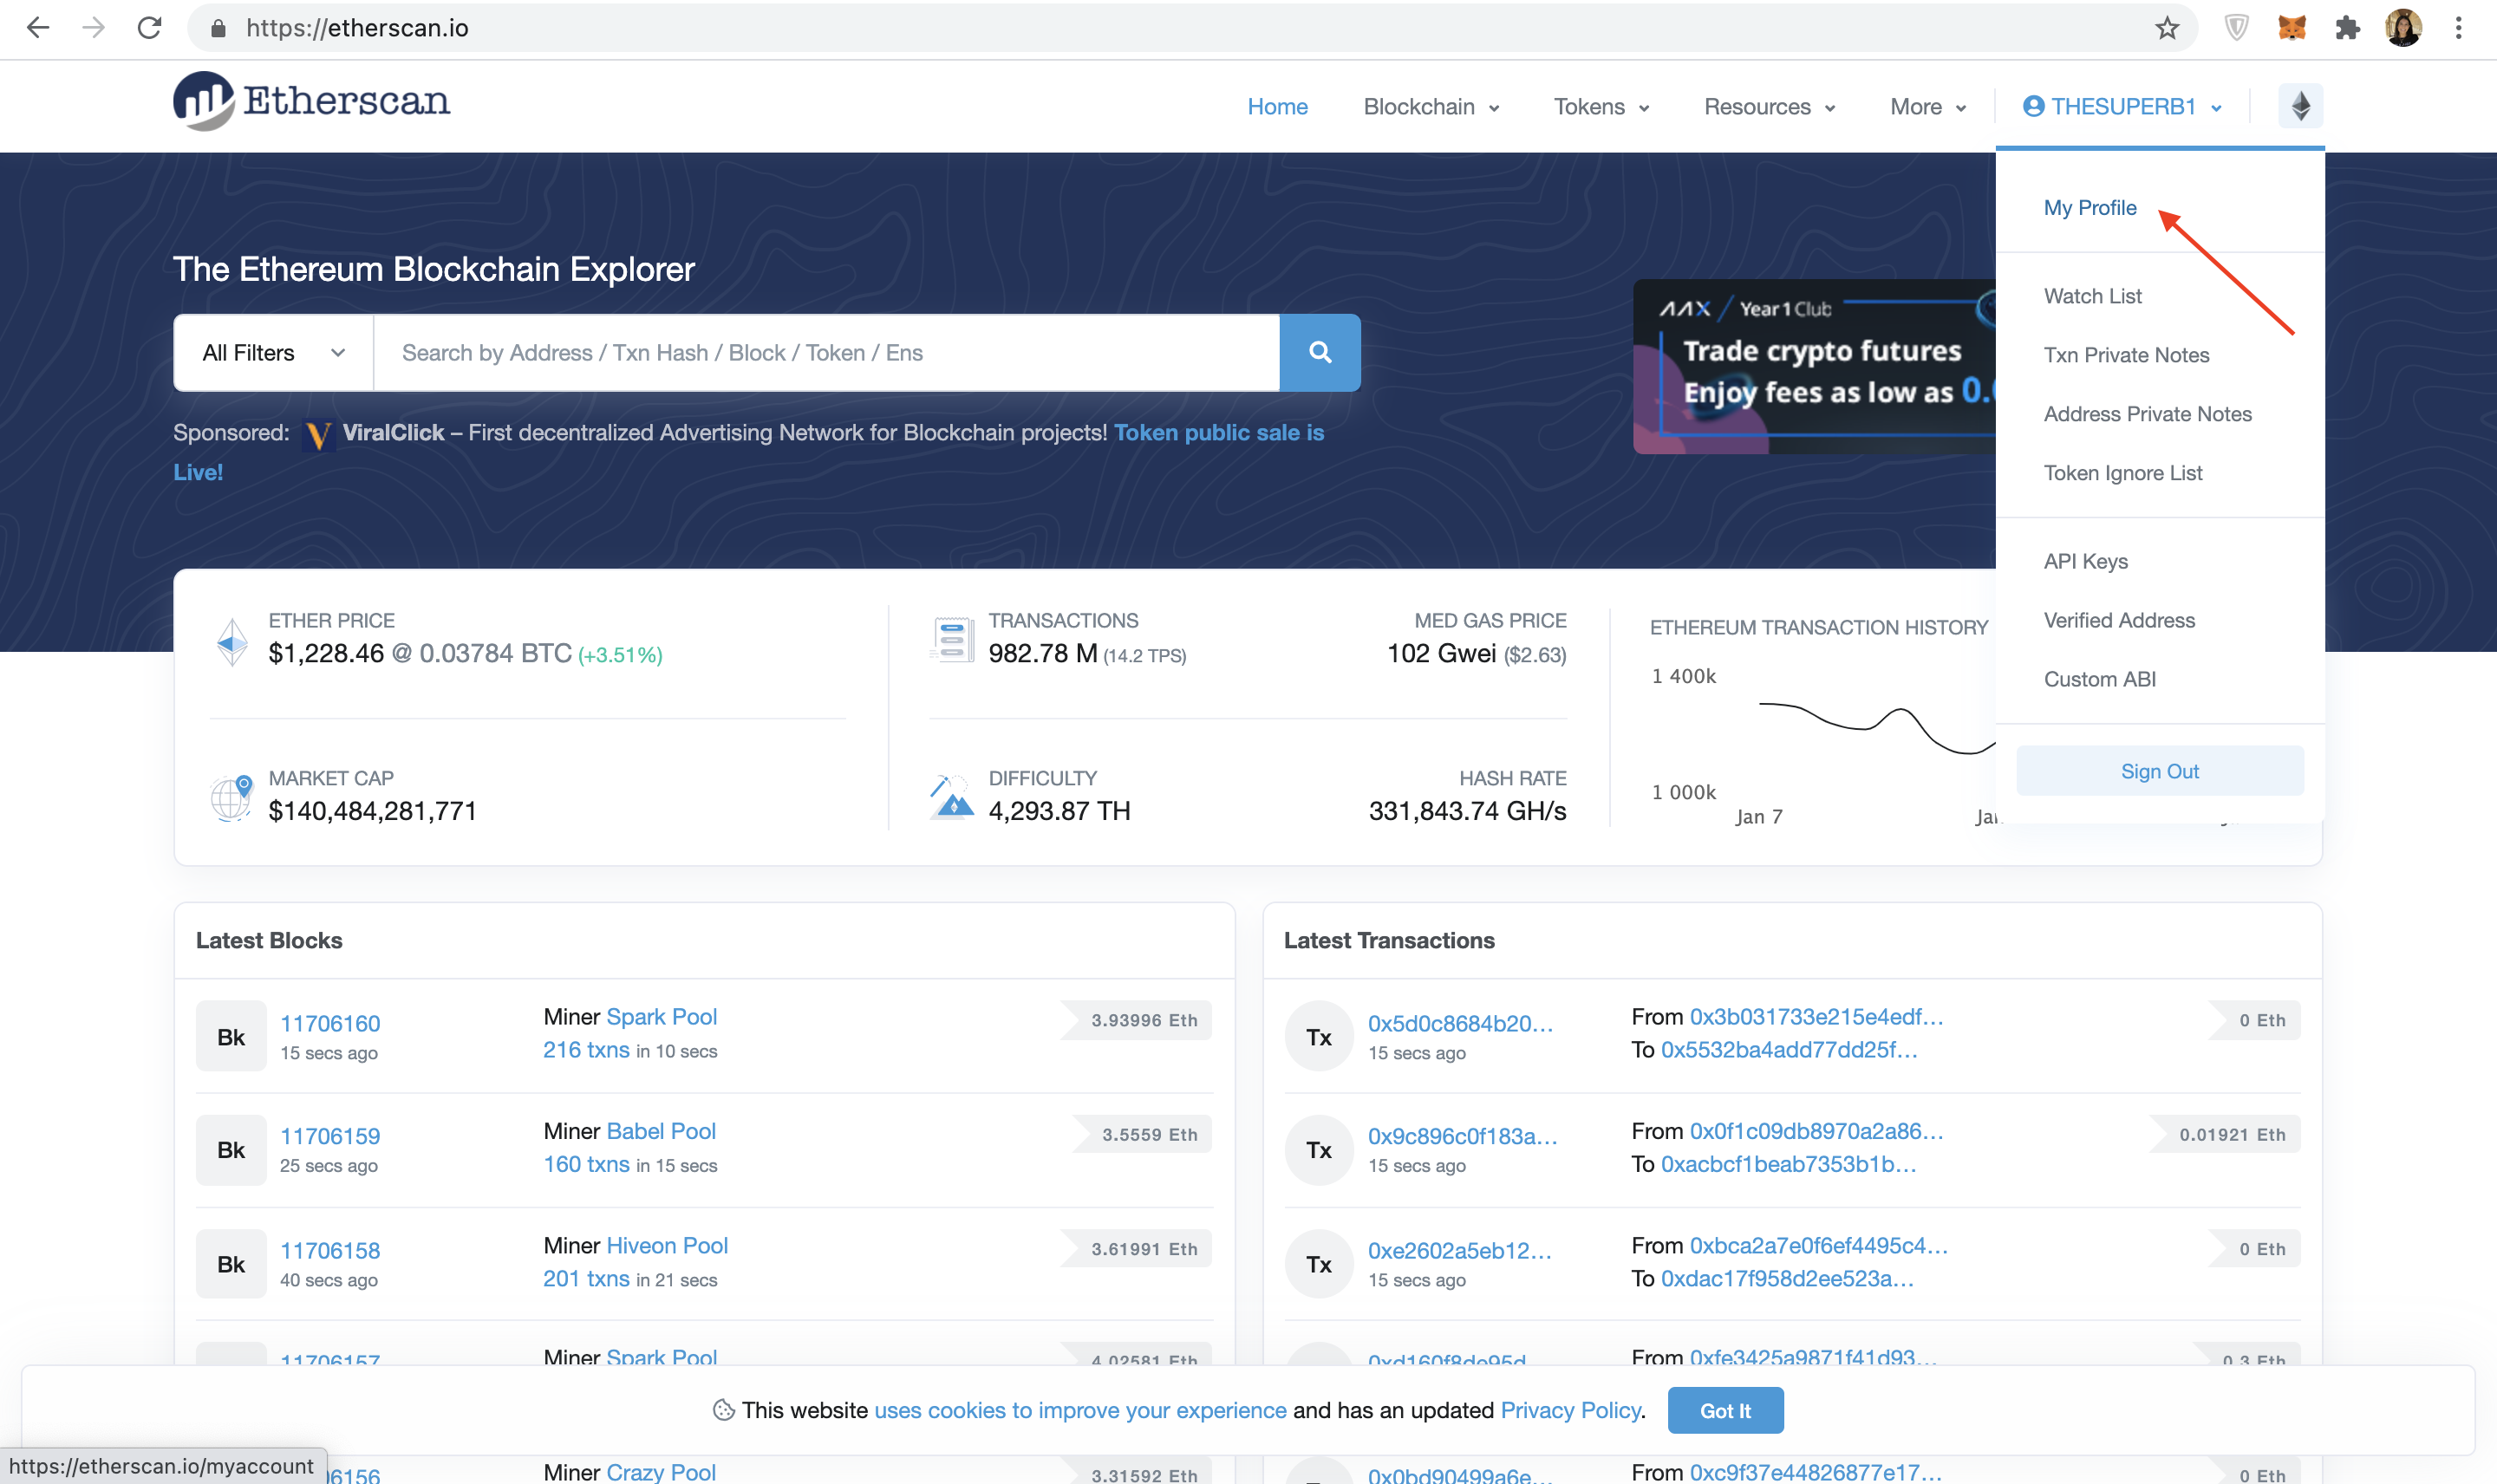
Once logged in, press your username on the top right, and select the "My profile" button:

Etherscan Profile
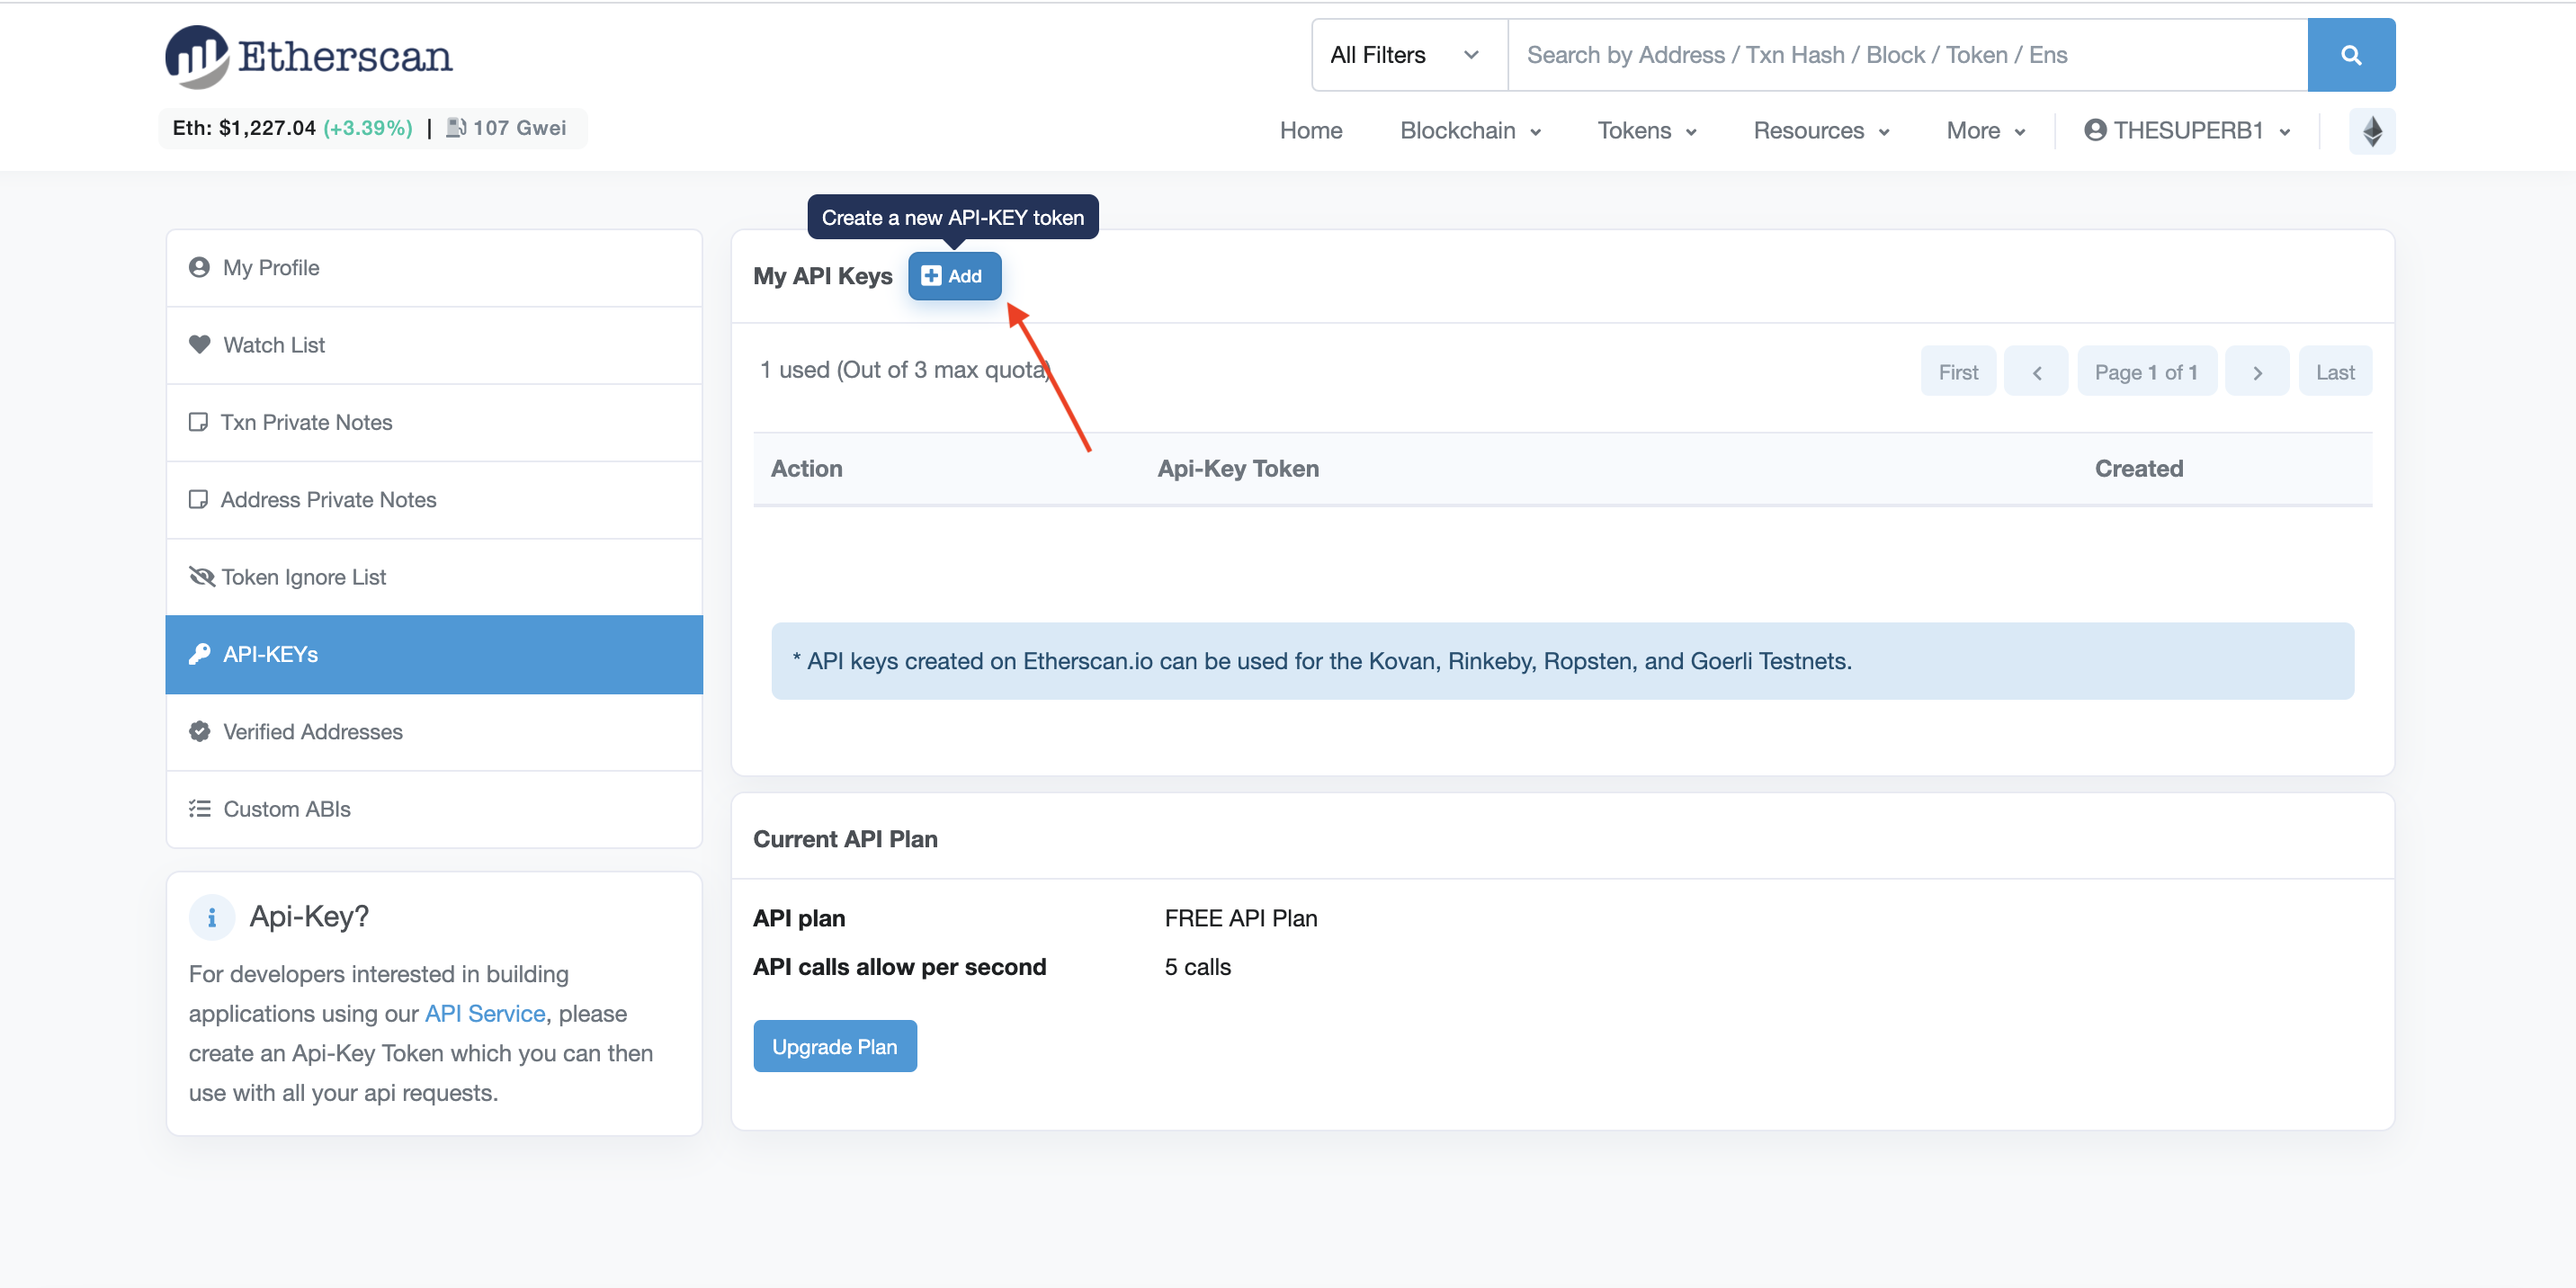
Next, navigate to the "API-KEYs" button on the left tab bar. Then press the "Add" button, name your app whatever you wish (we chose hello-world), and then select continue.

Create a new API-KEY Token
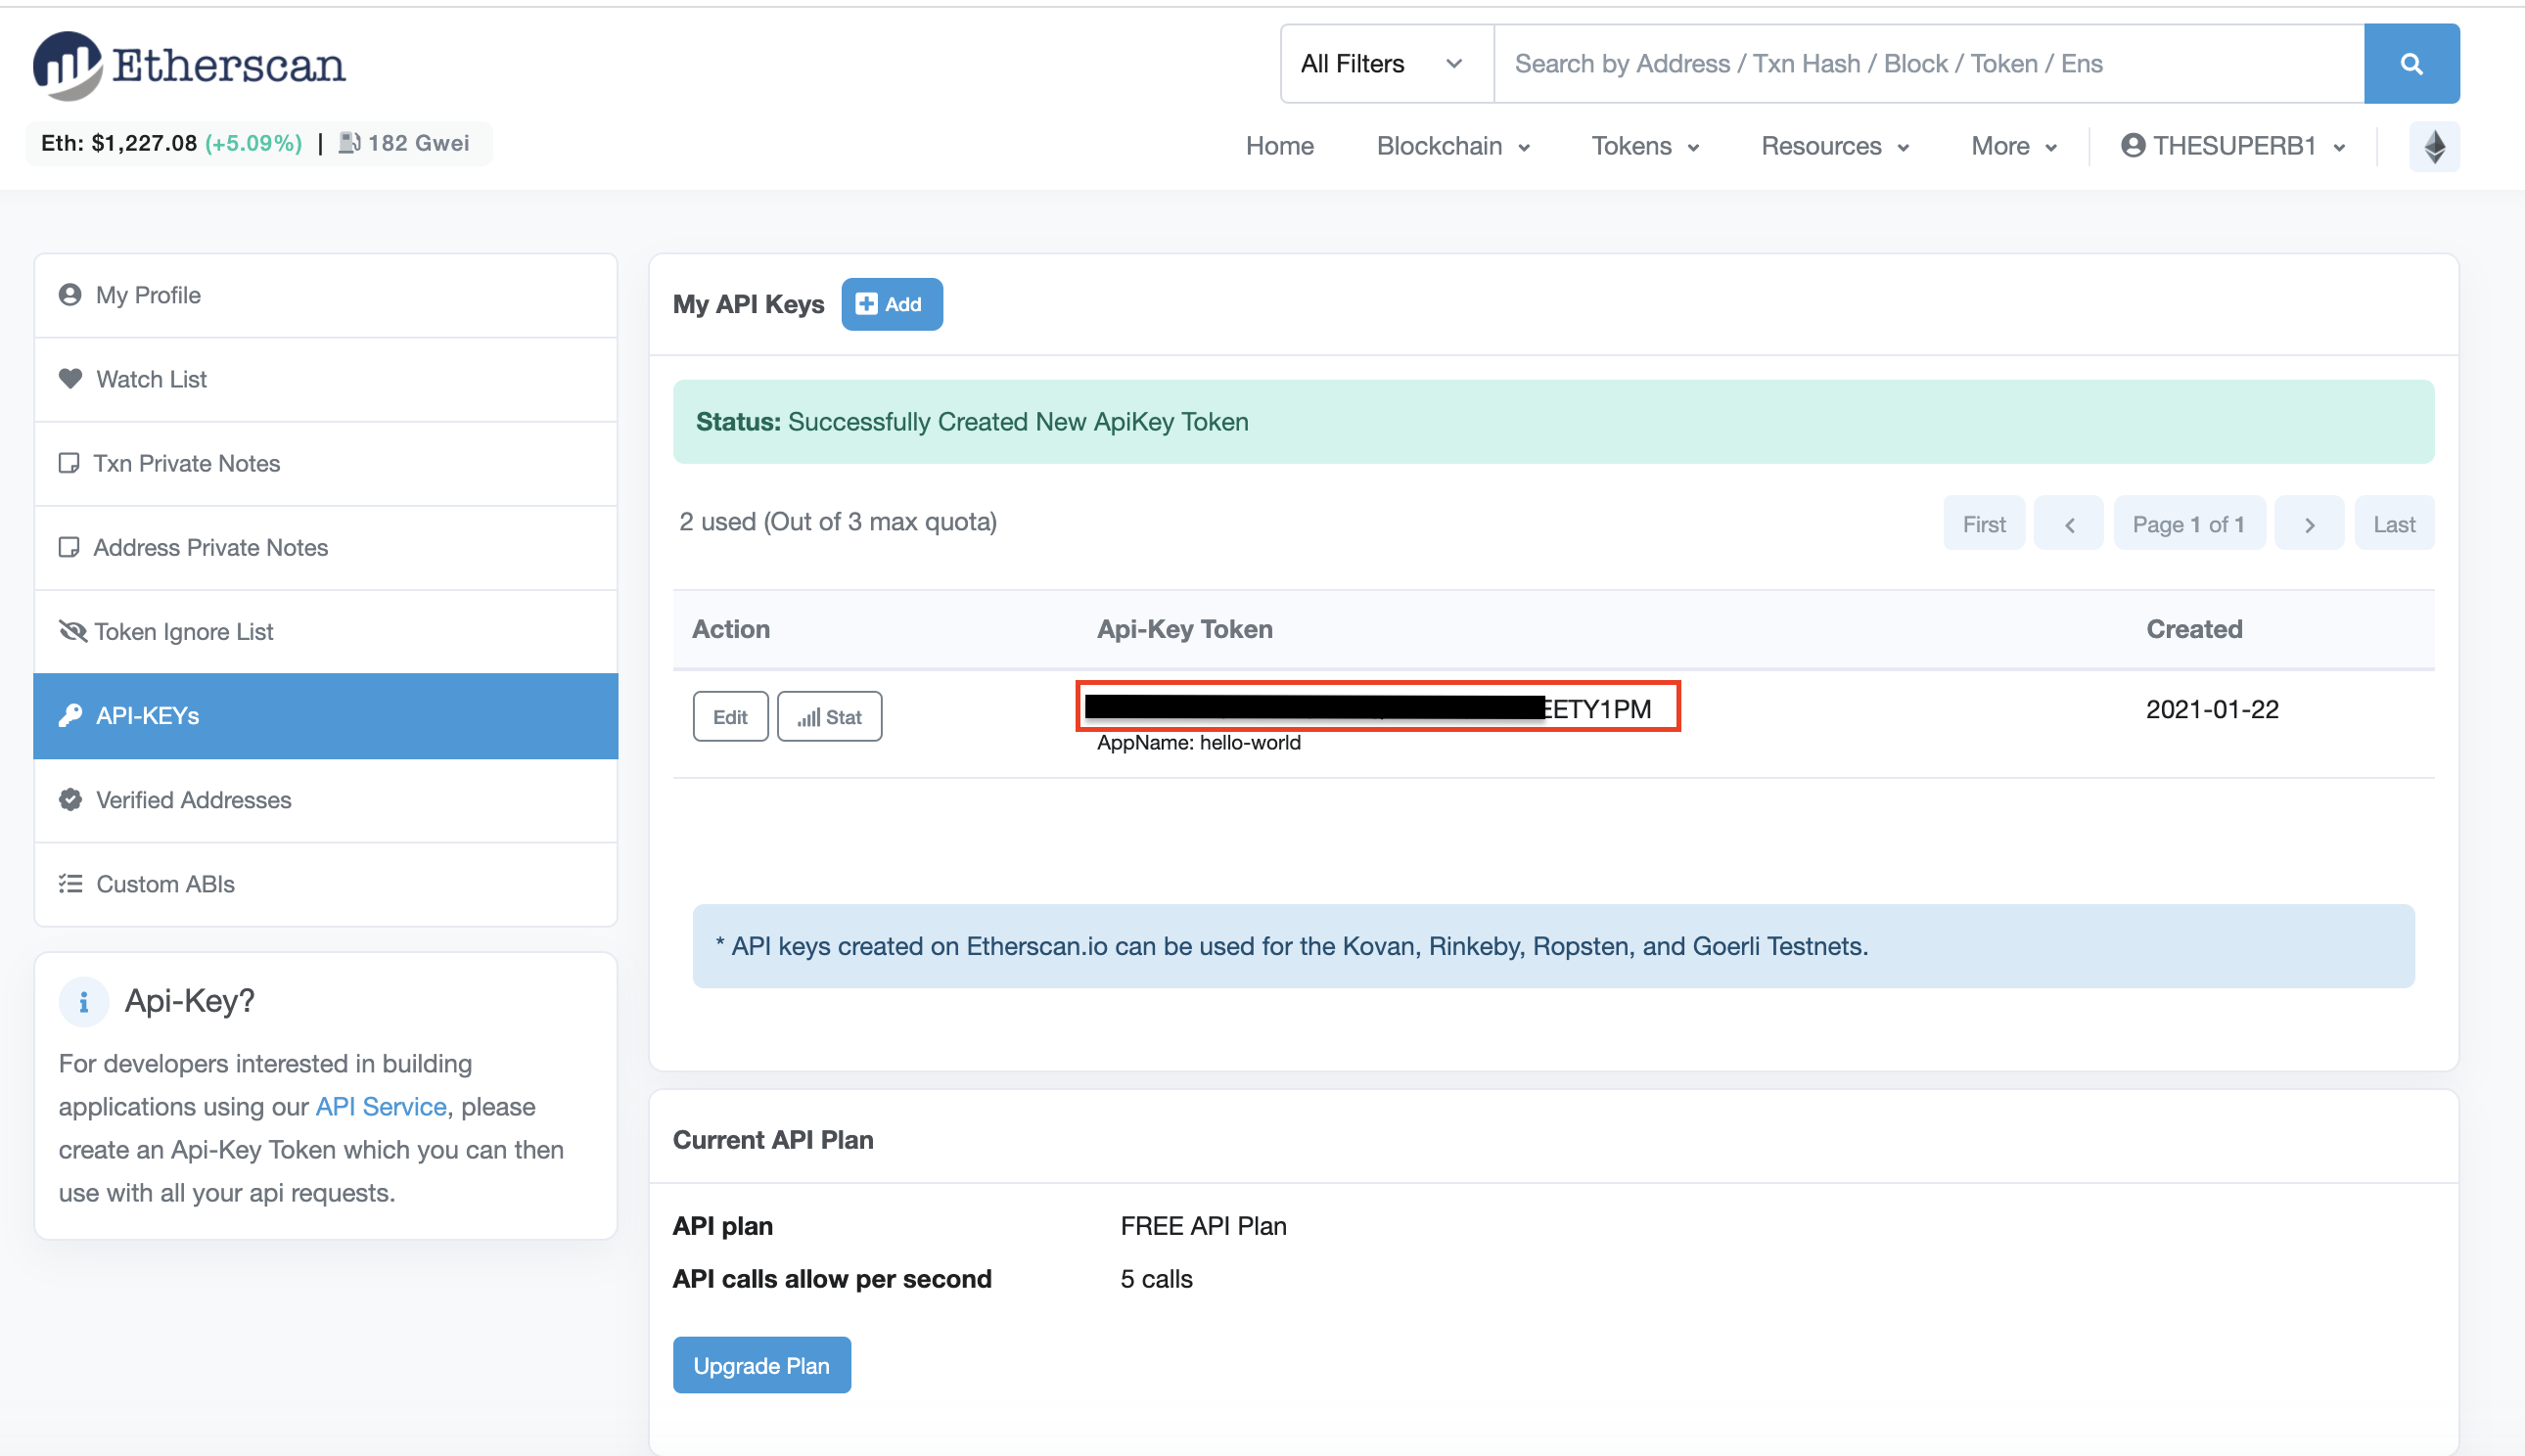
Once you have followed the steps above, you should be able to view your new API key, which we have highlighted in red below. Copy this API key to your clipboard.

Generate API-KEY.
Let's update your .env file to include your Etherscan API Key. If you were following the Hardhat tutorial, your .env file should look like this:
API_URL = "https://eth-sepolia.g.alchemy.com/v2/your-api-key"
API_KEY = "your-api-key"
PRIVATE_KEY = "your-private-account-address"
ETHERSCAN_API_KEY = "your-etherscan-key"
Step 2: Hardhat-deployed Smart Contracts
Step 2.1 Install the hardhat-etherscan plugin
Publishing your contract to Etherscan with HardHat is super simple. To get started, you will first need to install the hardhat-etherscan plugin to automatically verify your smart contract's source code and ABI on Etherscan. In your hello-world project directory run:
npm install --save-dev @nomiclabs/hardhat-etherscan
Note: If using an earlier version of ethers, i.e., ethers^6.0.0+, you might encounter problems when installing hardhart-etherscan because of the peer depency of hardhat. You can use the --force or --legacy-peer-deps flags to ignore these warning and install hardhat-etherscan, i.e., npm install --save-dev @nomiclabs/hardhat-etherscan --legacy-peer-deps.
Once installed, include the following statement at the top of your hardhat.config.js, and add the Etherscan config options:
/**
* @type import('hardhat/config').HardhatUserConfig
*/

require('dotenv').config();
require("@nomiclabs/hardhat-ethers");
require("@nomiclabs/hardhat-etherscan");

const { API_URL, PRIVATE_KEY } = process.env;
const ETHERSCAN_API_KEY = process.env.ETHERSCAN_API_KEY;

module.exports = {
  solidity: "0.7.3",
  defaultNetwork: "sepolia",
  networks: {
      hardhat: {},
      sepolia: {
         url: API_URL,
         accounts: [`0x${PRIVATE_KEY}`]
      }
  },
  etherscan: {
    // Your API key for Etherscan
    // Obtain one at https://etherscan.io/
    apiKey: ETHERSCAN_API_KEY
  }
};
Step 2.2 Verify your smart contract on Etherscan!
Make sure your files are properly saved (especially if you're in VSCode) and your .env variables are properly configured.
Finally, run the verify task, passing the address of the contract and the first message argument string that we deployed it with:
npx hardhat verify --network sepolia DEPLOYED_CONTRACT_ADDRESS 'Hello World!'
Address Verification
Make sure that
DEPLOYED_CONTRACT_ADDRESSis the address of your deployed smart contract on the Sepolia test network. Also, the last argument, 'Hello World!' must be the same string value that you used during the deploy step in Part 1.
If all goes well, you should see the following message in your terminal:
Successfully submitted source code for contract
contracts/HelloWorld.sol:HelloWorld at 0xdeployed-contract-address
for verification on Etherscan. Waiting for verification result...


Successfully verified contract HelloWorld on Etherscan.
https://sepolia.etherscan.io/address/<contract-address>#contracts
Congrats! Your smart contract code should be on Etherscan! Check out Step 3 to see how to view your smart contract code!
Step 3: Check out your smart contract on Etherscan!
When you navigate to the link provided in your terminal, you should be able to see your smart contract code and ABI published on Etherscan!
Wahooo - you did it champ! Now, anyone can call or write to your smart contract! We can't wait to see what you build next!
Once you complete this tutorial, let us know your experience or if you have any feedback by tagging us on Twitter @alchemyplatform!
Updated over 1 year ago
